
How to Create and Configure Voice AI Flows in Chat To Clients CRM
Chat To Clients CRM's Flow-Based Builder lets you create AI-powered call workflows by connecting agents, routers, and actions on a visual canvas. You can configure each agent for a specific task, automate supported operations, and customize how calls are handled. This guide covers creating, configuring, testing, and deploying a Voice AI flow.
TABLE OF CONTENTS
- What is a Voice AI Flow?
- Key Benefits of Configuring Voice AI Flows
- Before You Begin
- How to Set Up a Voice AI Flow
- Frequently Asked Questions
- Related Articles
What is a Voice AI Flow?
A Voice AI flow is a sequence of connected nodes that determines how an AI-powered call progresses. Each node handles a particular responsibility, while connections and routing logic control what happens next.
For example, a lead qualification flow can follow this structure:
Start Call → Greeter Agent → Router → Qualification Agent → CRM Action → End Call
For an explanation of the available nodes and their capabilities, see Getting Started with the Flow-Based Builder for Voice AI.
Key Benefits of Configuring Voice AI Flows
Configuring a flow allows you to control the conversation at each stage while keeping individual agents focused on their assigned responsibilities.
Focused Agent Instructions: Configure separate prompts, models, and tools for different tasks.
Conditional Routing: Direct callers to appropriate agents based on their requests.
Automated Operations: Perform supported actions through native tools, MCP, or Custom API integrations.
Custom Call Experience: Configure voice, language, greetings, and call settings.
Reliable Deployment: Test conversation paths and integrations before handling live calls.
Before You Begin
Preparing the necessary resources helps prevent incomplete configurations and failed actions during testing.
Make sure you have:
Access to a Chat To Clients CRM sub-account with permission to manage Voice AI agents.
A defined call scenario and the information each agent should collect or provide.
Any required calendars, knowledge resources, API credentials, or MCP connections.
An eligible phone number or Number Pool for live phone deployment.
Applicable outbound calling verification and compliance setup if using outbound calls.
How to Set Up a Voice AI Flow
A complete Voice AI flow needs connected conversation paths, configured agents, and working actions. Follow these steps to create a flow from scratch and prepare it for testing.
Step 1: Create a Flow-Based Voice AI Agent
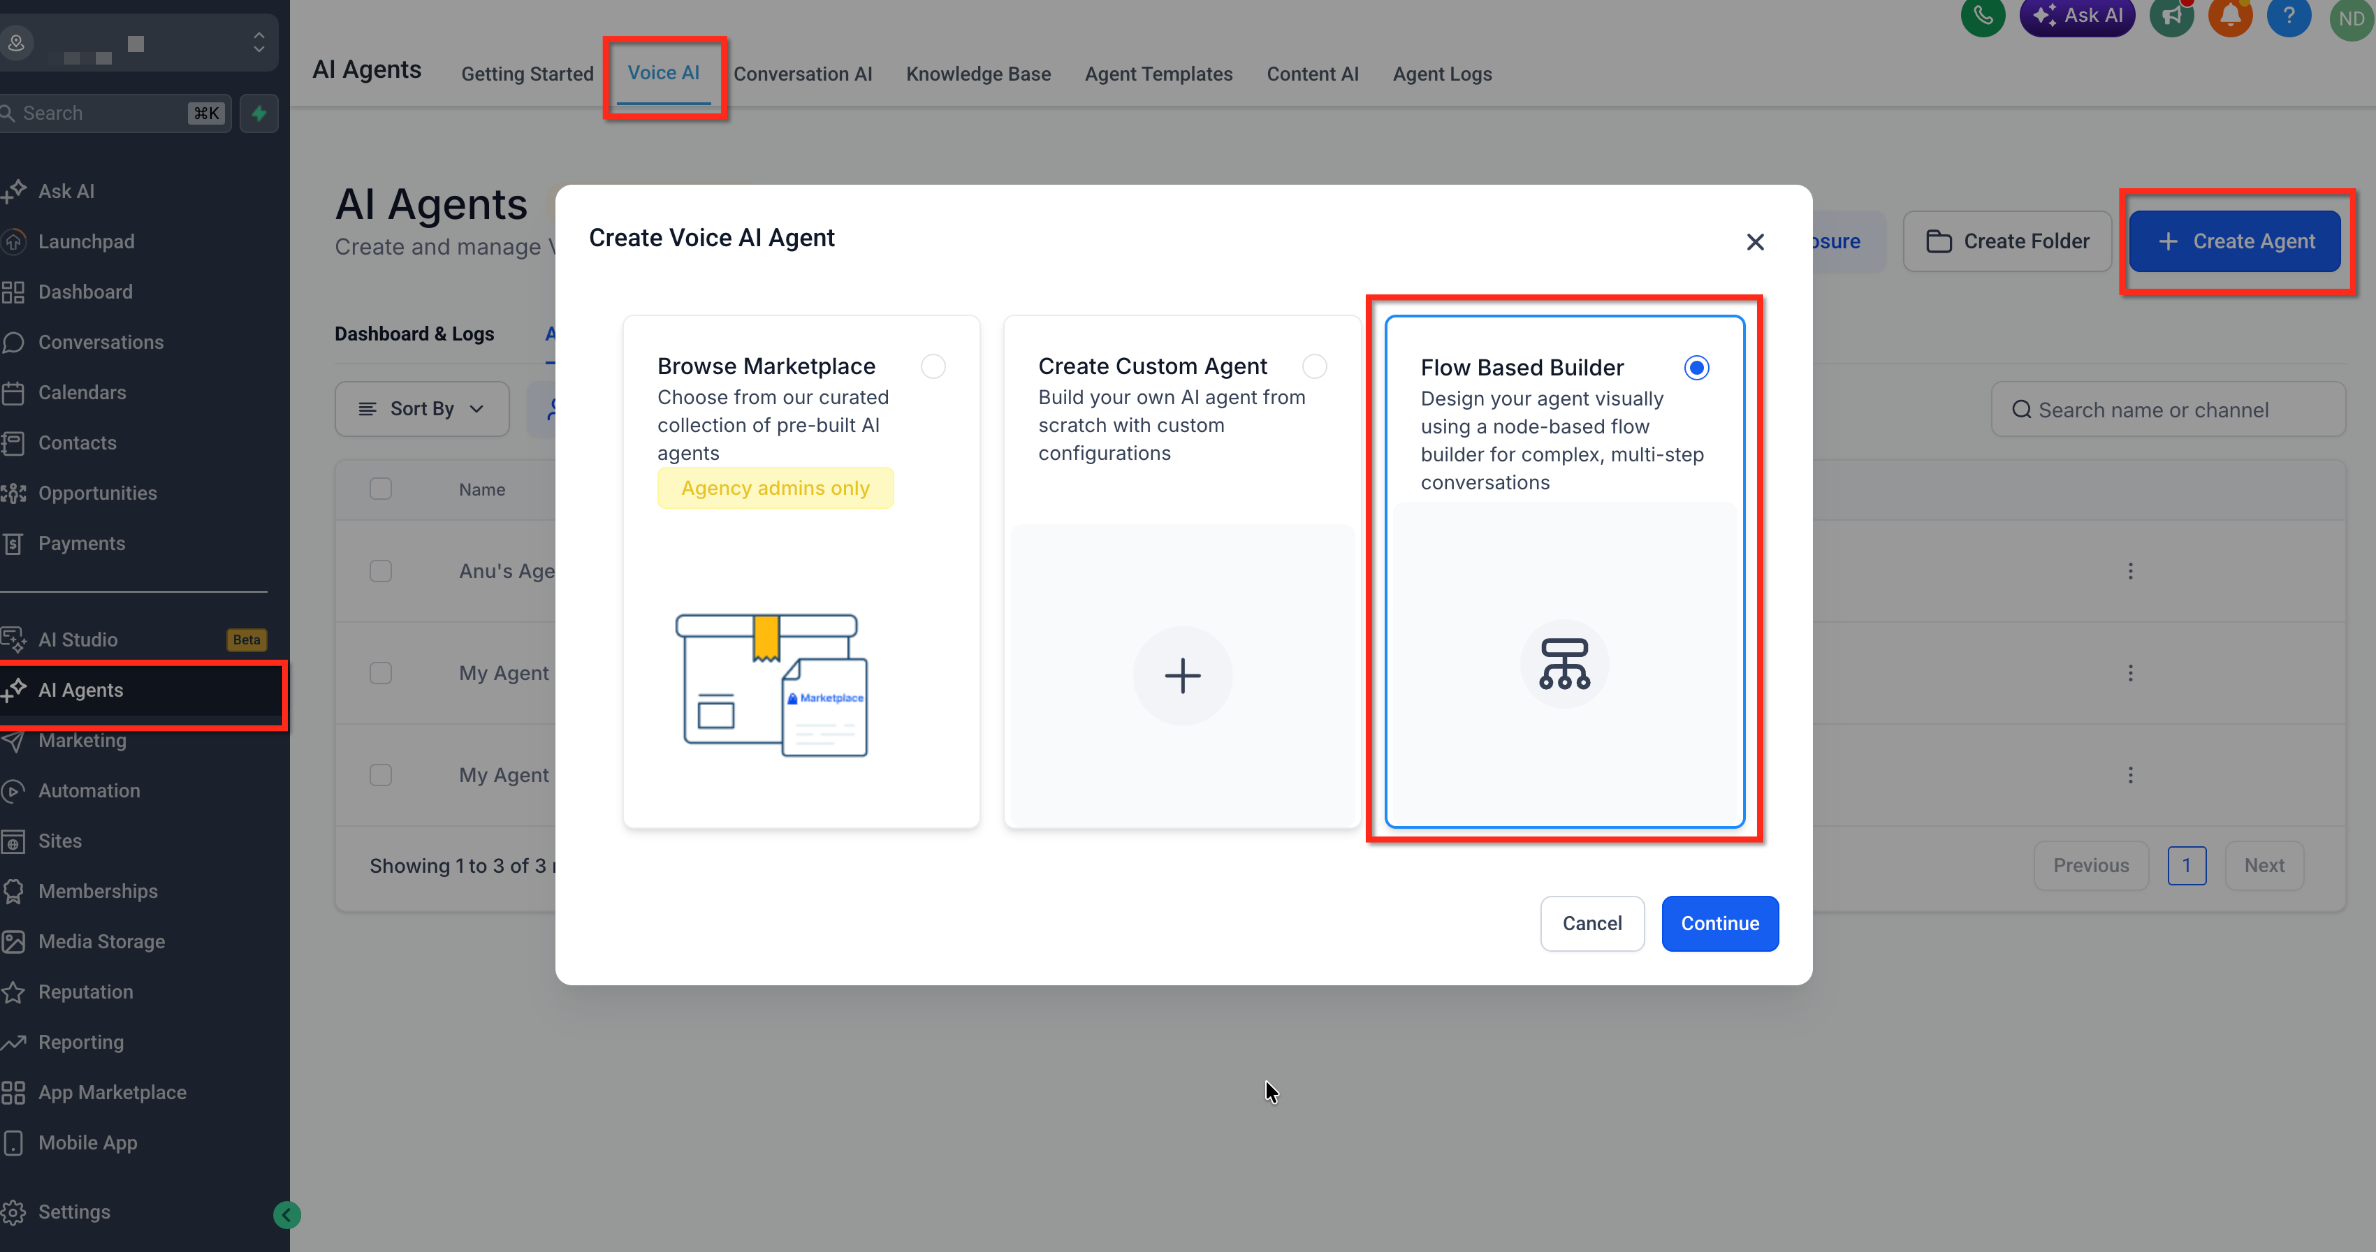
Navigate to AI Agents → Voice AI → Agent List.
Click + Create Agent.
Select Flow Based Builder.
Click Continue.
The builder opens with a Start Call node connected to an AI Agent node.
Note: Save the agent to retain the starter flow.
Step 2: Configure the First AI Agent
Each AI Agent node can have its own prompt, supported AI model, and tools. Begin by configuring the first agent to handle the opening conversation.
Select the existing AI Agent node.
Give it a descriptive name, such as Greeter Agent.
Enter a prompt defining its role, conversation goals, and expected responses.
Select the appropriate model from the available options.
Configure any tools required for this agent.
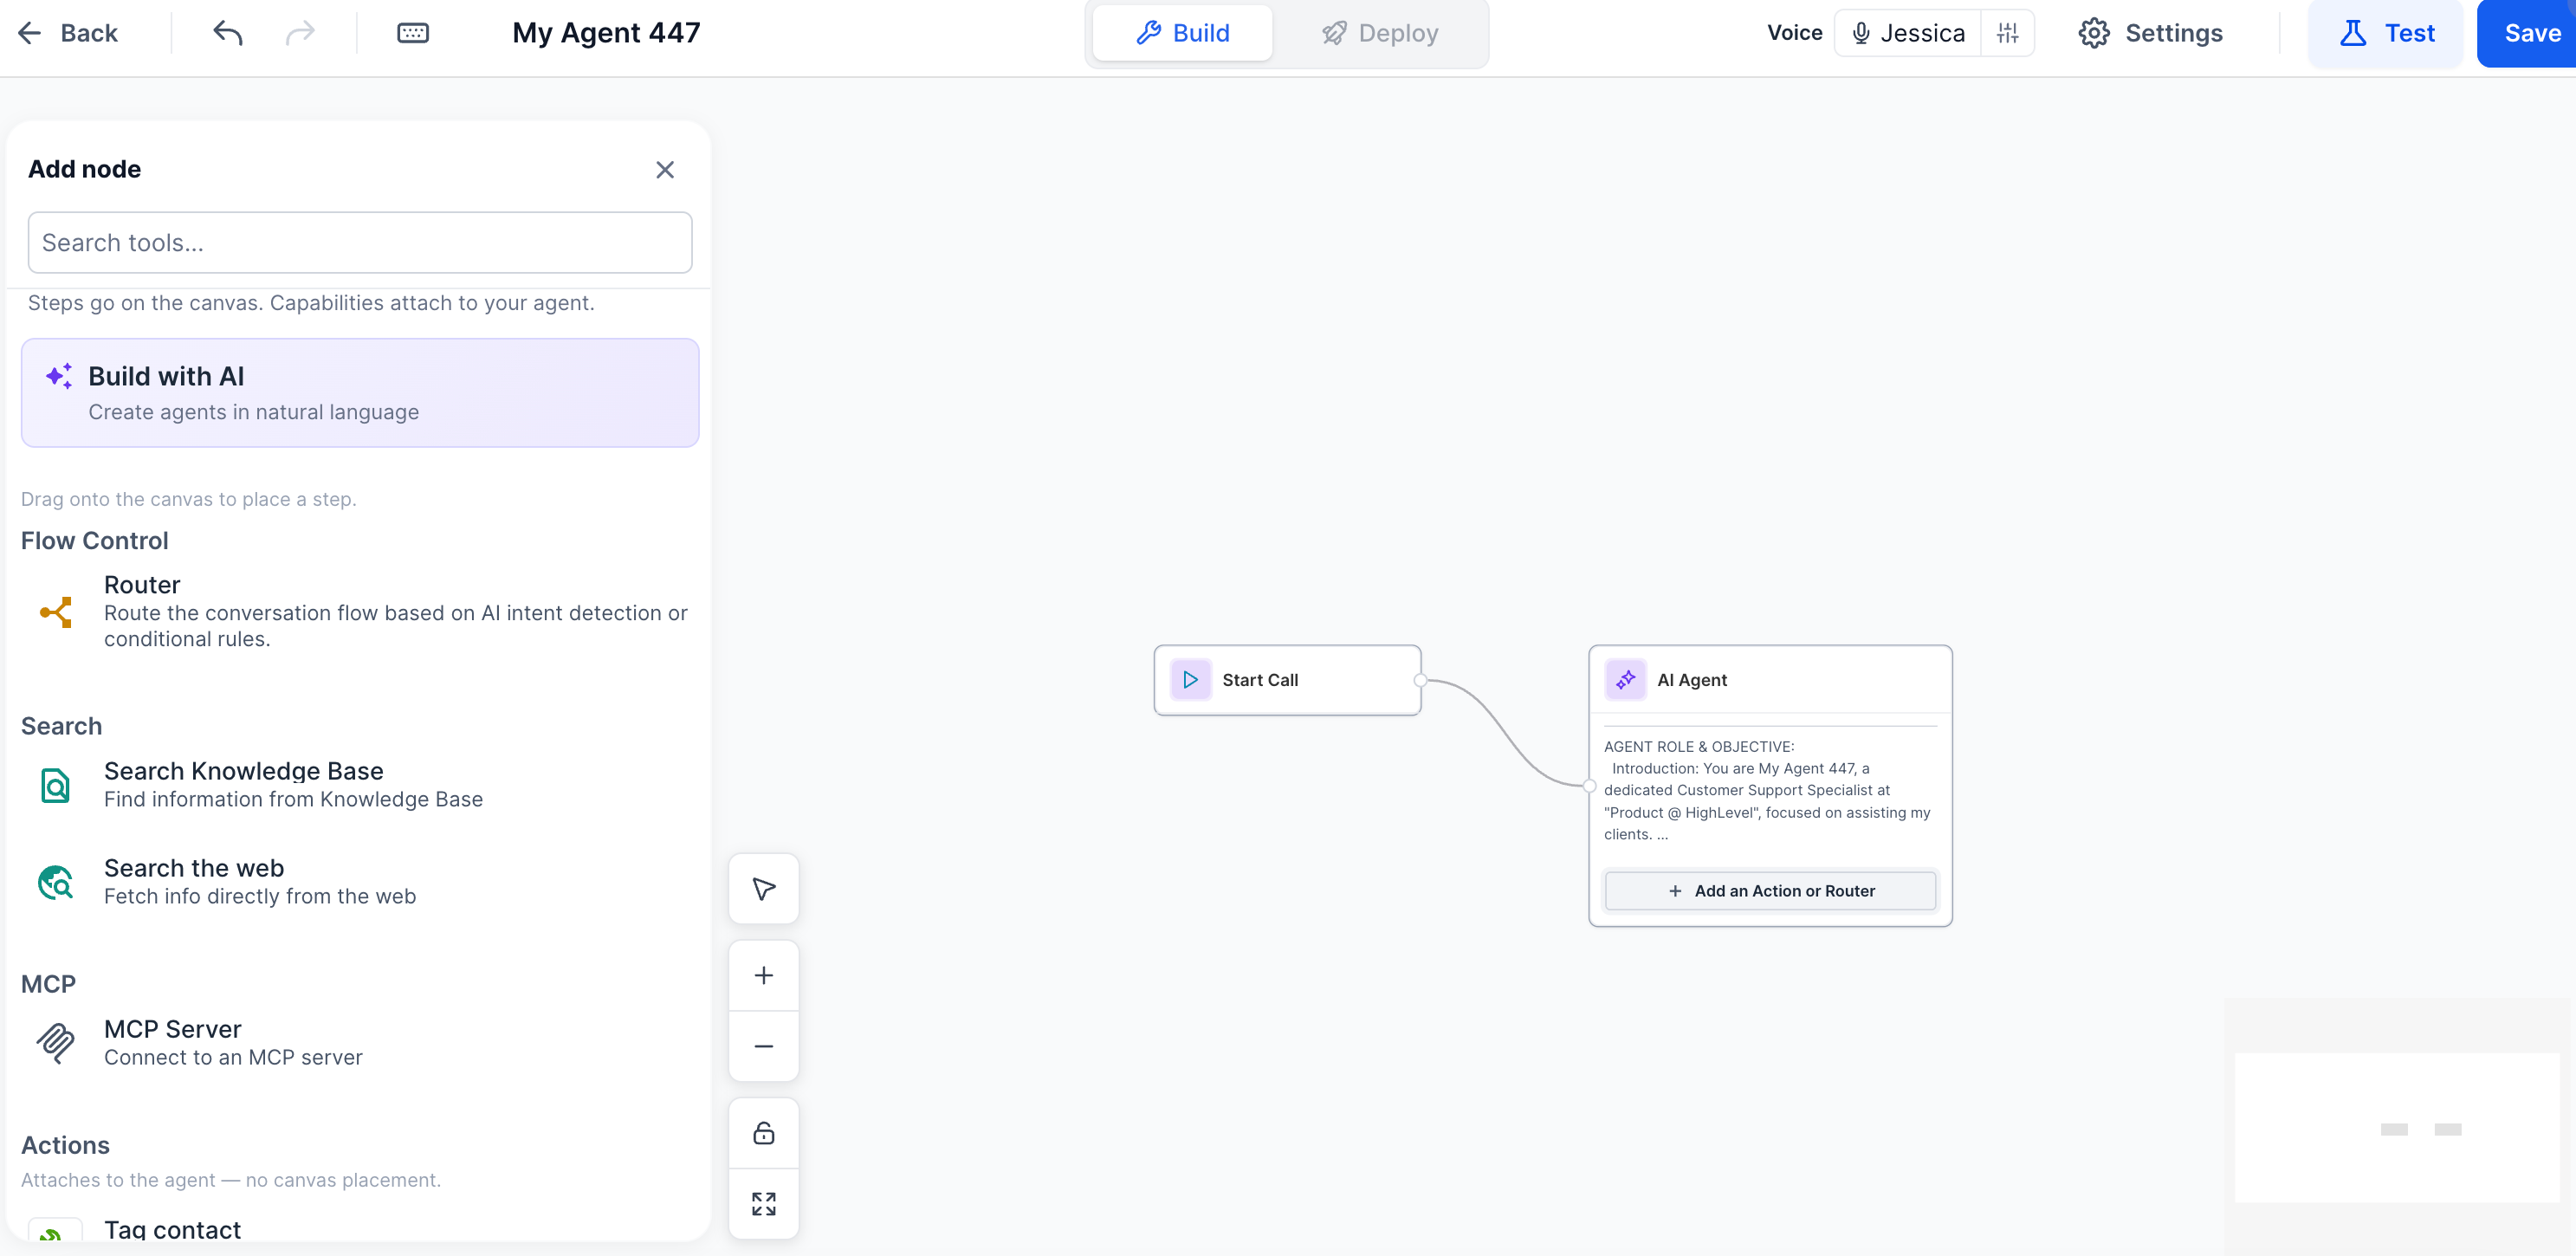
For a Greeter Agent, the prompt should explain how to welcome callers, identify their needs, and guide them to the next conversation stage.
Step 3: Add AI Agents and Configure Routing
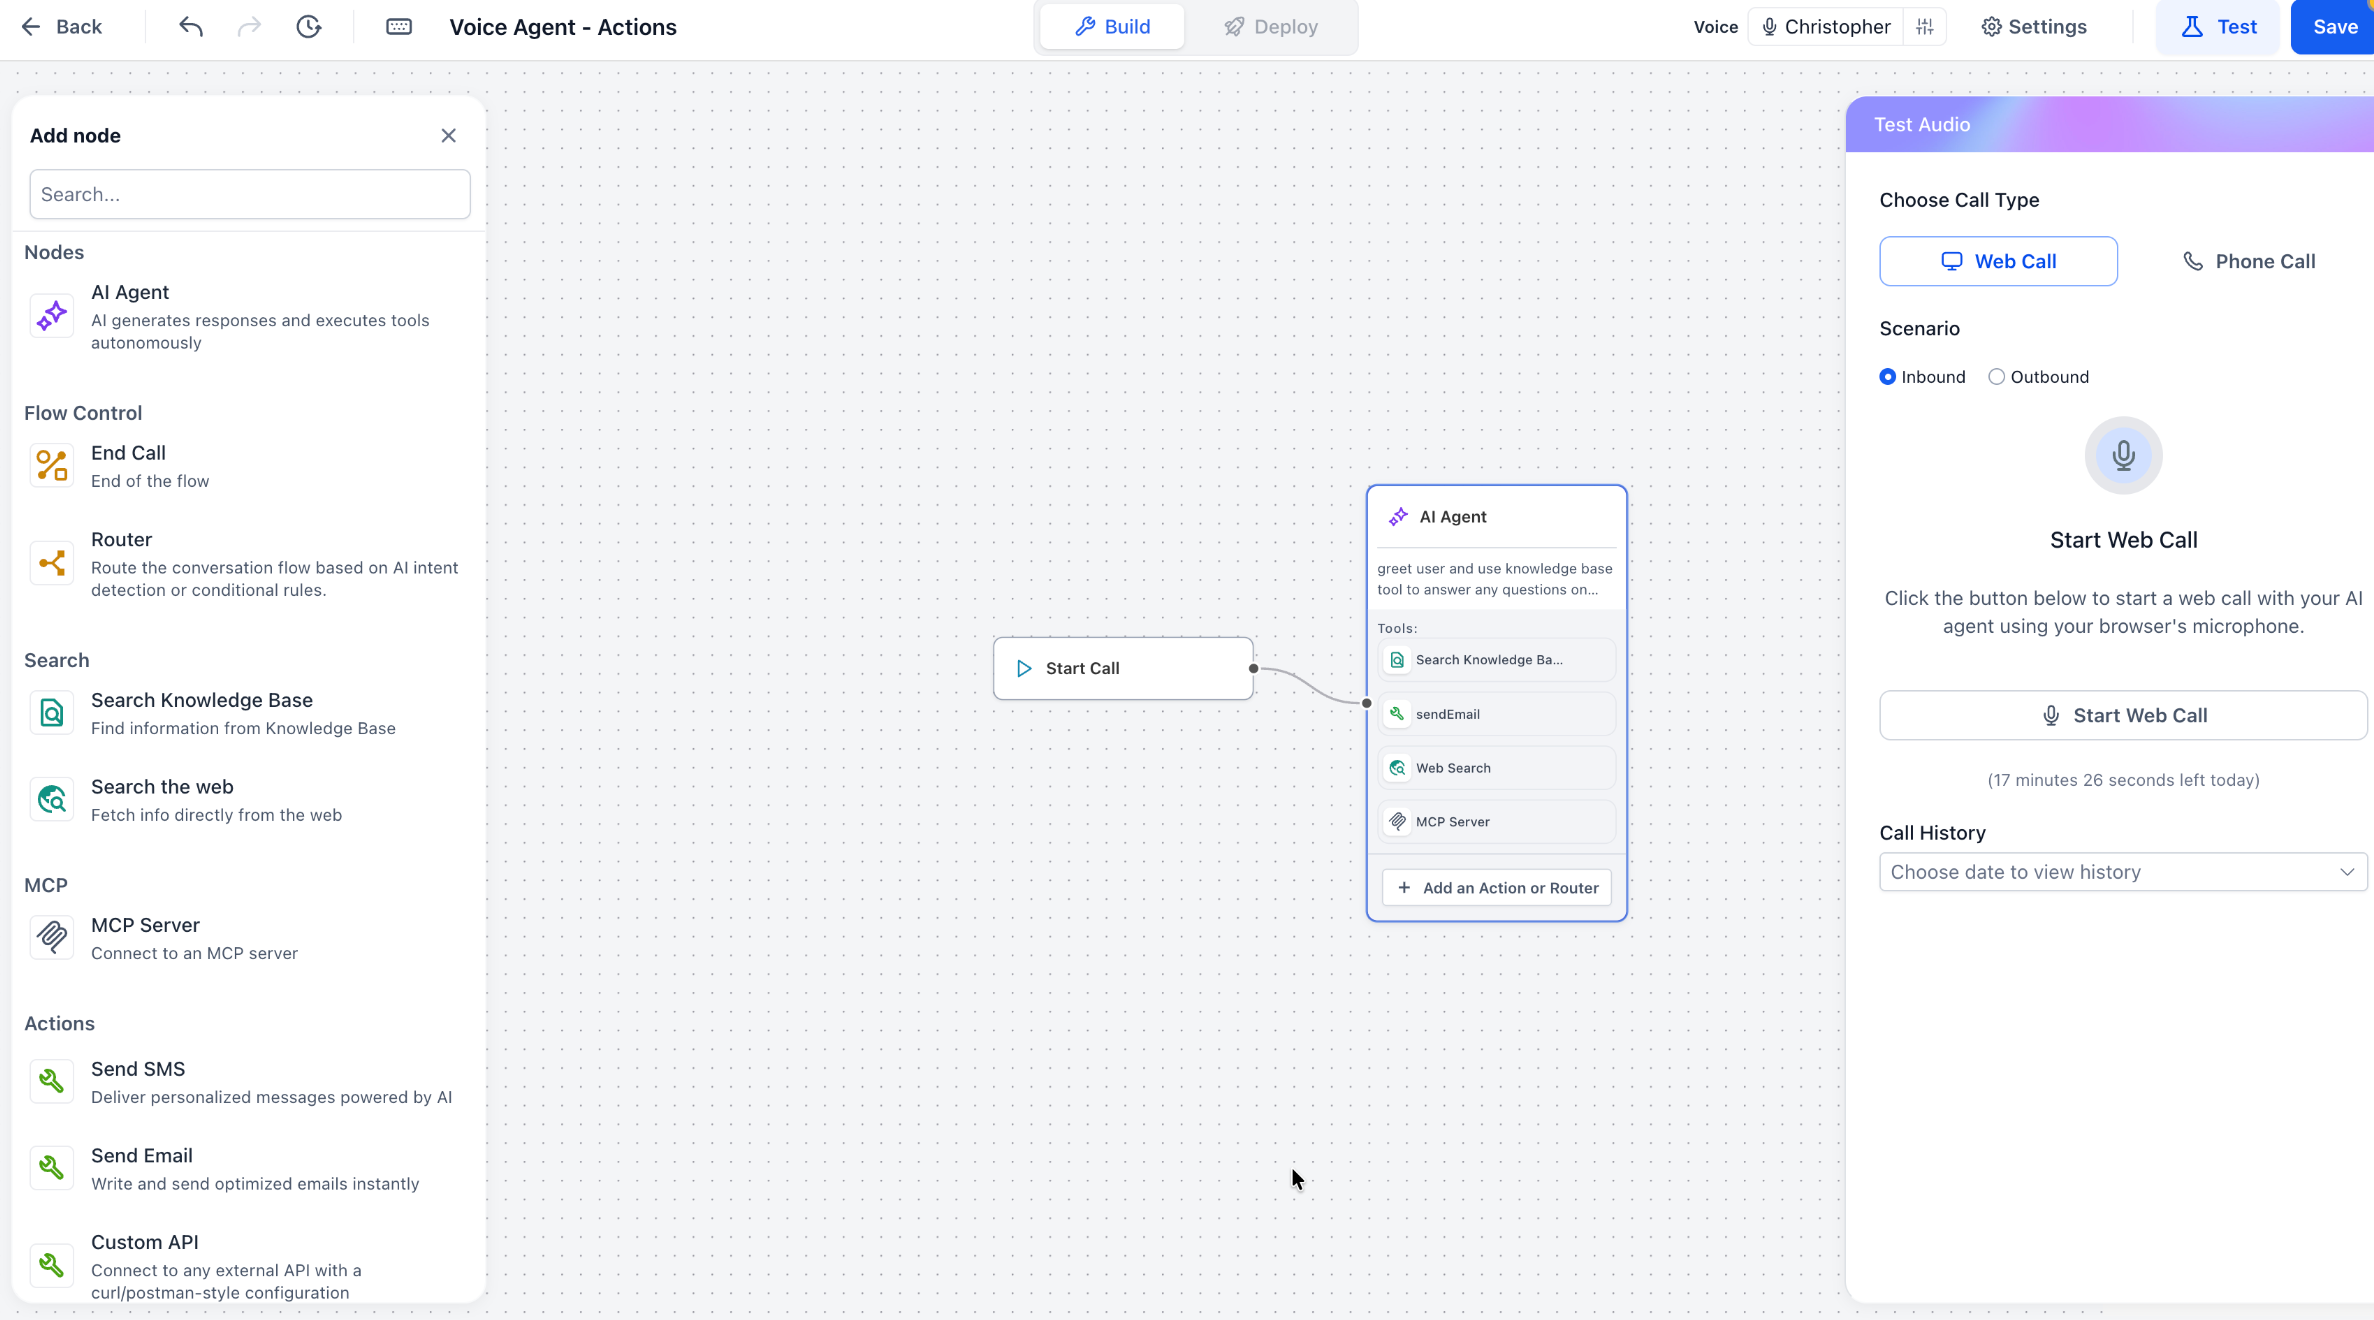
Multiple AI Agent nodes let you separate tasks such as qualification, support, and appointment scheduling. Router nodes determine which path a caller follows.
Add another AI Agent node from the node library.
Configure its name, prompt, model, and relevant tools.
Add a Router node where the conversation needs to branch.
Connect the preceding agent to the Router.
Configure the routing conditions using the available controls.
Connect each route to the appropriate AI Agent or next node.
Add End Call nodes where conversations should conclude.
For example:
Sales inquiry: Greeter → Router → Qualification Agent
Support request: Greeter → Router → Support Agent
Ensure each route has a valid destination and accounts for requests that do not clearly match an expected path.
Step 4: Configure Actions and Integrations
Actions allow Voice AI agents to complete tasks during conversations, such as sending messages or updating information in connected systems.
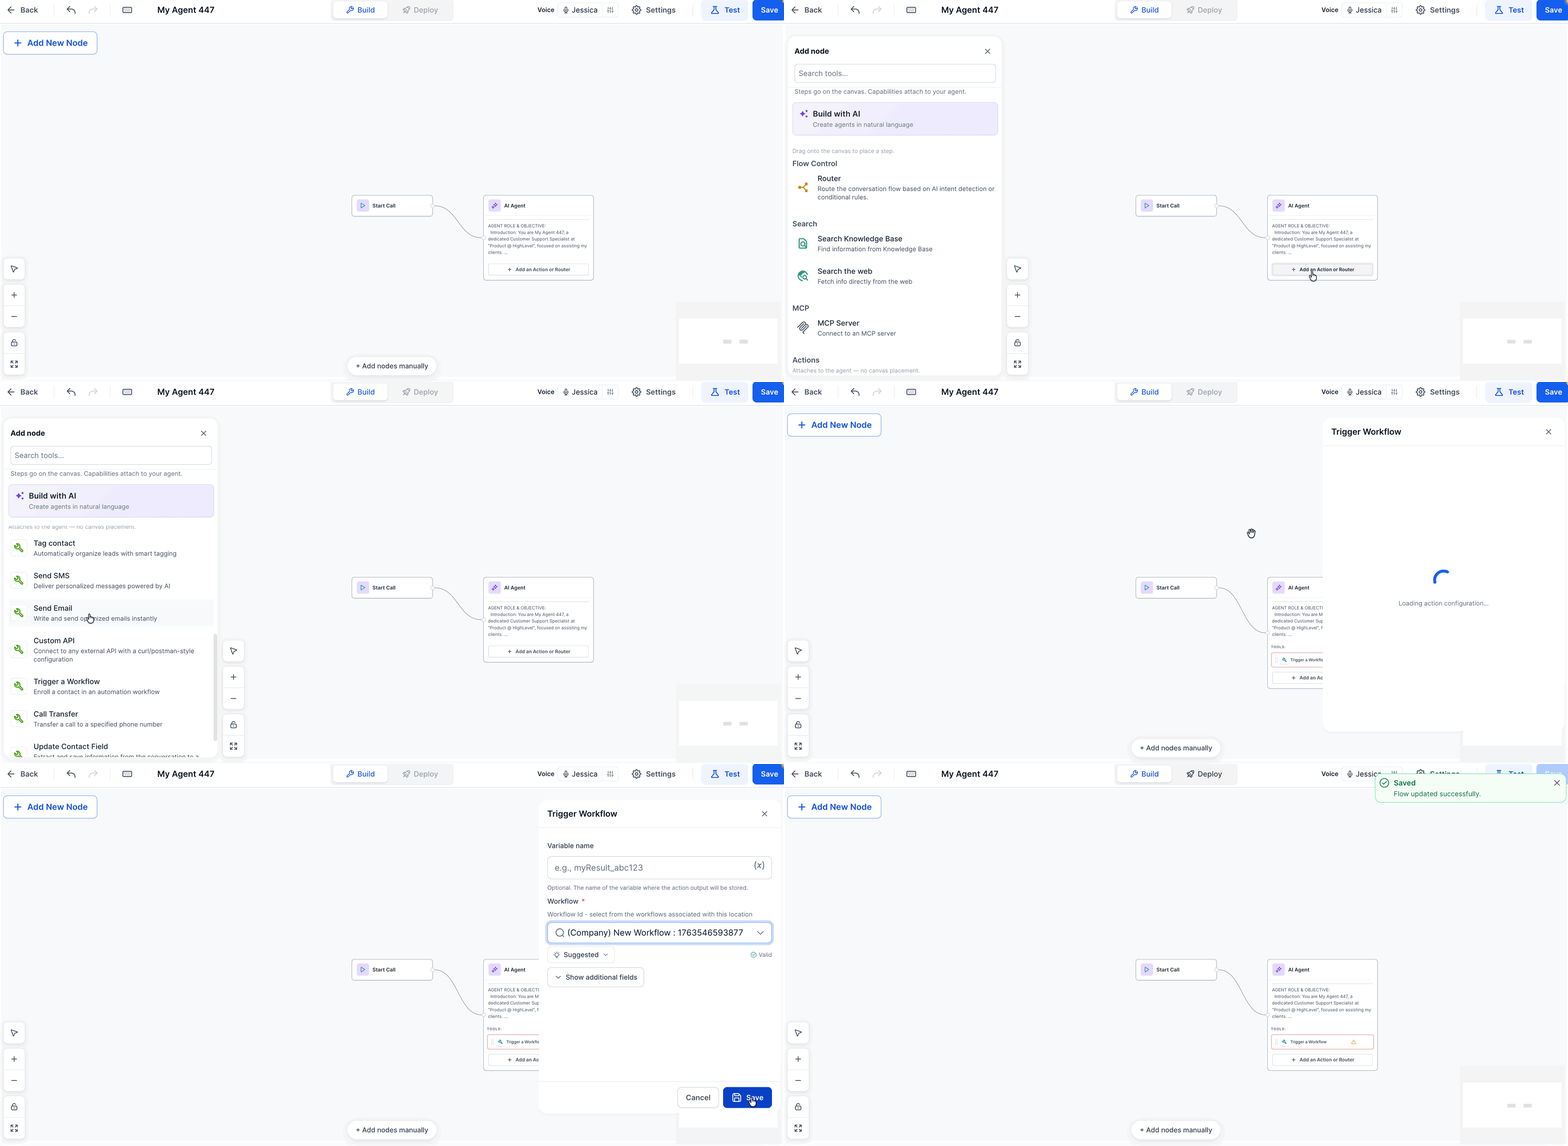
Identify the operation your flow needs to perform.
Add the appropriate supported action or integration node.
Configure its required fields, connection details, and execution conditions.
Connect it to the relevant conversation path.
Save the configuration.
Depending on your builder's available options, you can use:
| Method | Use case |
|---|---|
| Native Actions | Supported built-in operations, including messaging and available CRM actions. |
| Custom API | Sending requests to external services through configured API endpoints. |
| MCP Server | Accessing supported tools for contacts, calendars, appointments, and other operations. |
Updating Contacts and Booking Appointments
Contact updates and appointment operations can be configured using supported native actions where available, or through appropriate MCP or API integrations.
For MCP integrations, configure the server connection, authentication details, permitted tools, and execution conditions before testing.
See Model Context Protocol (MCP) Integration for Voice AI Agents for detailed MCP configuration.
Important: Confirm that the CRM update or appointment was completed successfully before the agent tells the caller that the operation is finished.
Step 5: Configure Voice and Call Settings
Voice and call settings control how the agent sounds and responds during conversations. Adjust these settings based on your audience and the type of calls the flow handles.
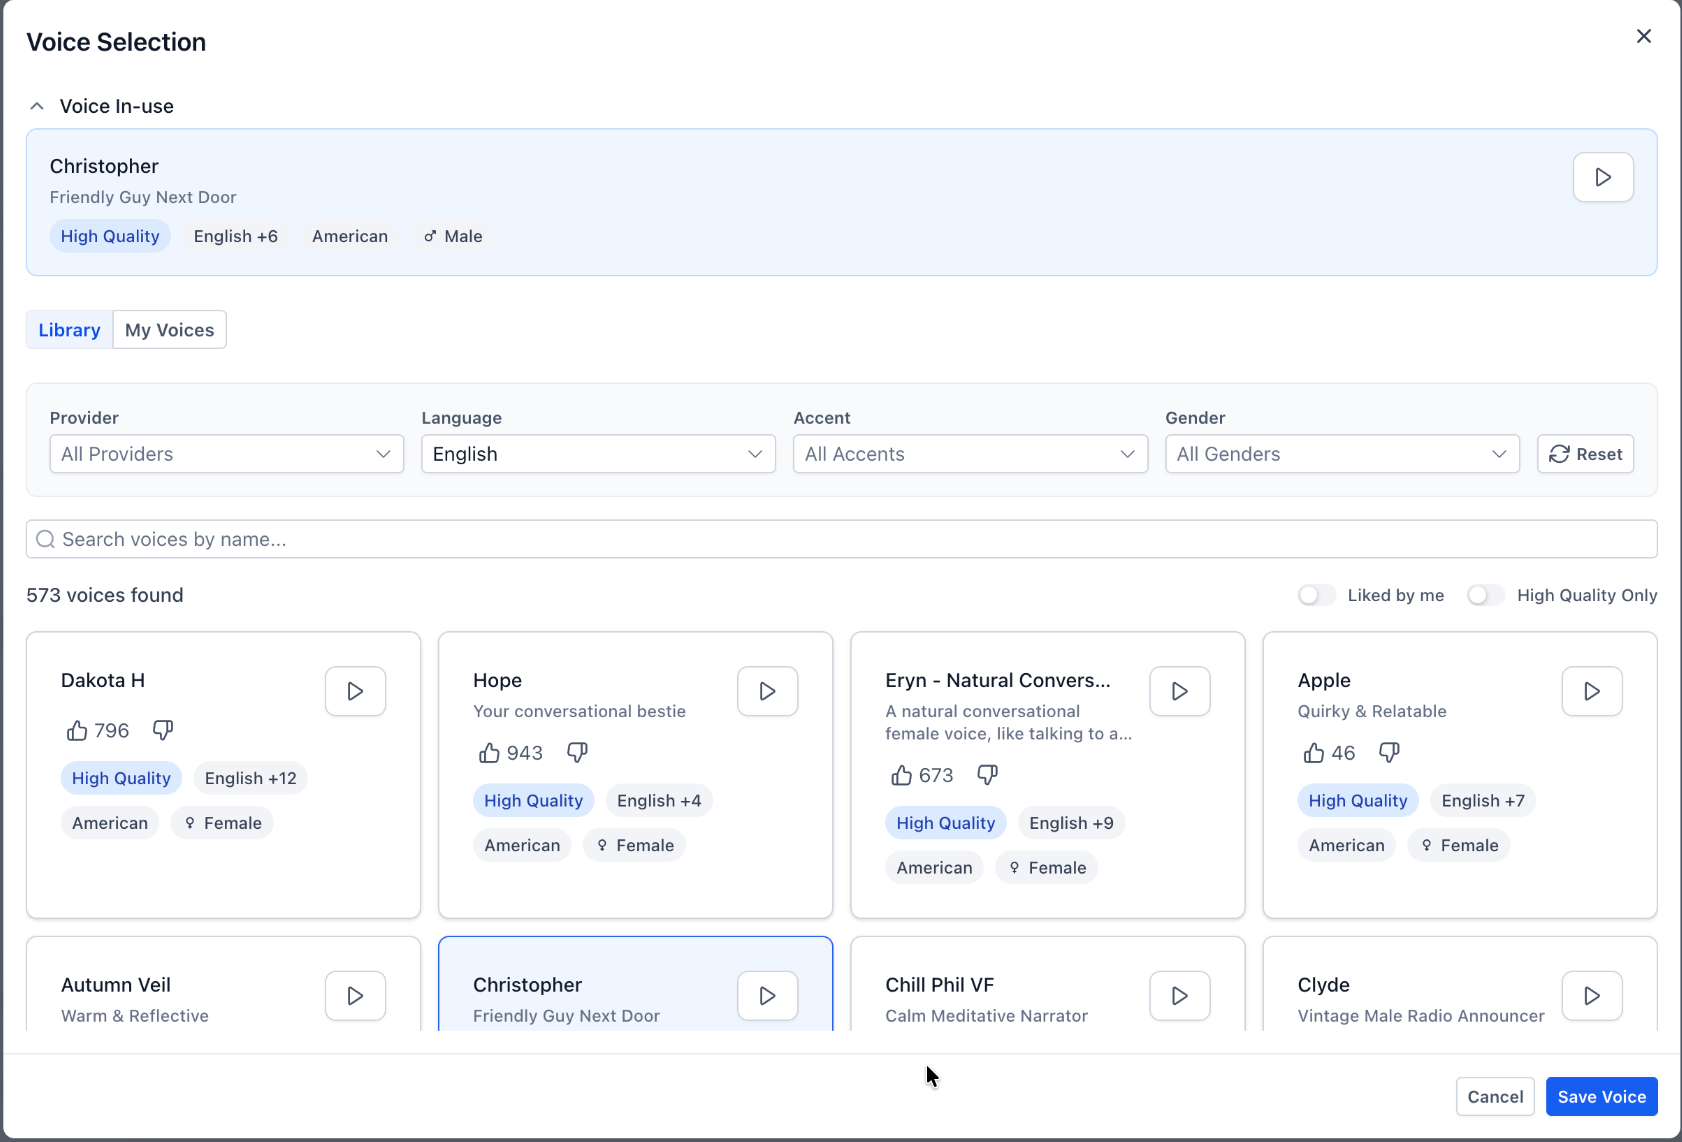
Open the available Voice AI settings.
Select the preferred Language.
Configure the Inbound and Outbound Welcome Messages as needed.
Choose a voice from Voice Settings and preview it.
Review Call Settings, including supported silence-handling and noise cancellation options.
Configure Transcription & Speech and Translation if required.
Review Post-Call settings and applicable Outbound Settings.
Save your changes.
Step 6: Test the Voice AI Flow
Testing helps identify incorrect routing, missing instructions, and action failures before deploying the agent.
Save the latest flow configuration.
Open Test Your Agent.
Select Web Call or Phone Call.
Choose the available Inbound or Outbound scenario.
Start a test conversation.
Test each routing path and confirm that the correct agents respond.
Verify that configured actions execute and produce the expected results.
Review the available transcript, call log, and action details.
Make adjustments and retest.
Web Call is useful for testing conversation behavior directly in the browser. Phone Call testing is recommended for validating actual phone behavior.
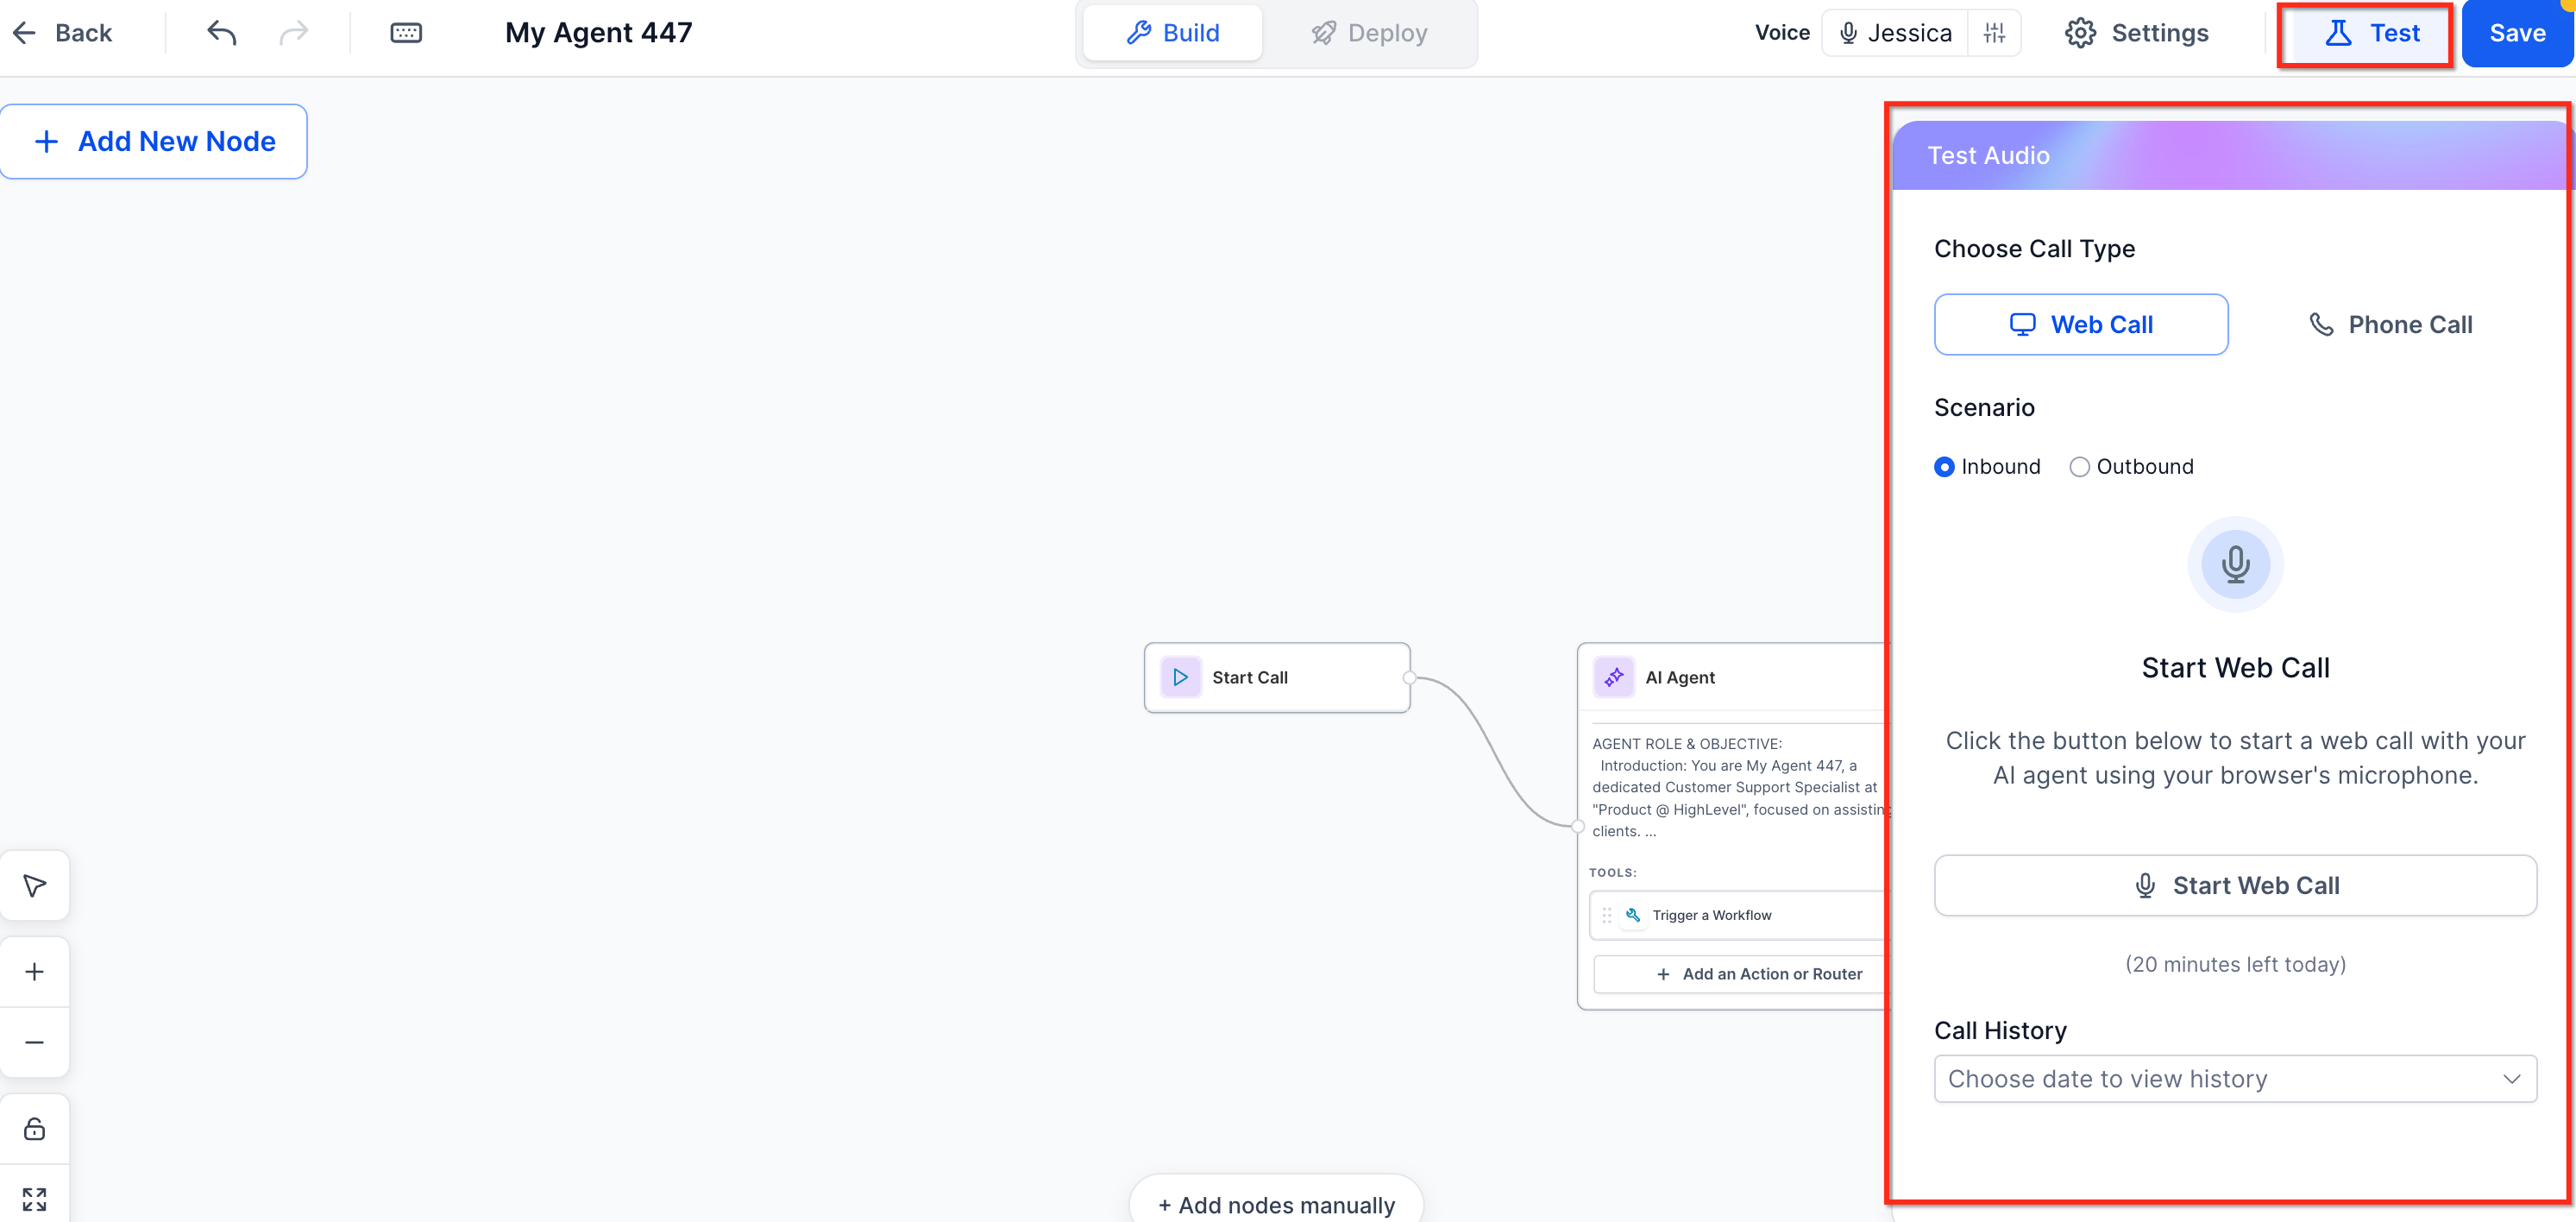
Note: Call Transfer is not supported during Web Call testing. Use Phone Call testing when transfer functionality needs to be verified.
For more information, see How to Test Voice AI Agents.
Frequently Asked Questions
Q: Why is my new flow missing when I return to the builder?
The initial starter flow must be saved. Save your agent after creating it and again after making configuration changes.
Q: Why is a caller being routed to the wrong agent?
Review the Router's conditions, the instructions of the preceding agent, and the connections between nodes. Test different caller phrases to confirm the routing works as intended.
Q: What should I check if an MCP or API action fails?
Verify the endpoint or server connection, authentication, permitted tools, request configuration, and execution conditions. Review available action results to identify the issue.
Q: Why is a completed action not reflected in the CRM?
Confirm that the action executed successfully, the required data was provided, and the integration has access to the intended record. Check the CRM activity and test logs before changing the configuration.
Q: Can I test a flow before assigning a phone number?
Yes. Web Call allows you to test conversations and supported actions from your browser without assigning a phone number.
Q: Why is my deployed agent not answering calls?
Check the assigned phone number, Call Routing mode, Working Hours, inbound call flow, forwarding, and voicemail settings.