
Manage Notification Settings in a Sub-Account
Notification Settings let users control how and where they receive alerts for conversations, tasks, appointments, reviews, and other supported activity. Each user can customize their notification channels and preferences to stay informed without receiving unnecessary alerts.
TABLE OF CONTENTS
- What Are Notification Settings?
- Key Benefits
- Manage Your Notification Settings
- Notification Behavior and Redirects
- Add Users to a Sub-Account
- Frequently Asked Questions
- Related Articles
What Are Notification Settings?
Notification Settings determine which supported events notify you and which channels are used to deliver those alerts.
Depending on the notification type, available channels can include In-App/Web, Desktop, Email, Mobile, and SMS.
Key Benefits
- Control notification channels: Choose how supported alerts are delivered.
- Reduce notification noise: Disable alerts that are not relevant to your work.
- Stay on top of tasks: Configure reminders and supported daily task summaries.
- Open relevant records faster: Supported notifications can redirect you directly to the related conversation, task, calendar, or record.
Manage Your Notification Settings
Step 1: Open Notifications
From the applicable Sub-Account, go to Settings → My Profile → Notifications.
In My Profile, select Notifications from the left-side menu.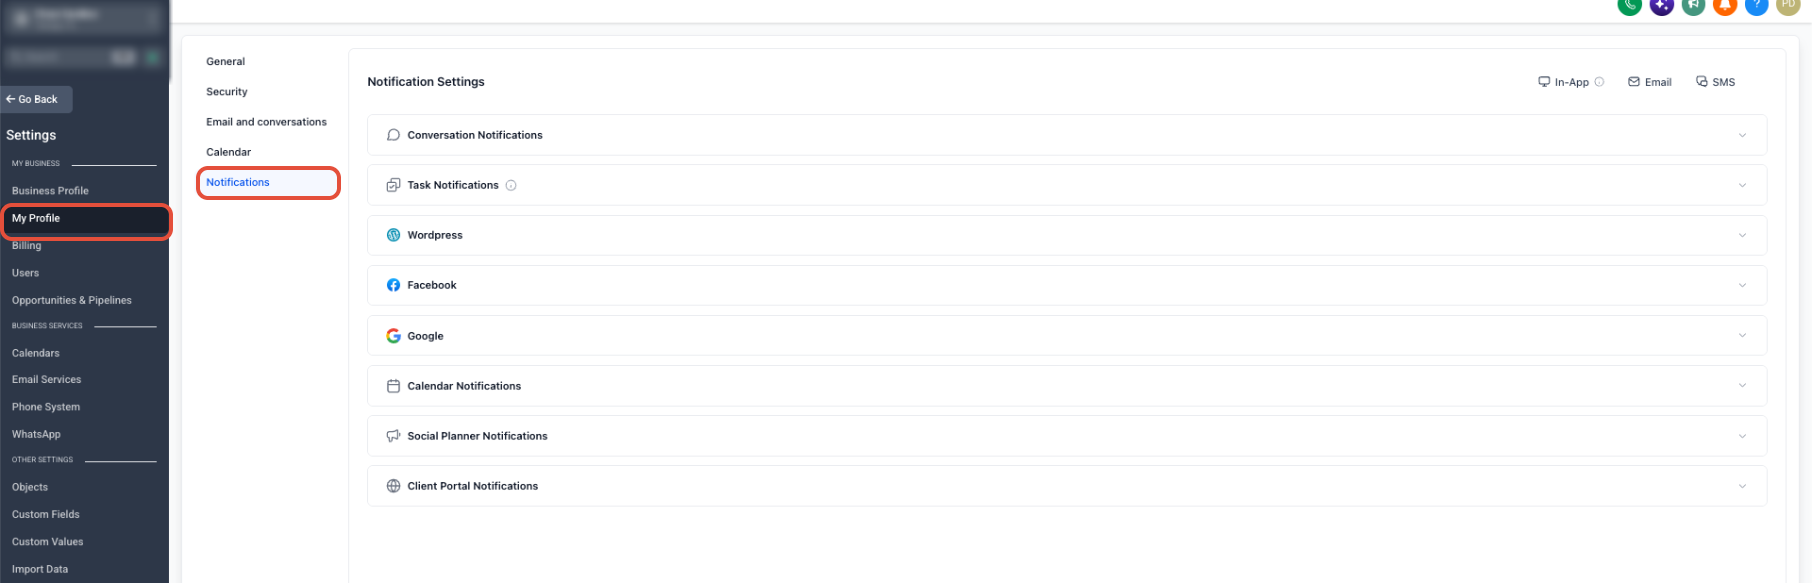
Step 2: Choose Your Notification Preferences
Review the available notification categories and select the channels you want to use for each supported notification type.
Preferences can include alerts for:
- Conversations and assigned messages
- Tasks and task reminders
- Daily due or overdue task summaries
- Appointments and calendar activity
- Reviews
- Other supported account activity
Language: Notification titles and content are delivered in the recipient's Platform Language when a translation is available. If no translation is available, the notification falls back to English (en_US).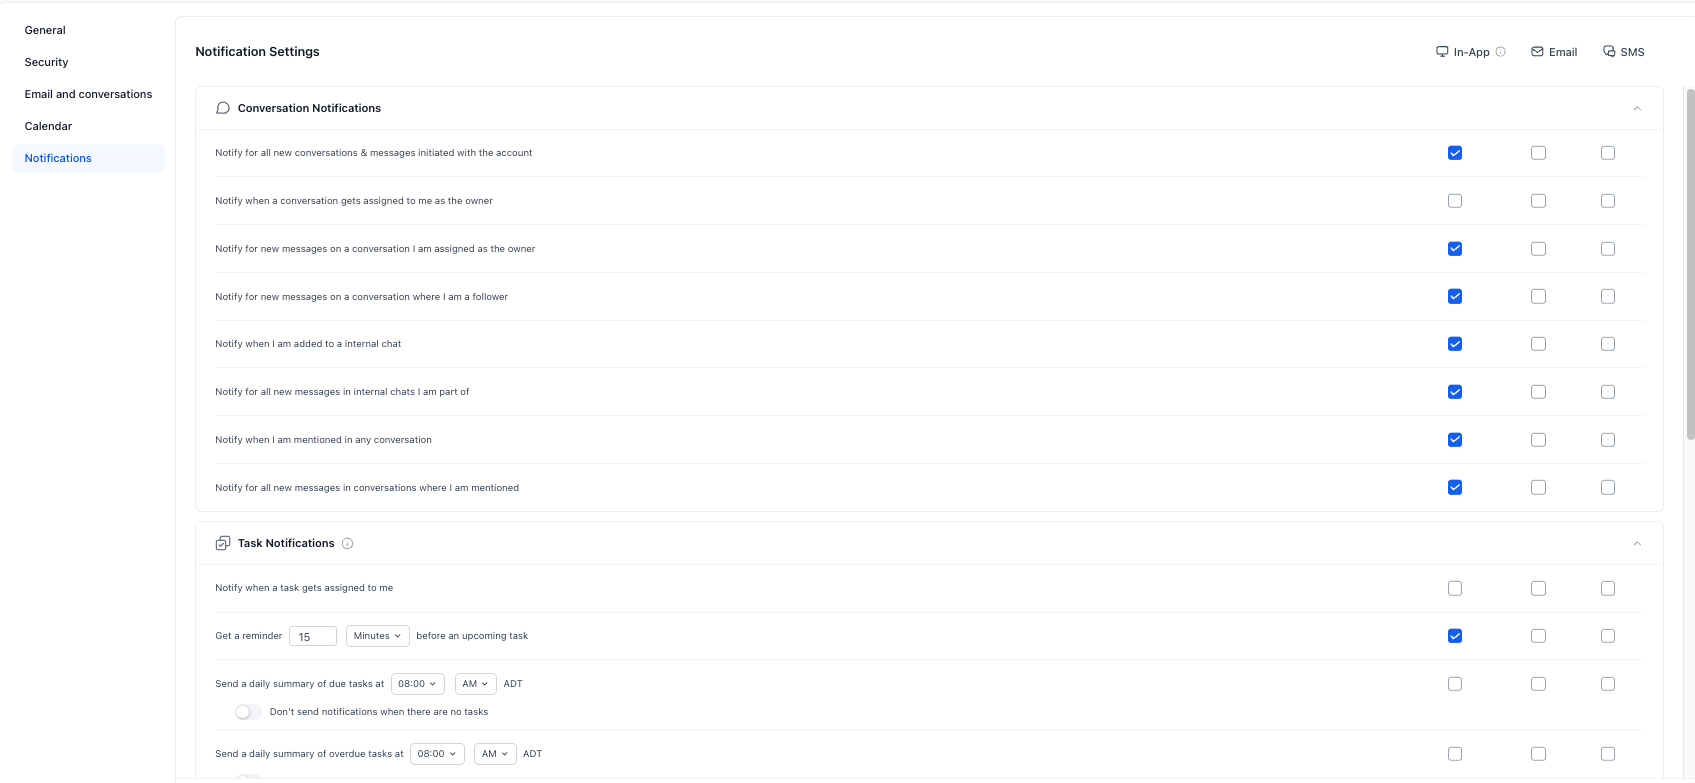
Step 3: Save Your Preferences
After configuring your notification preferences, use the available save action to apply your changes.
Note: A user must have access to the applicable Sub-Account to receive its notifications. Users with Only Assigned Data enabled do not receive supported notifications for unassigned leads.
Admins can review changes to notification preferences from Sub-Account → Settings → Audit Logs by filtering the module to Notification Preferences.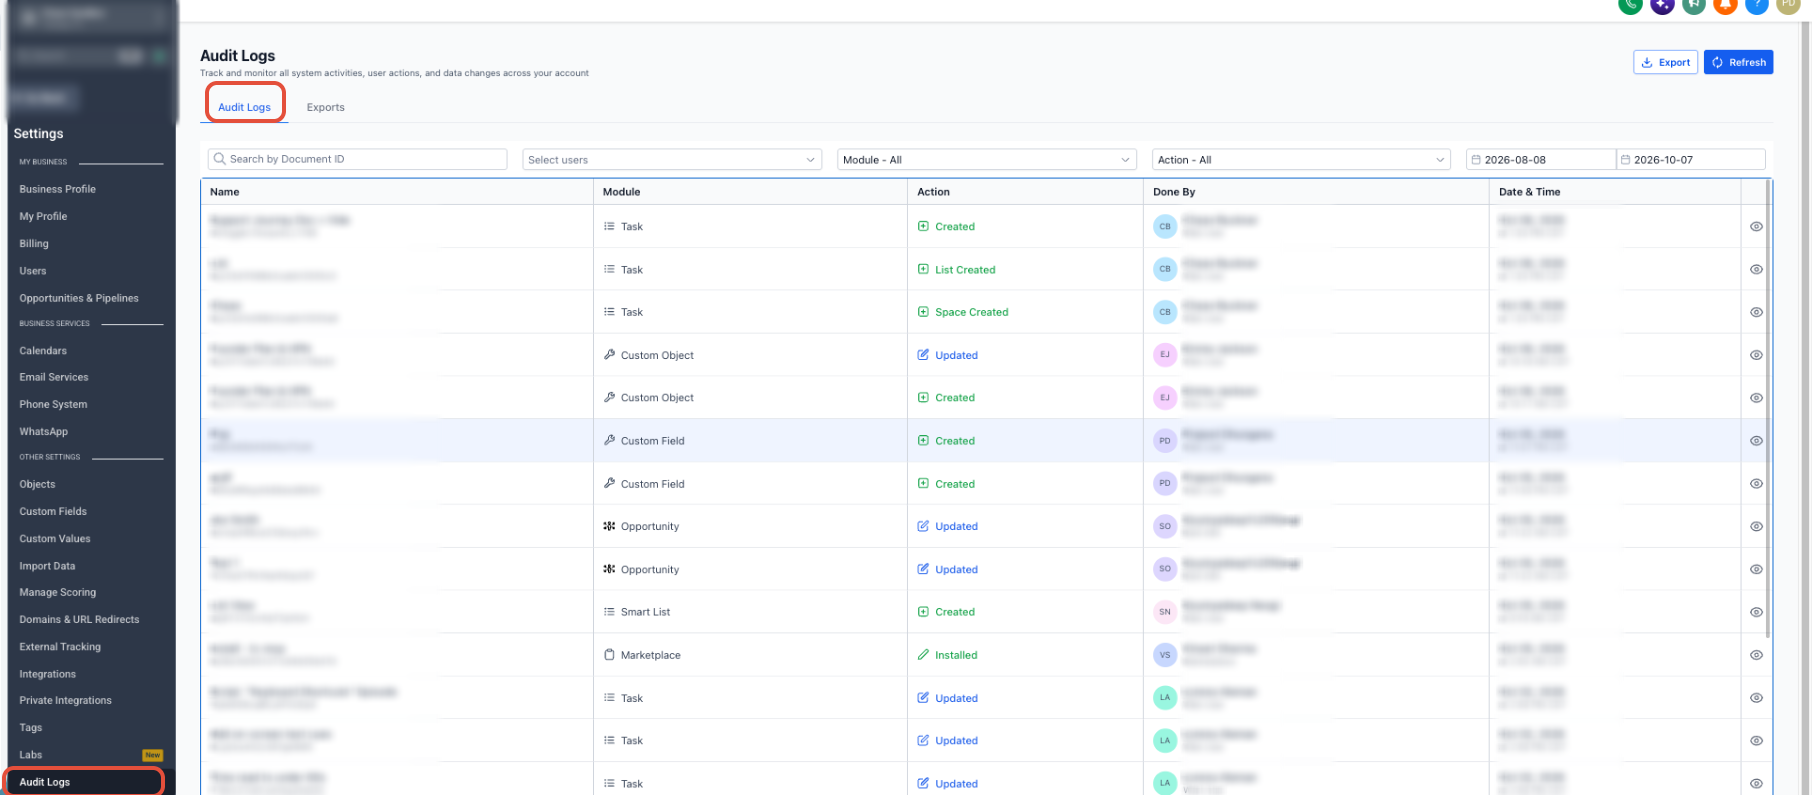
Notification Behavior and Redirects
Supported In-App notifications can be clicked to open the related area of the Sub-Account.
- Conversations: Opens the relevant conversation or message.
- Tasks: Opens the applicable task area.
- Calendars: Opens the relevant calendar or appointment area.
- Review notifications: Supported review alerts can redirect to the relevant conversation or review-related record.
Follower Message Notifications
Notify for new messages on a conversation where I am a follower is enabled by default for In-App notifications for existing and new users.
This notification applies to inbound messages. Additional channels such as Email or SMS can be configured when available.
Task and Appointment Reminders
Supported notification preferences can include:
- Reminders before an assigned task is due
- Daily summaries of due tasks
- Daily summaries of overdue tasks
- Reminders before assigned appointments
- Alerts for new or assigned appointments
Scheduled notification summaries use the applicable time and timezone configuration.
Add Users to a Sub-Account
Users must have access to a Sub-Account before they can receive and manage notifications for it.
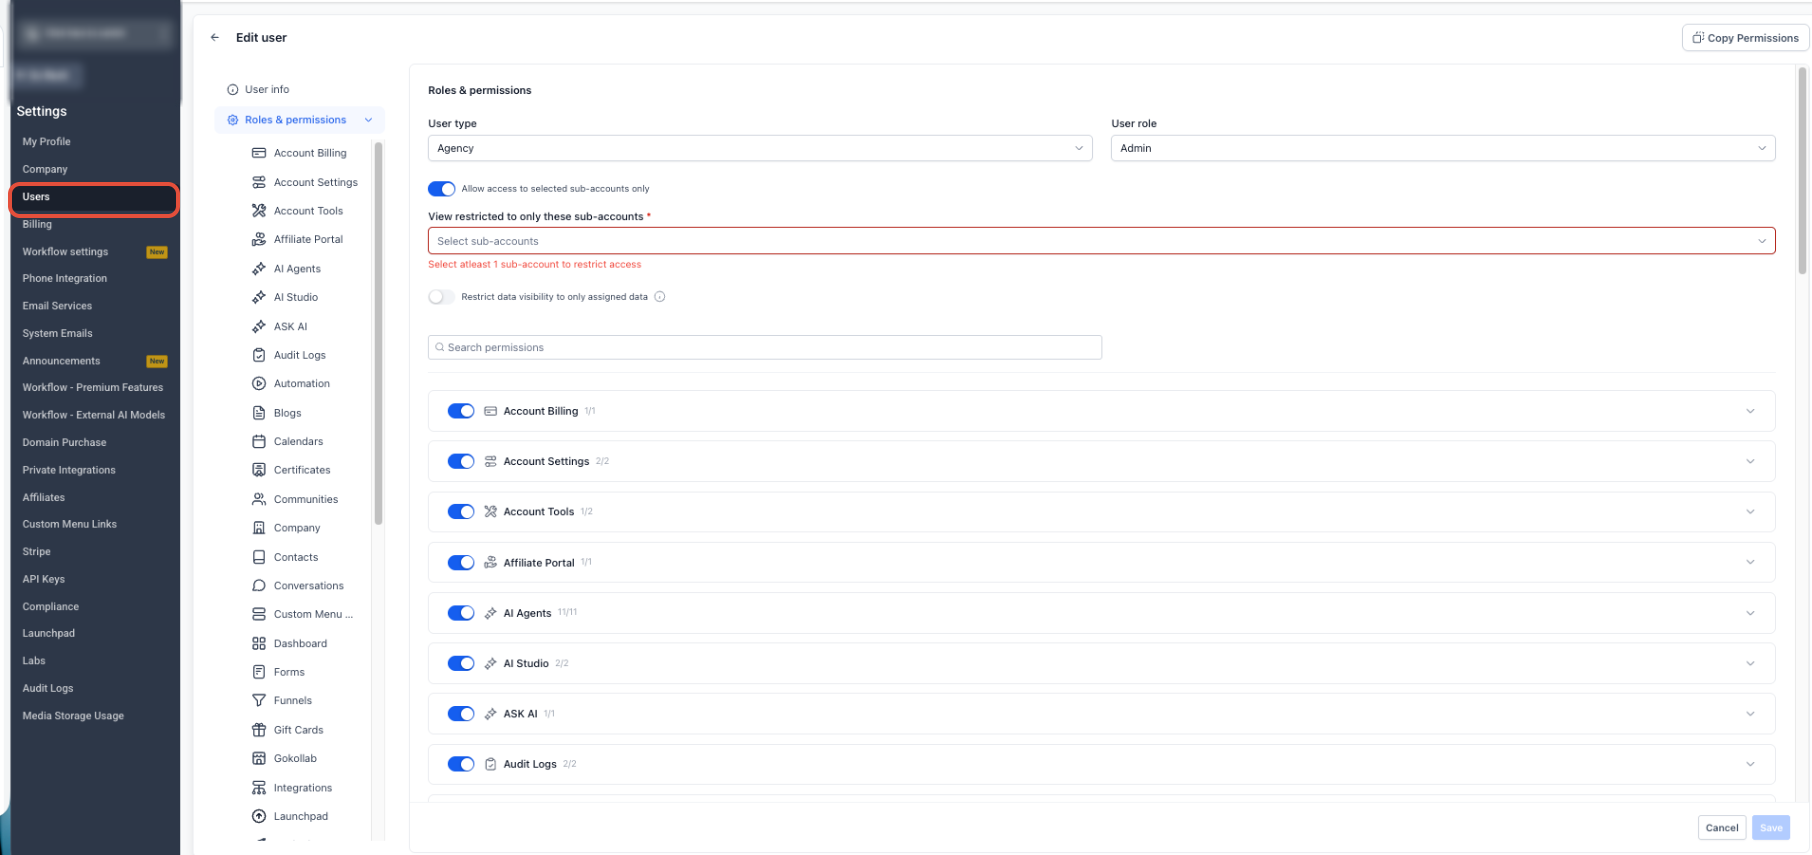
- From Agency View, go to Settings → Users.
- Open the user you want to update.
- Select Roles & Permissions.
- Assign the Sub-Account or Sub-Accounts the user should be able to access.
- If needed, restrict the user to only the selected Sub-Accounts.
- Save the user's access settings.
After access is assigned, the user can go to Sub-Account → Settings → My Profile → Notifications to configure their personal notification preferences.
Frequently Asked Questions
Q: How does Mark all as read work?
It changes the logged-in user's current unread notifications to read.
Q: Why am I receiving duplicate notifications for the same message?
Multiple notification conditions may apply to the same activity. For example, a message could trigger both an assigned-conversation notification and a new-message notification. Review your preferences and disable overlapping alerts if needed.
Q: What does Clear All do?
Clear All removes the current notifications from view. New notifications can still appear afterward, and cleared notifications cannot be restored.
Q: Why am I not receiving notifications for some leads?
Confirm that you have access to the applicable Sub-Account and review whether Only Assigned Data is enabled. Users with restricted assigned-data access do not receive supported notifications for unassigned leads.