
How to Create and Manage Social Groups in Social Planner
Social Groups in Chat To Clients CRM Social Planner make it easier to manage and publish content across multiple social media accounts. Instead of selecting individual profiles every time, you can organize them into groups and select them together when creating posts. This guide explains how to create, use, edit, and delete Social Groups.
TABLE OF CONTENTS
- What are Social Groups in Social Planner?
- Key Benefits of Social Groups
- How to create a Social Group?
- How to Use a Social Group When Creating a Post
- How to Edit or Delete a Social Group
- Frequently Asked Questions
- Related Articles
What are Social Groups in Social Planner?
Social Groups allow you to organize multiple connected social media accounts into a single group. You can select a group when creating posts or filtering content, saving time when managing multiple profiles.
Key Benefits of Social Groups
Social Groups simplify managing multiple accounts and help streamline your social media publishing workflow.
Quick Account Selection: Select multiple social accounts together using a group.
Better Organization: Organize connected profiles by brand, campaign, or business.
Easy Group Management: Add or remove accounts and rename groups as needed.
Simplified Publishing: Select an existing group directly when creating a social media post.
How to create a Social Group?
Creating Social Groups helps you organize connected accounts for easier selection and content management.
Navigate to Marketing → Social Planner → Planner.
Click the social account dropdown and select Create new group.
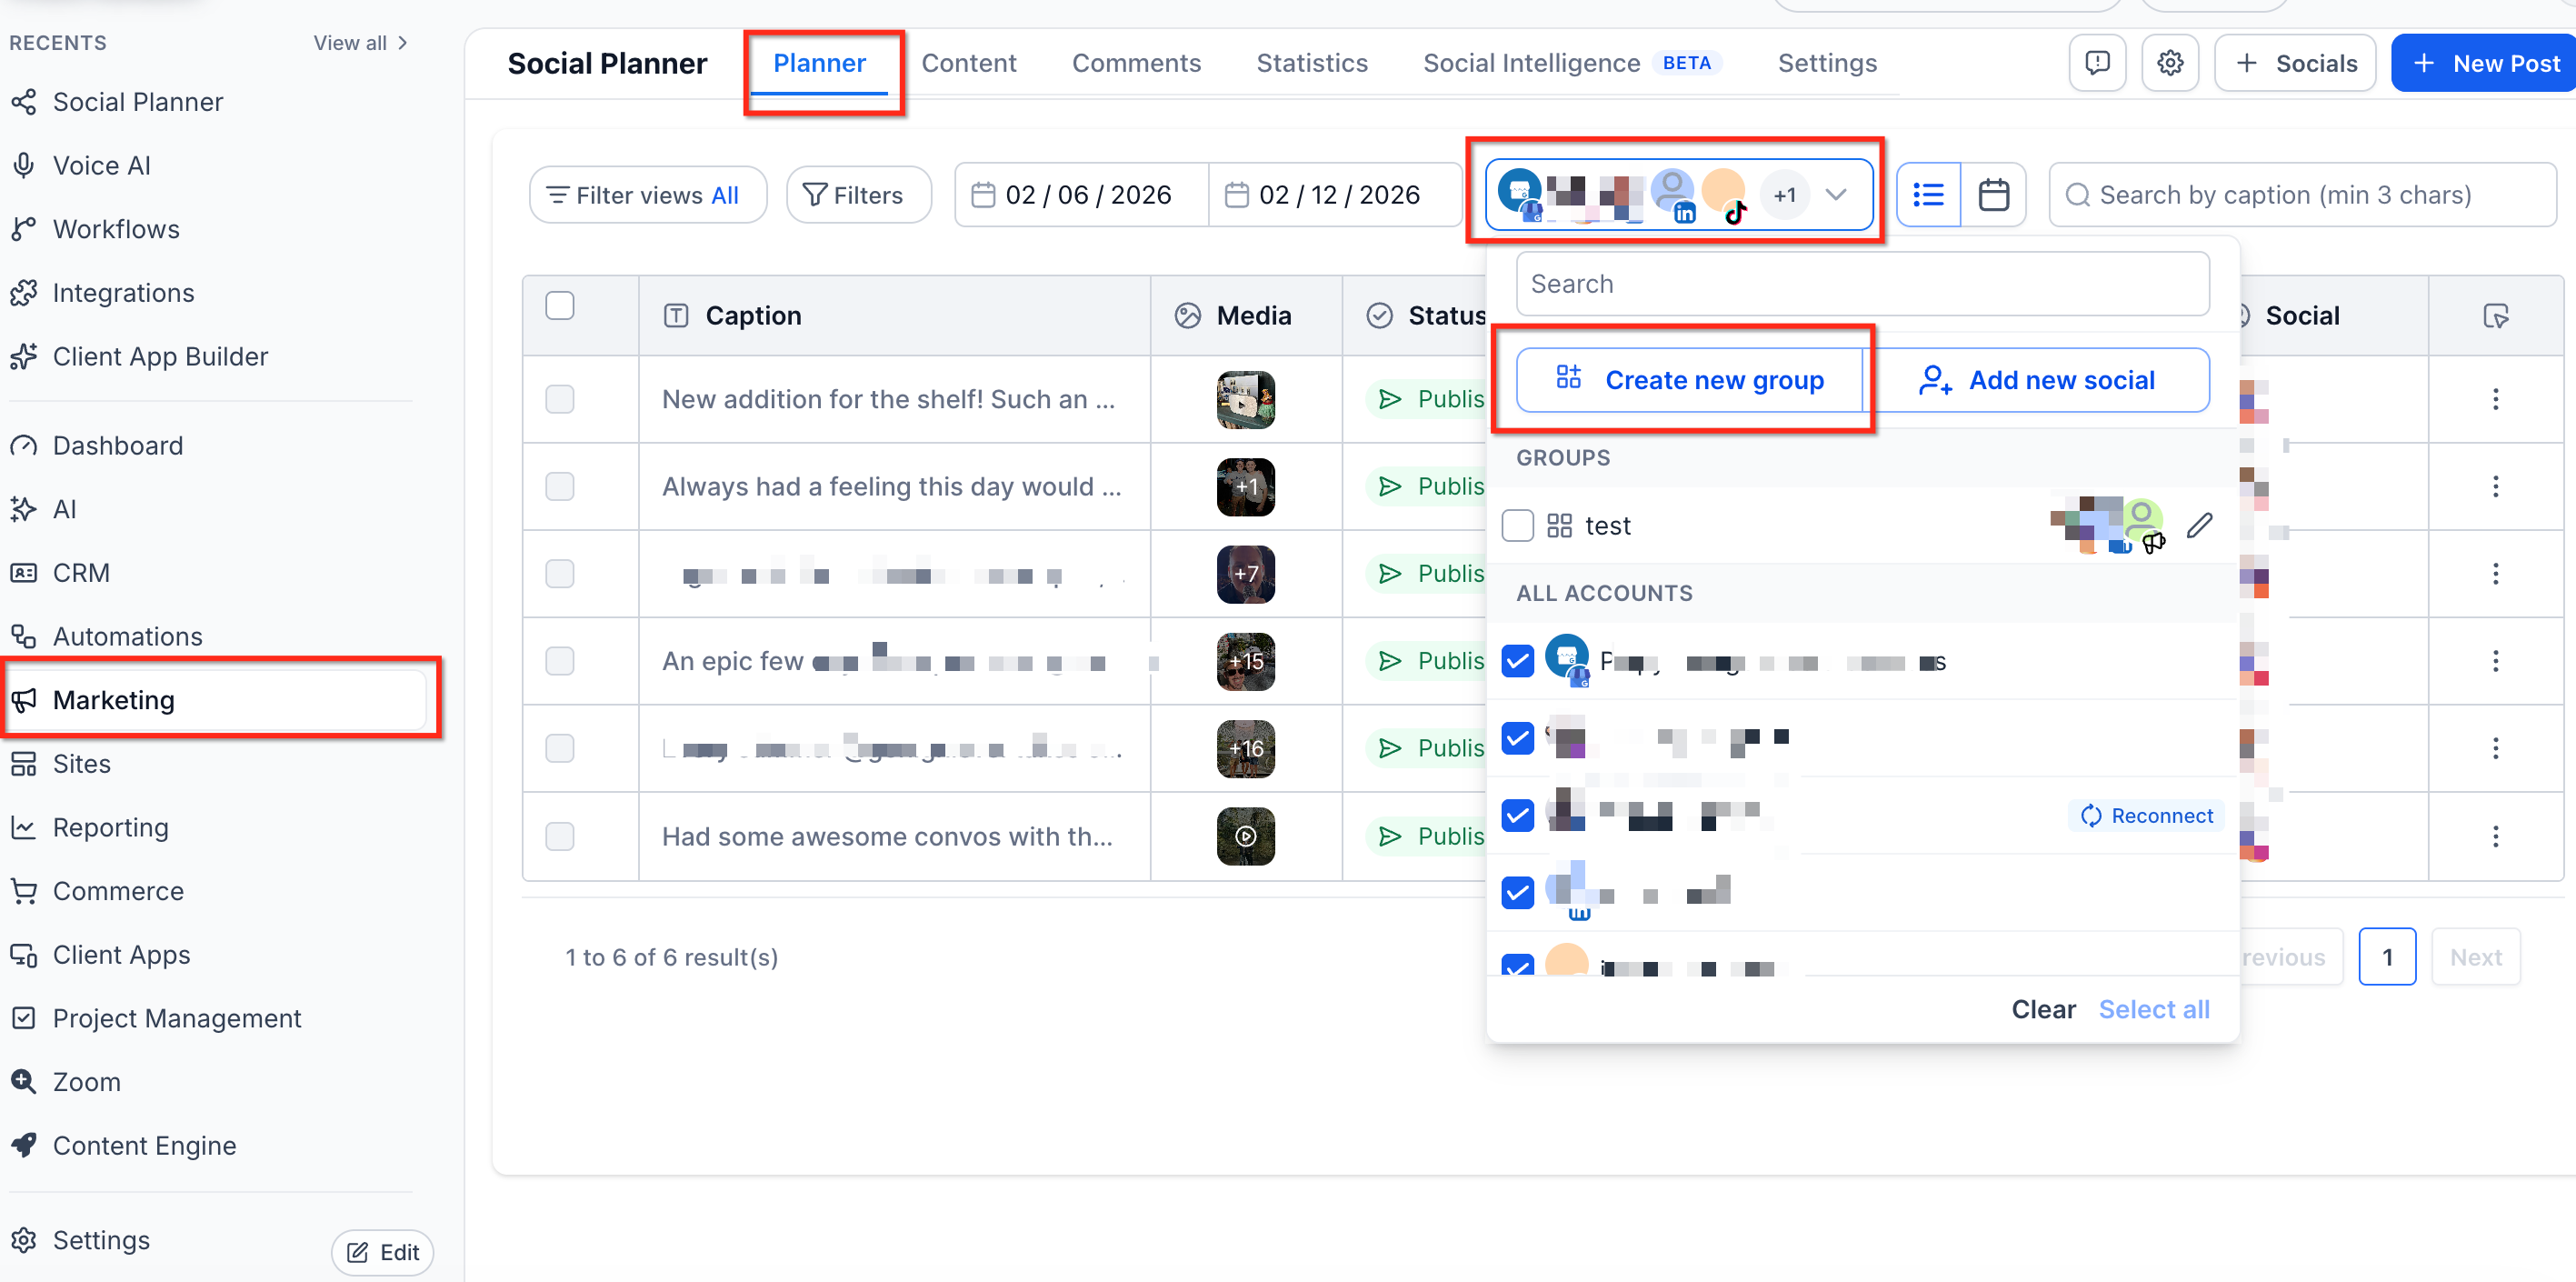
Enter a name in the Type group name field.
Under Add accounts to group, select the social profiles you want to include.
Click Create to save the group.
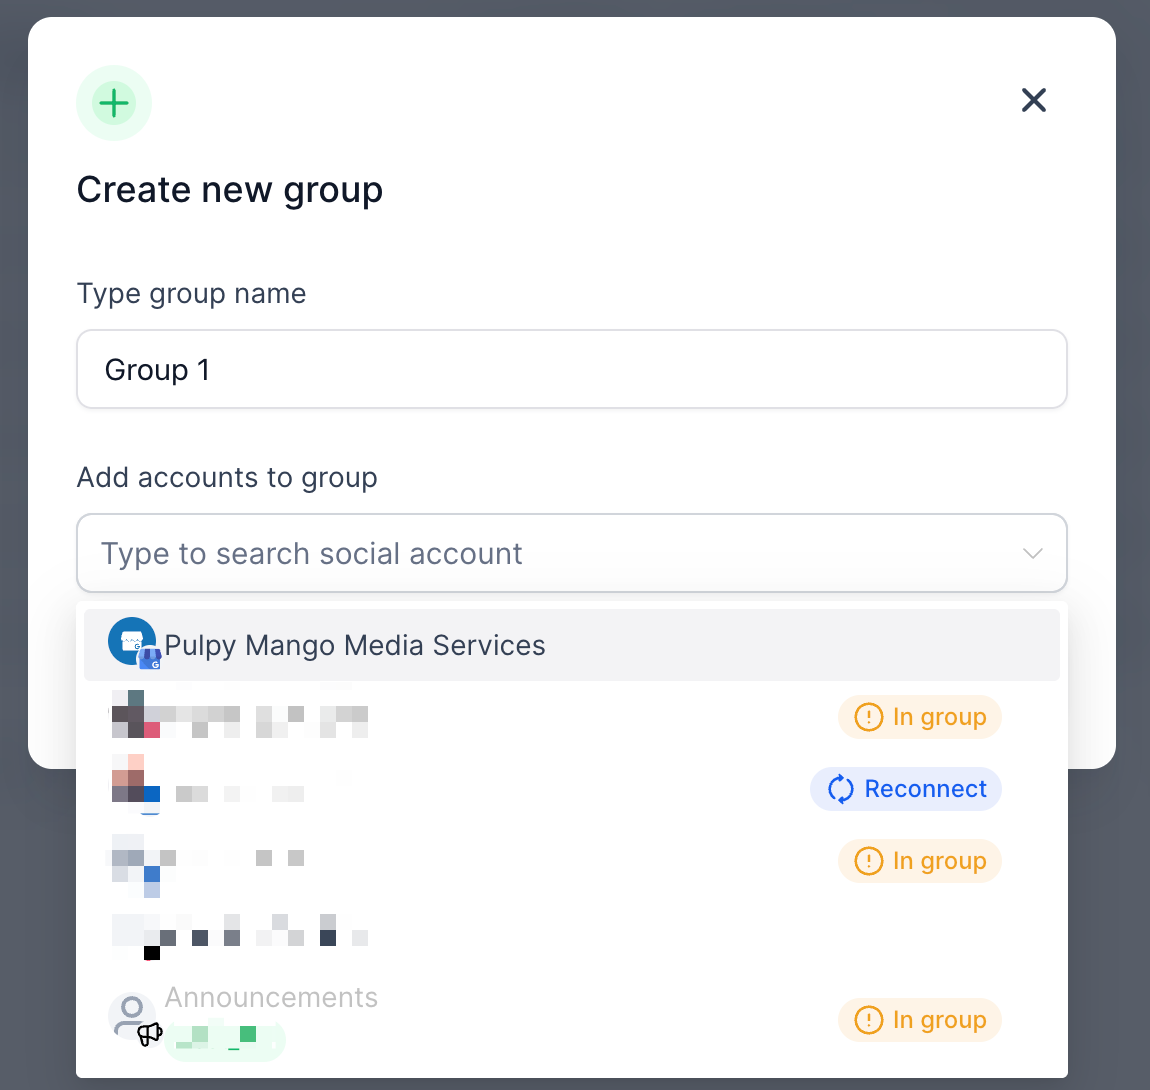
Your new group will appear under Groups in the social account dropdown.
How to Use a Social Group When Creating a Post
Selecting a Social Group allows you to include multiple social accounts in a new post without selecting each profile individually.
Navigate to Marketing → Social Planner.
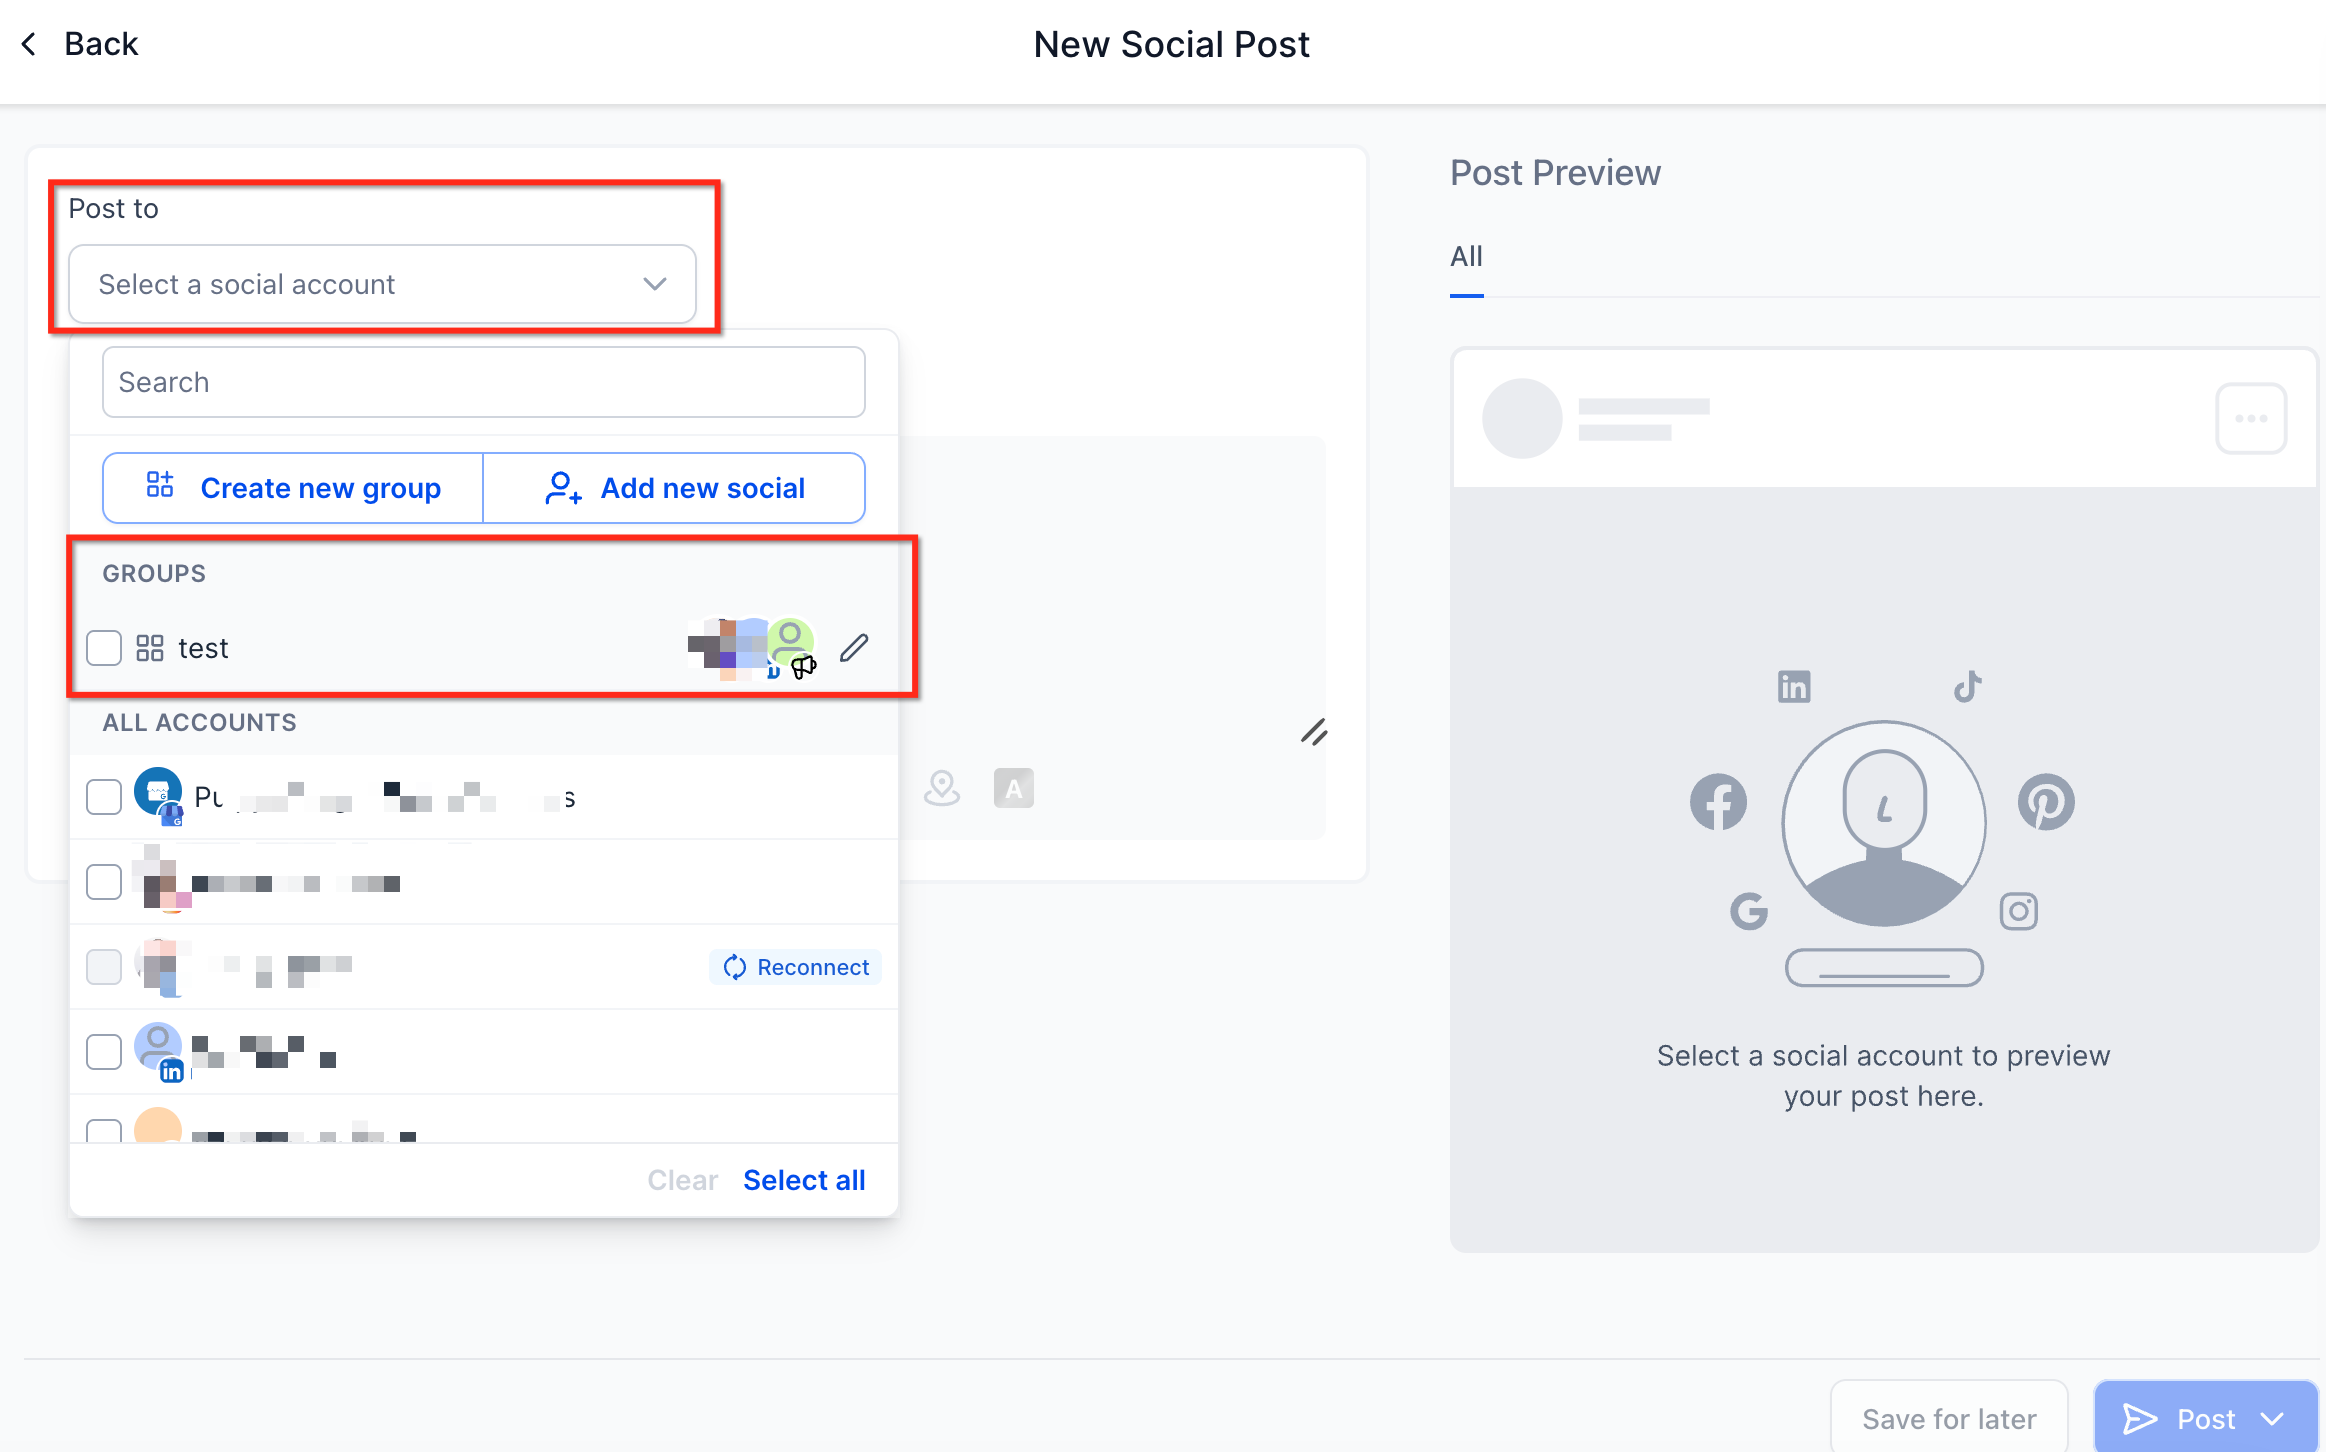
Click + New Post → Create New Post.
Under Post to, open the Select a social account dropdown.
Locate Groups and select the checkbox next to your preferred group.
Add your post content and proceed with publishing or scheduling.
How to Edit or Delete a Social Group
You can update existing Social Groups whenever you need to rename a group or change the accounts included in it.
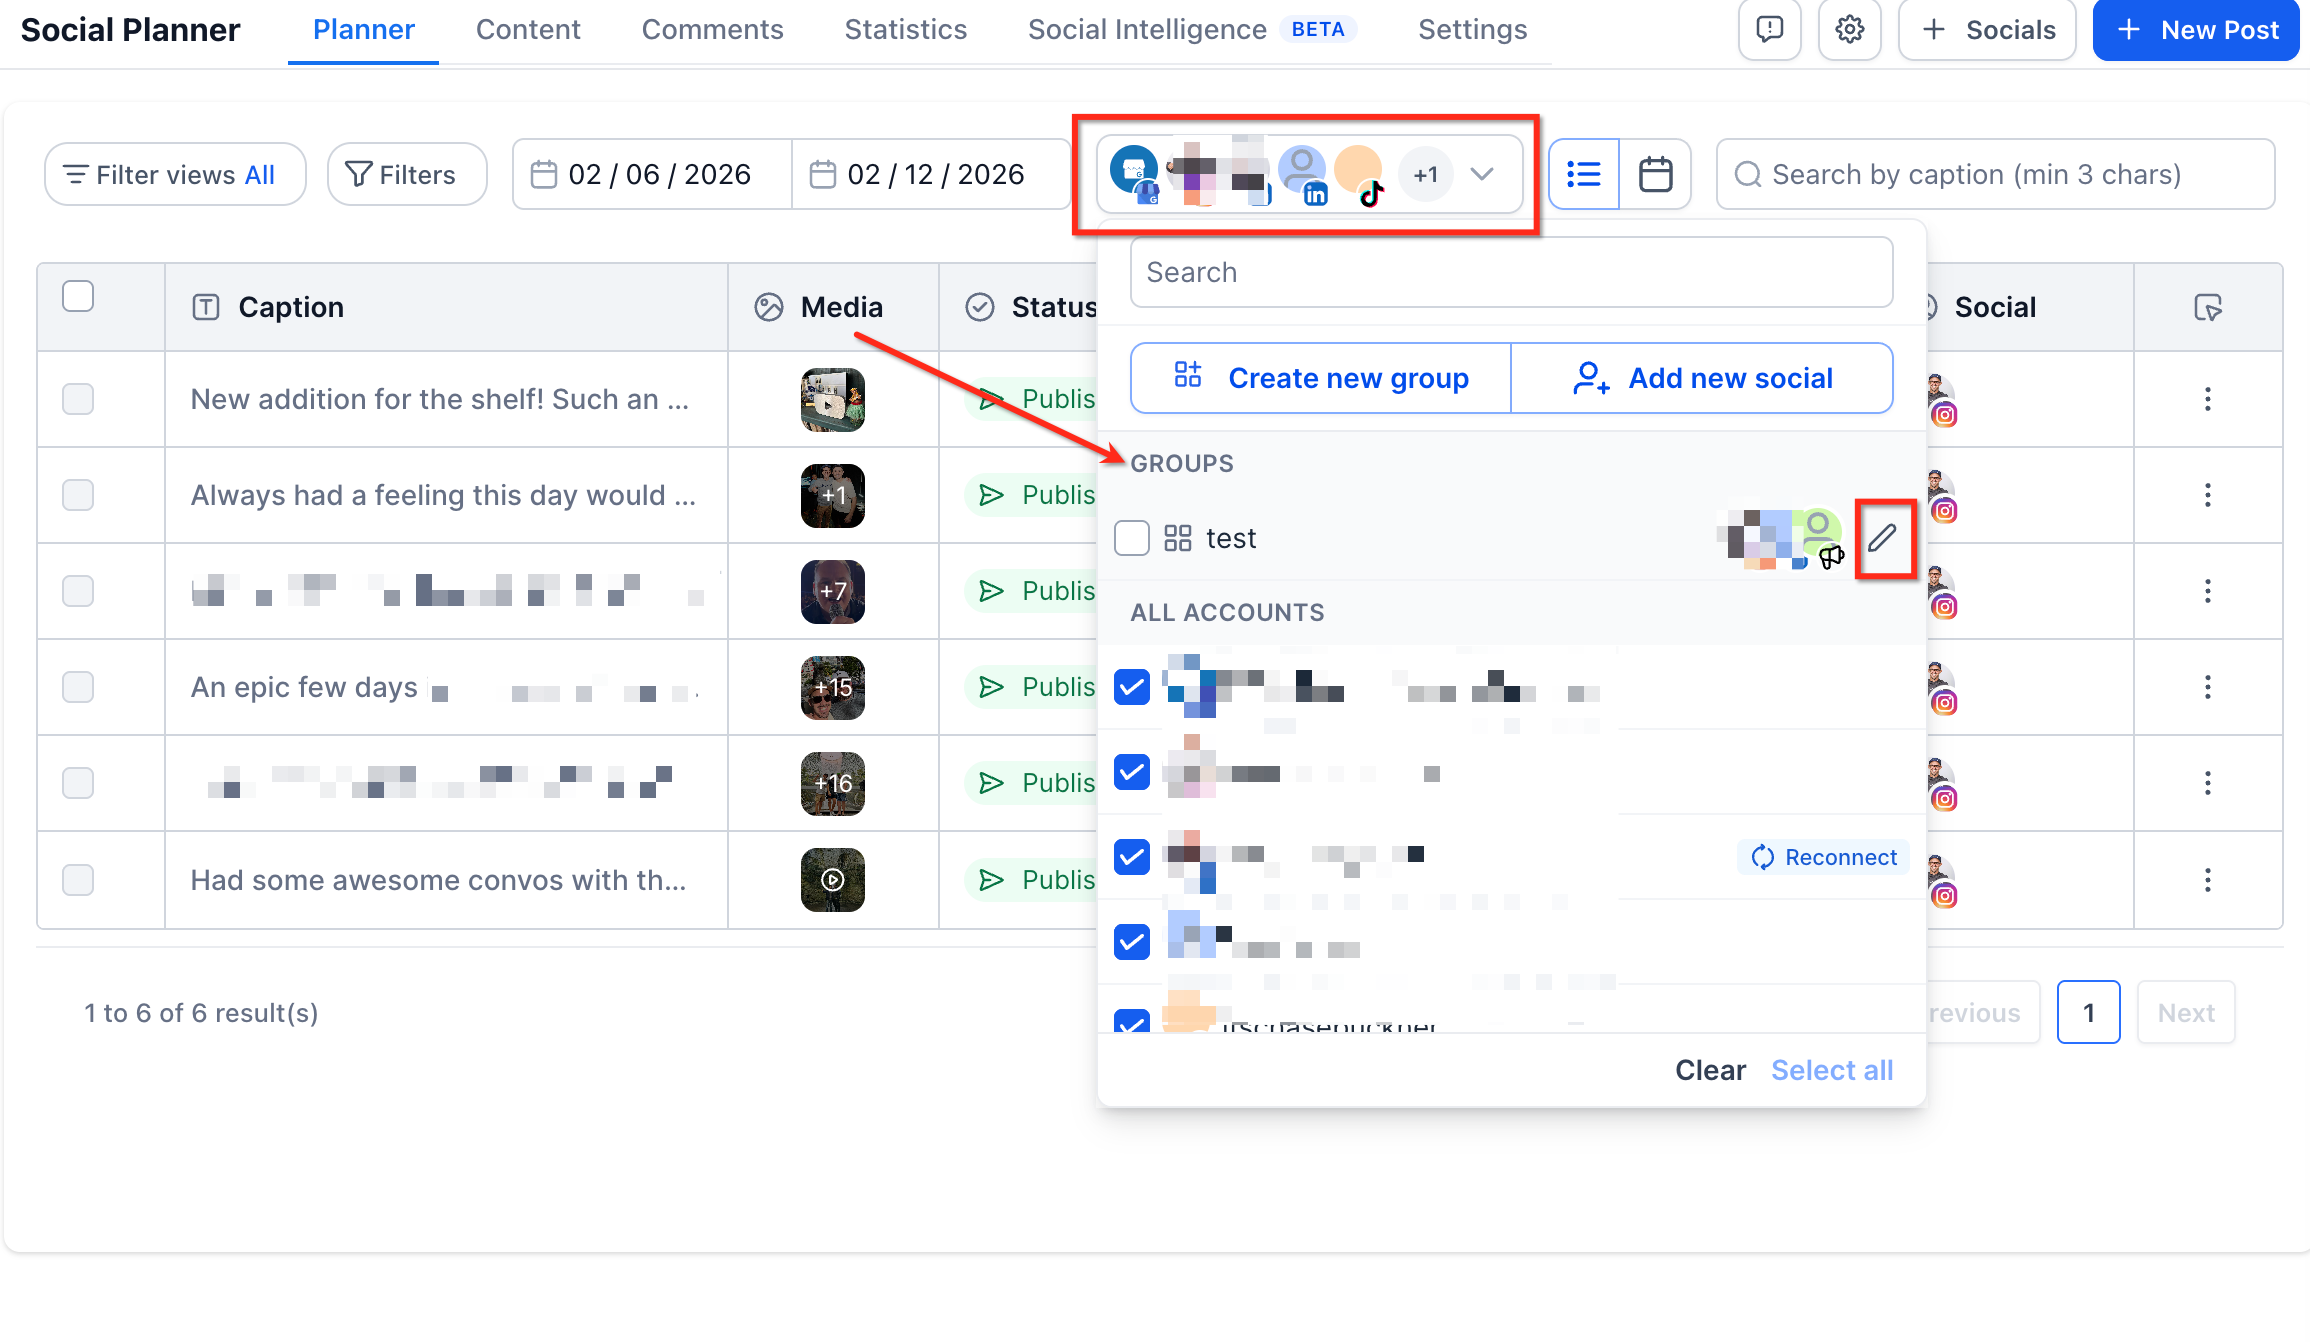
Navigate to Social Planner → Planner and open the social account dropdown.
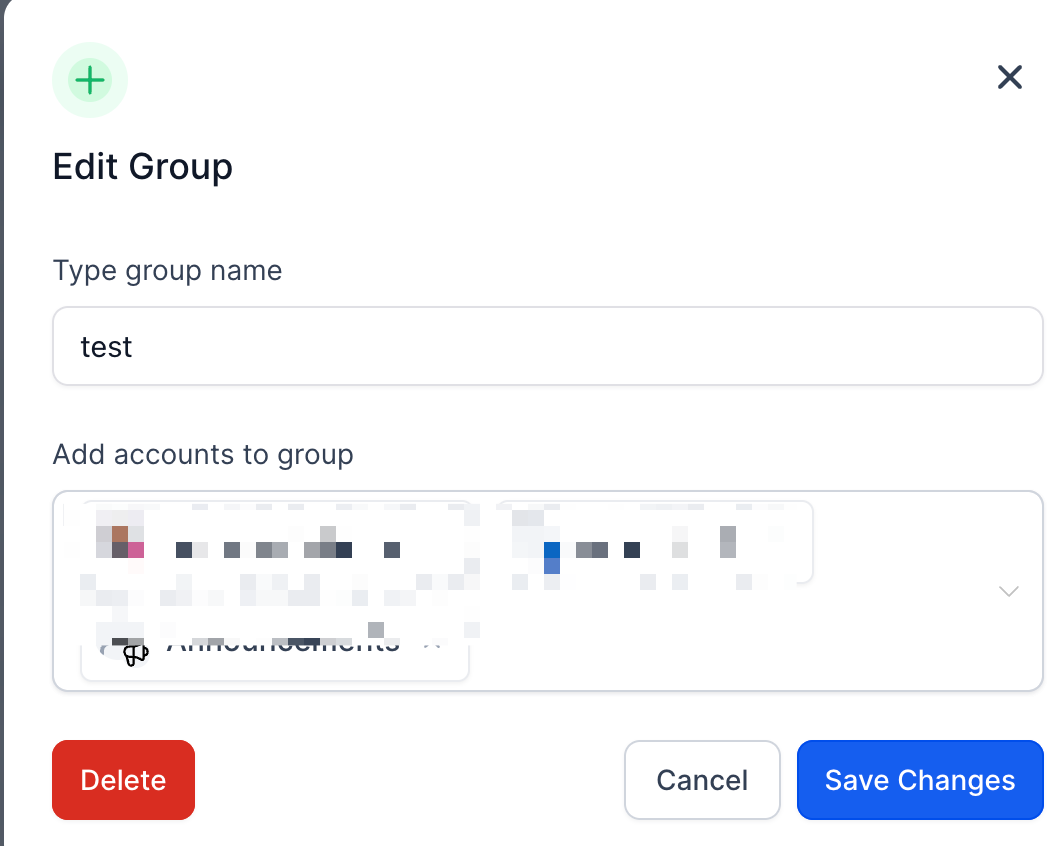
Under Groups, click the pencil icon next to the group you want to modify.
In the Edit Group window, update the group name or add/remove social accounts.
Click Save Changes to apply your updates, or click Delete to remove the group.
Frequently Asked Questions
Q: Can I include accounts from different social media platforms in one group?
Yes. You can organize connected accounts from different supported platforms within the same Social Group.
Q: Can I create a Social Group while composing a post?
Yes. Open the Post to dropdown in the New Social Post editor and select Create new group.
Q: Does selecting a Social Group customize content for each platform?
No. Social Groups simplify account selection. To create platform-specific captions and media, use Customize for
Each Channel.
Q: What happens if a social account in my group becomes disconnected?
You must reconnect the affected social account before publishing to it. Check Social Planner for a Reconnect option.