
Exporting Survey Answers to Google Sheets
How to Send Survey Responses to Google Sheets in Chat To Clients CRM
Chat To Clients CRM lets you automatically send survey submission data to Google Sheets using a workflow. This is useful when you want new responses organized in a spreadsheet for reporting, team review, or additional processing without manually copying information.
Exporting existing survey submissions and automatically sending future submissions to Google Sheets are two different processes. Use the native Export option for existing submissions and a Workflow for automatic Google Sheets updates.
1. What Does Sending Survey Responses to Google Sheets Do?
Using a Chat To Clients CRM workflow, you can automatically add information to Google Sheets whenever a contact submits a selected survey.
Survey Submitted → Google Sheets → Create Spreadsheet Row
You can send information such as:
- Contact name
- Email address
- Phone number
- Survey-related contact fields
- Submission information
- Other values available to the workflow
2. Export vs Automatic Google Sheets Sync
Choose the method based on whether you need existing responses or want future survey submissions sent automatically.
| Method | Best For | How It Works |
|---|---|---|
| Export Survey Submissions | Existing responses | Export submissions from Chat To Clients CRM and receive a download link by email. |
| Google Sheets Workflow | Future submissions | A workflow runs after a survey is submitted and sends mapped data to Google Sheets. |
3. Before You Begin
Prepare the required survey, Google account, and spreadsheet before building the workflow.
- A published Chat To Clients CRM survey
- A Google account connected to the Chat To Clients CRM sub-account
- A Google Sheet where the data will be added
- Column headers for the information you want to store
- Access to Automation → Workflows
- Premium Triggers & Actions enabled when required for the Google Sheets action
Note: Google Sheets is a Premium Workflow Action. Availability and usage charges can depend on the agency's current Premium Triggers & Actions configuration.
4. Prepare Your Google Sheet
Set up the destination spreadsheet before configuring the workflow so the required columns are ready for mapping.
- Open Google Sheets.
- Create a new spreadsheet or open an existing one.
- Select the worksheet where survey information should be added.
- Create a header row for the information you want to store.
| Name | Phone | Feedback | Submission Date |
|---|
5. Create the Workflow
Create a workflow that will run when the selected survey is submitted.
- In your Chat To Clients CRM sub-account, go to Automation → Workflows.
- Create a new workflow or open an existing workflow.
- Add a new workflow trigger.
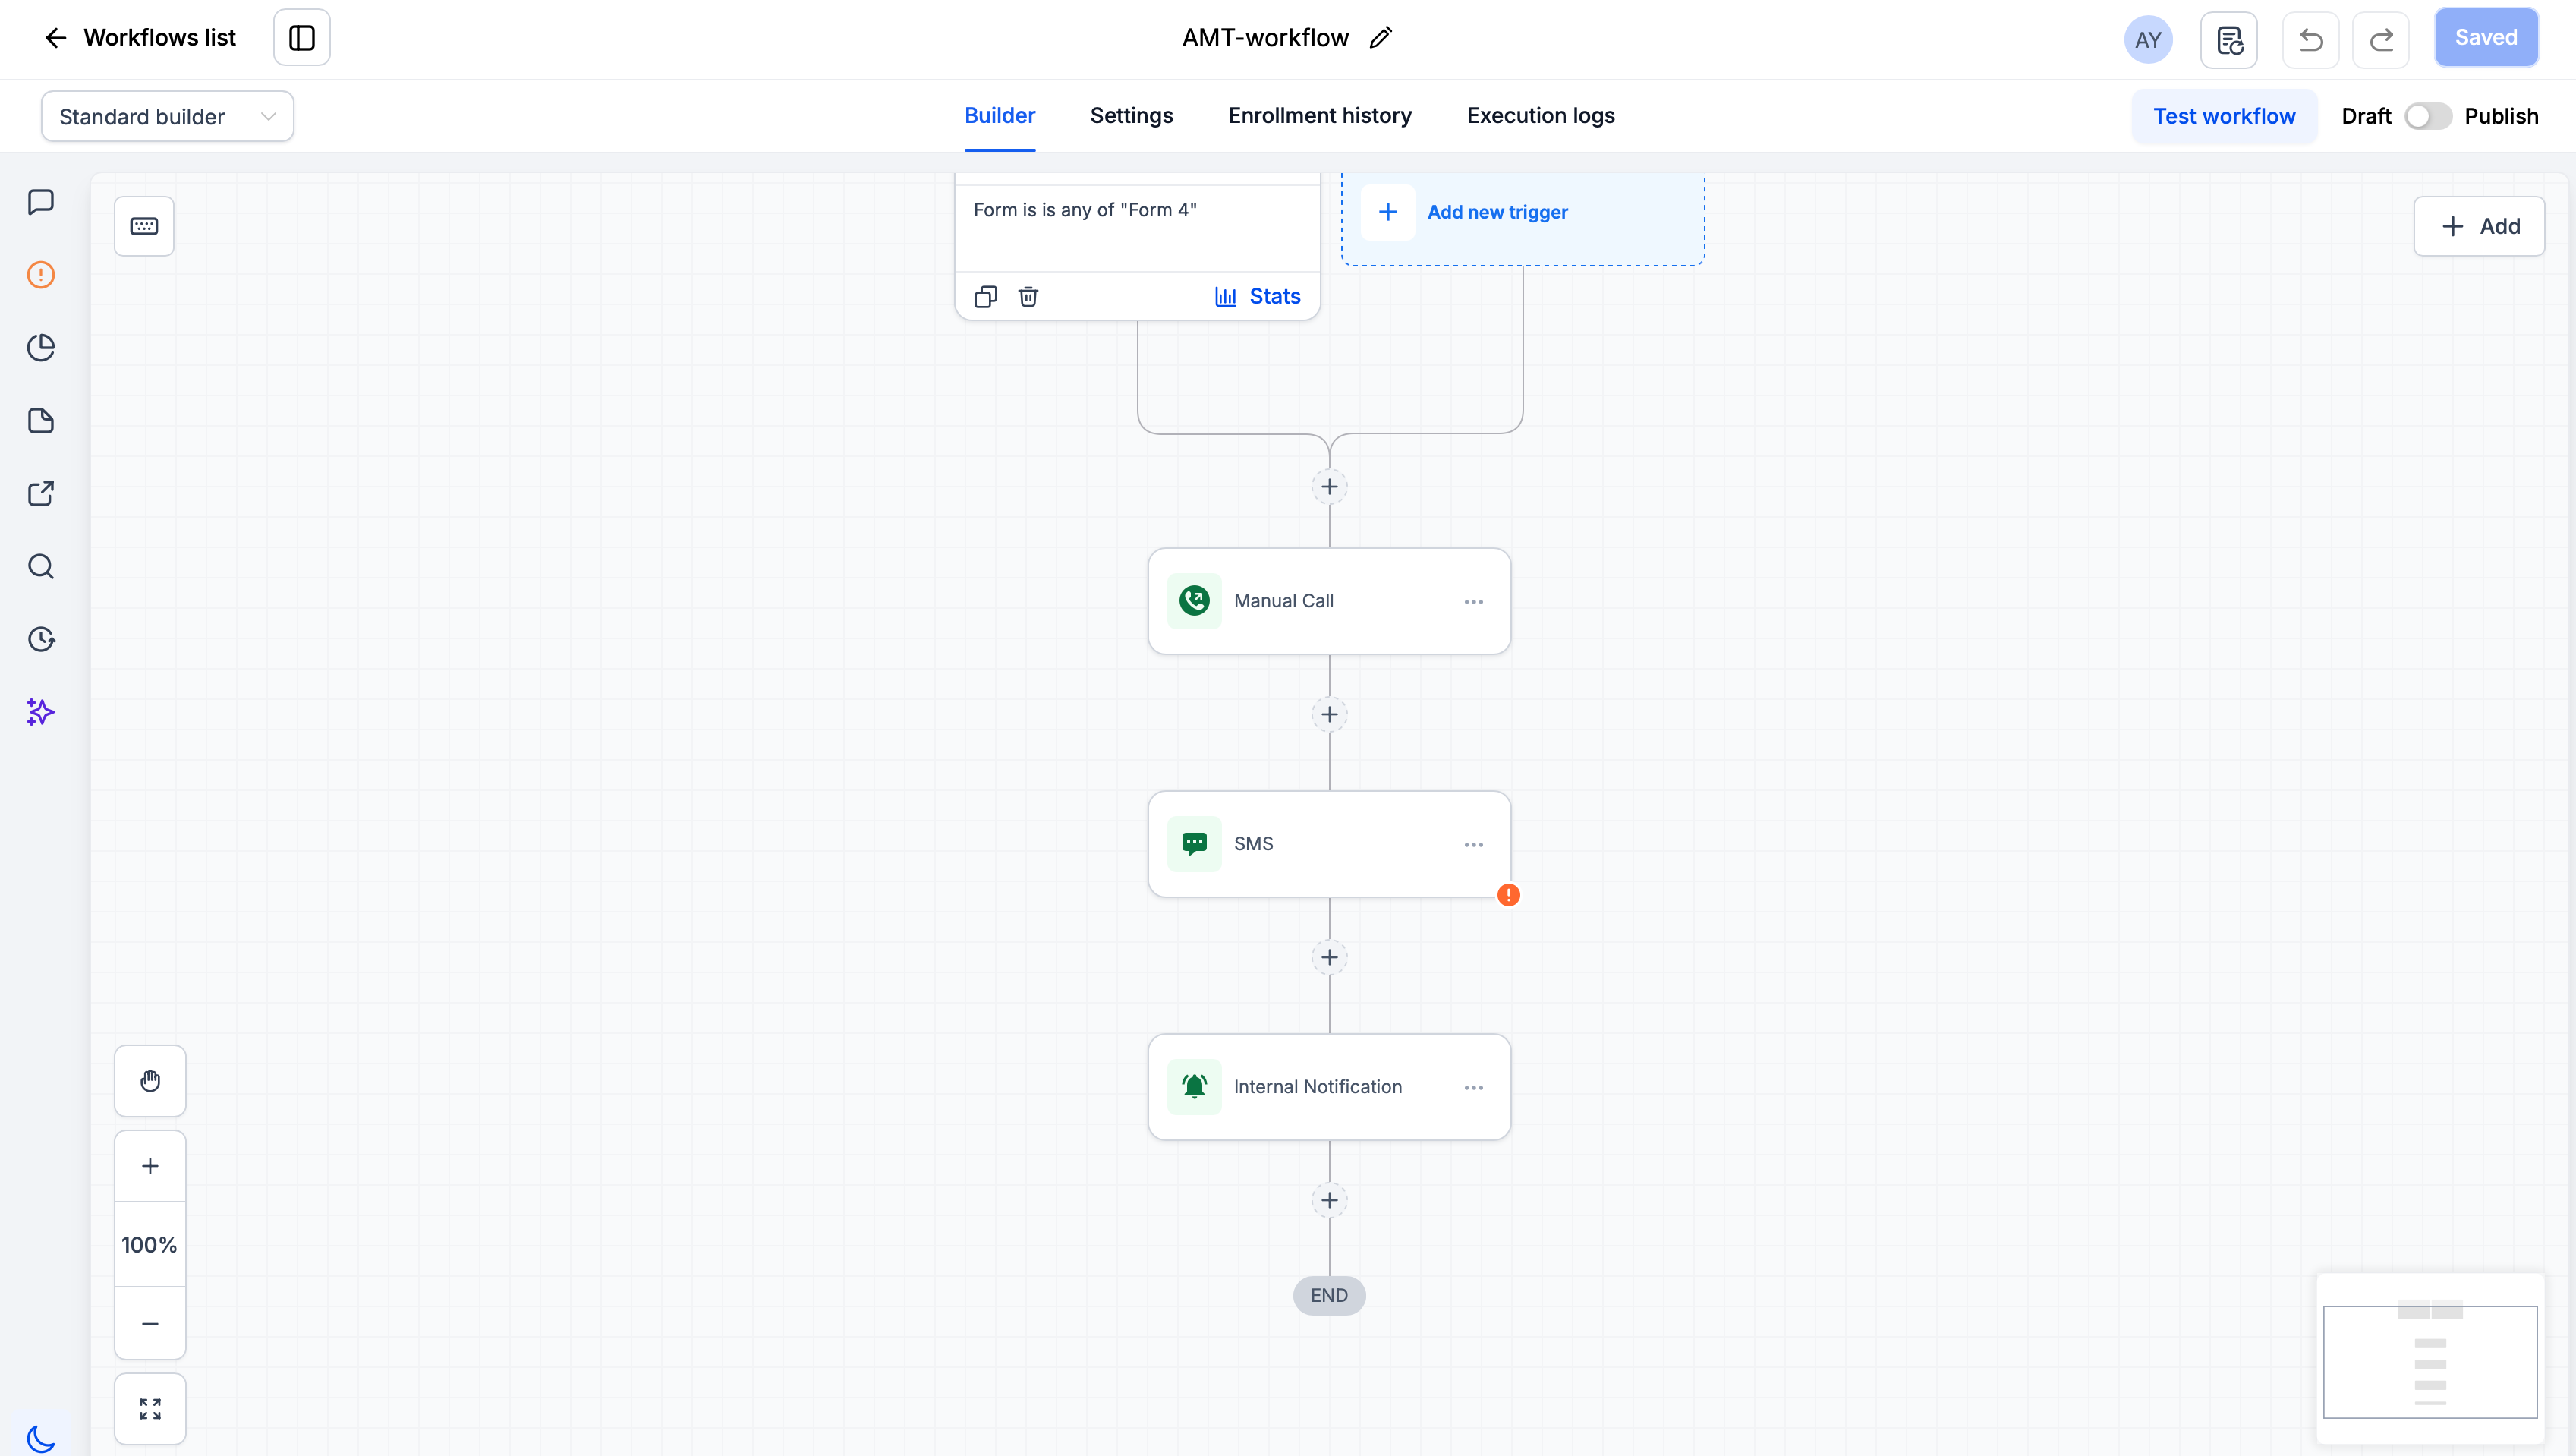
6. Add the Survey Submitted Trigger
The Survey Submitted trigger starts the workflow when a contact submits a survey.
- Select Survey Submitted as the workflow trigger.
- Add the Survey is filter.
- Select the survey whose submissions you want to send to Google Sheets.
- Save the trigger.
Tip: Use the Survey is filter when only one survey should send information to this Google Sheet.
7. Add the Google Sheets Action
Add a Google Sheets workflow action after the trigger to send the submission information to the selected spreadsheet.
- Click + Add Action.
- Search for and select Google Sheets.
- Select the appropriate action, such as Create Spreadsheet Row.
- Select the connected Google account.
- Select the required spreadsheet.
- Select the worksheet where the information should be added.
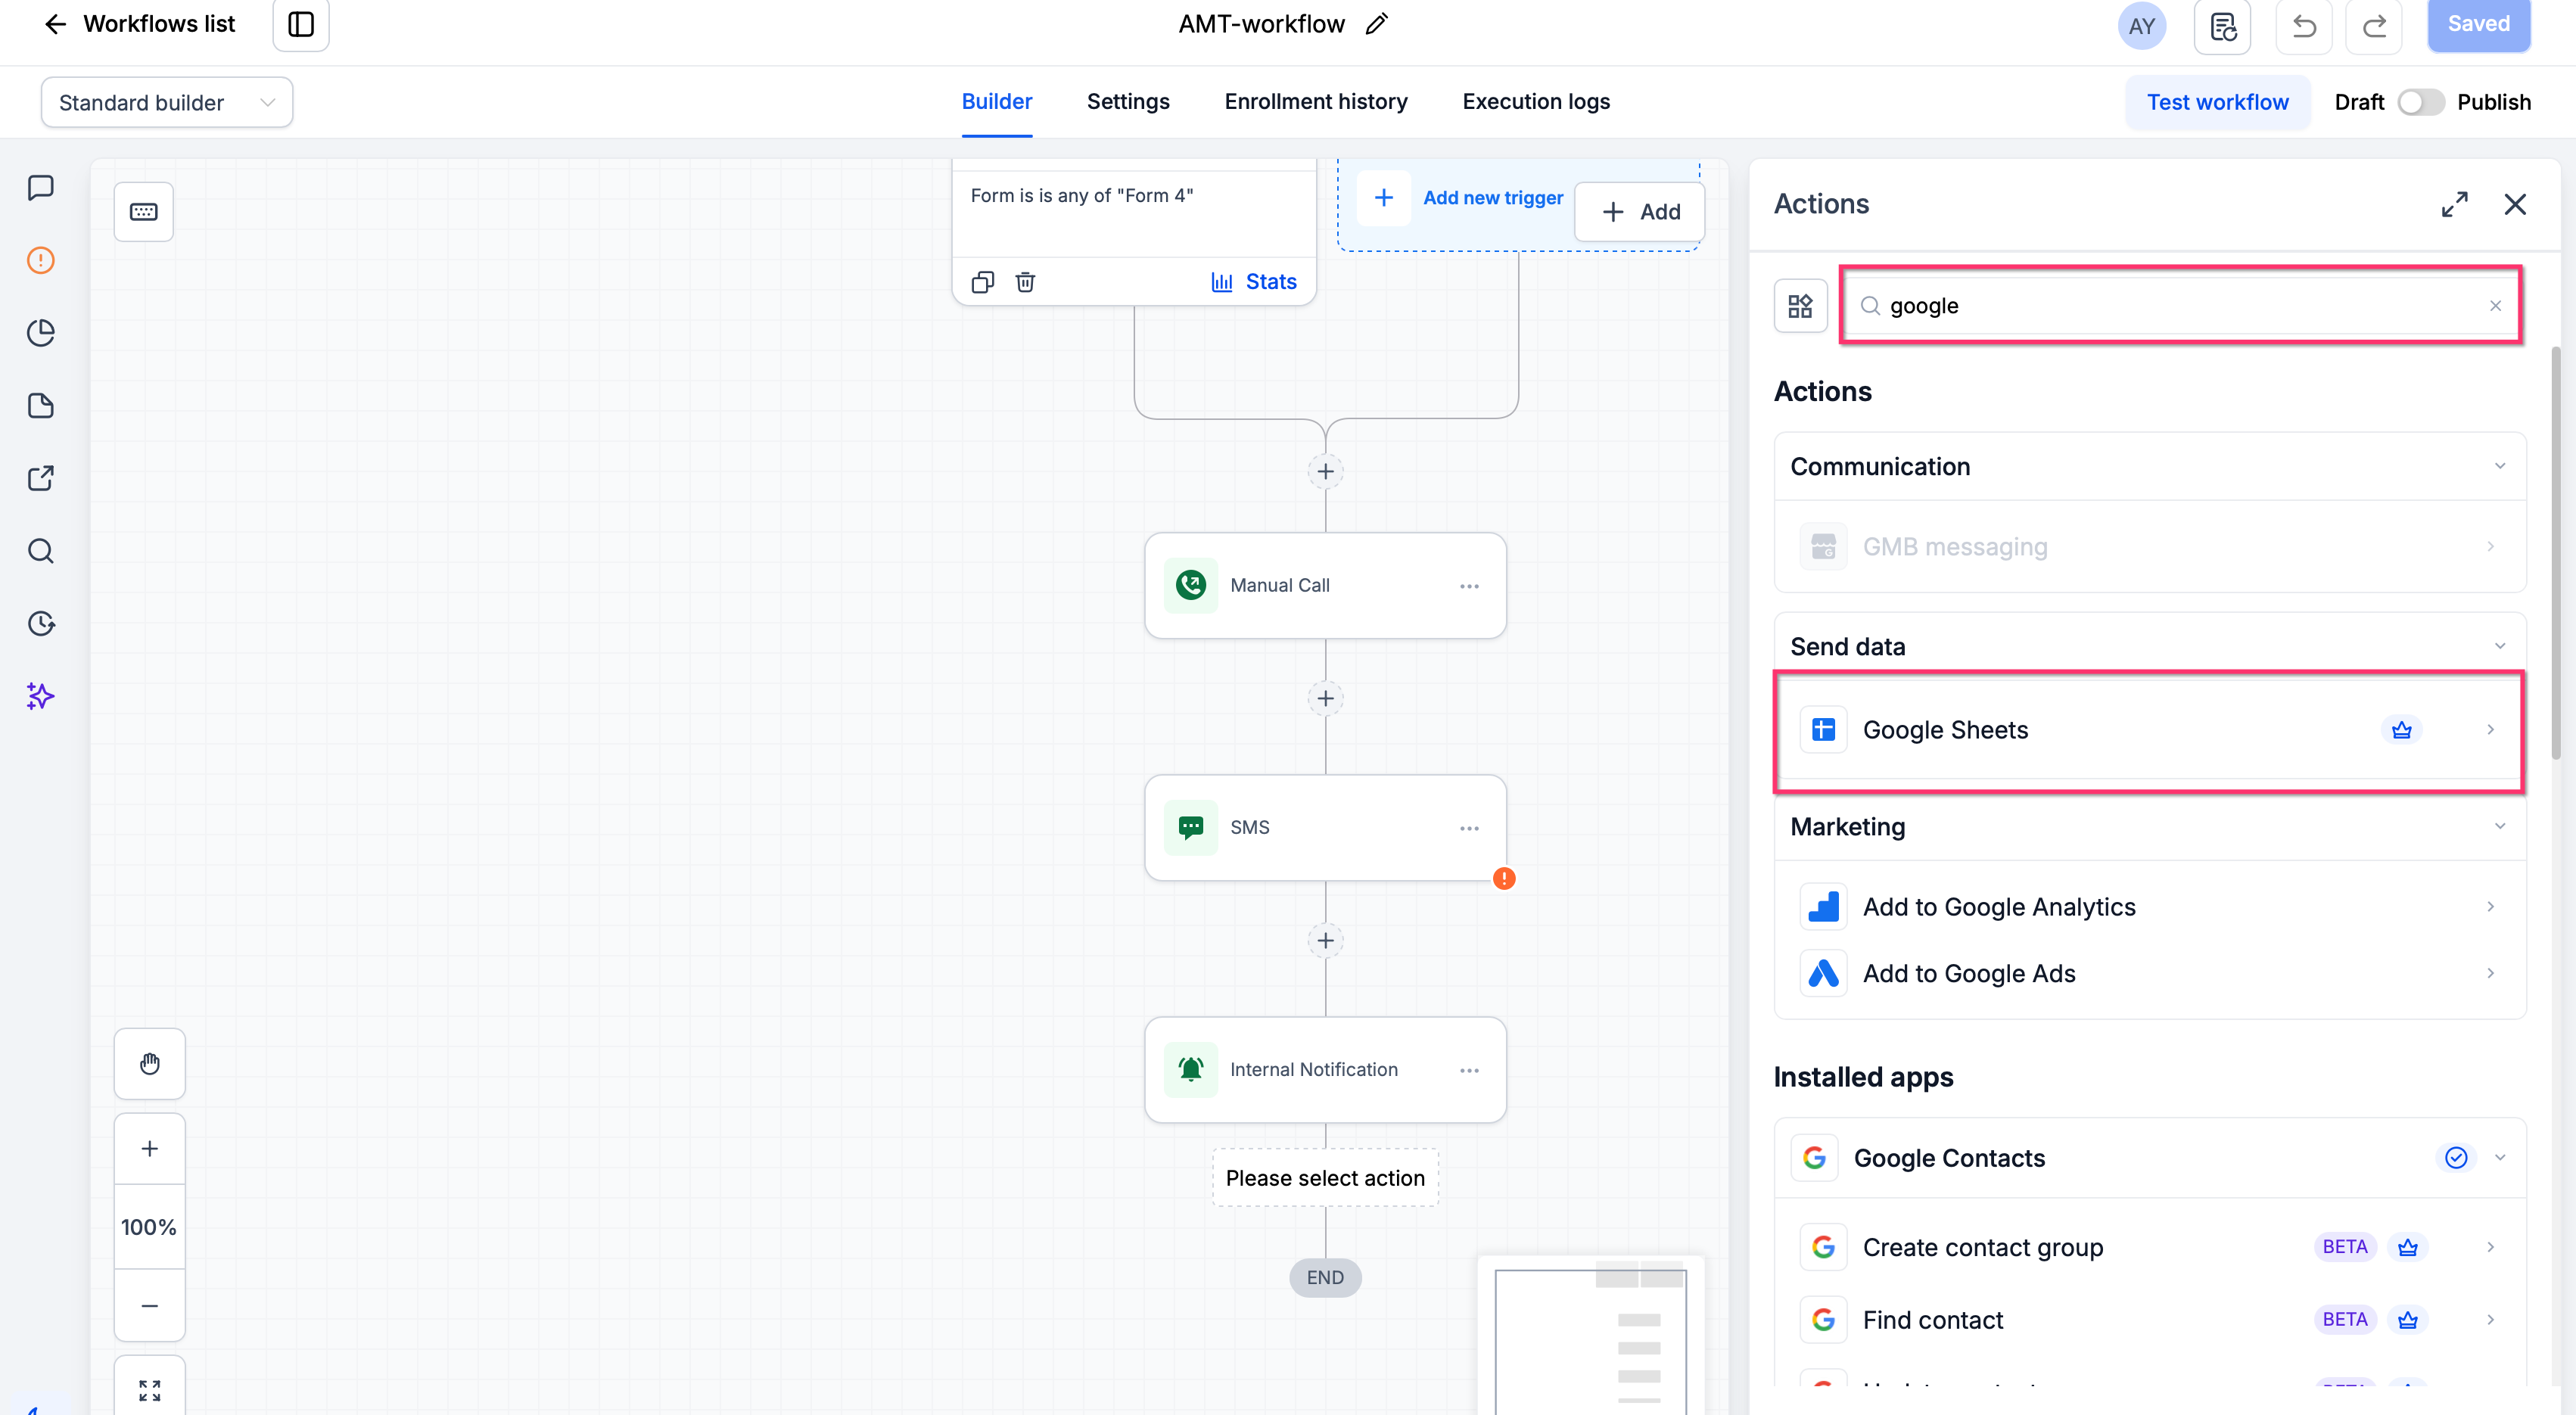
8. Map Data to Google Sheets
Match the Chat To Clients CRM values available in the workflow with the corresponding columns in your Google Sheet.
- Select the Chat To Clients CRM value you want to send.
- Map it to the appropriate Google Sheets column.
- Repeat for each required field.
- Save the action.
| Google Sheets Column | Example Chat To Clients CRM Value |
|---|---|
| Name | Contact Name |
| Contact Email | |
| Phone | Contact Phone |
| Feedback | Relevant mapped field |
Important: Not every survey answer automatically becomes a contact field. If you need a specific response in a workflow, confirm that the value is available in the workflow data picker or stored in an appropriate mapped field.
9. Test and Publish the Workflow
Test the workflow before relying on it for live survey submissions.
- Save the workflow configuration.
- Publish the workflow.
- Submit the selected survey using a test contact.
- Open the destination Google Sheet.
- Confirm that a new row was created.
- Verify that each value appears under the correct column.
Result: Future qualifying survey submissions can now send the mapped information to the selected Google Sheet automatically.
10. Export Existing Survey Submissions
If you need survey responses that have already been submitted, use Chat To Clients CRM's native export option instead of the workflow method.
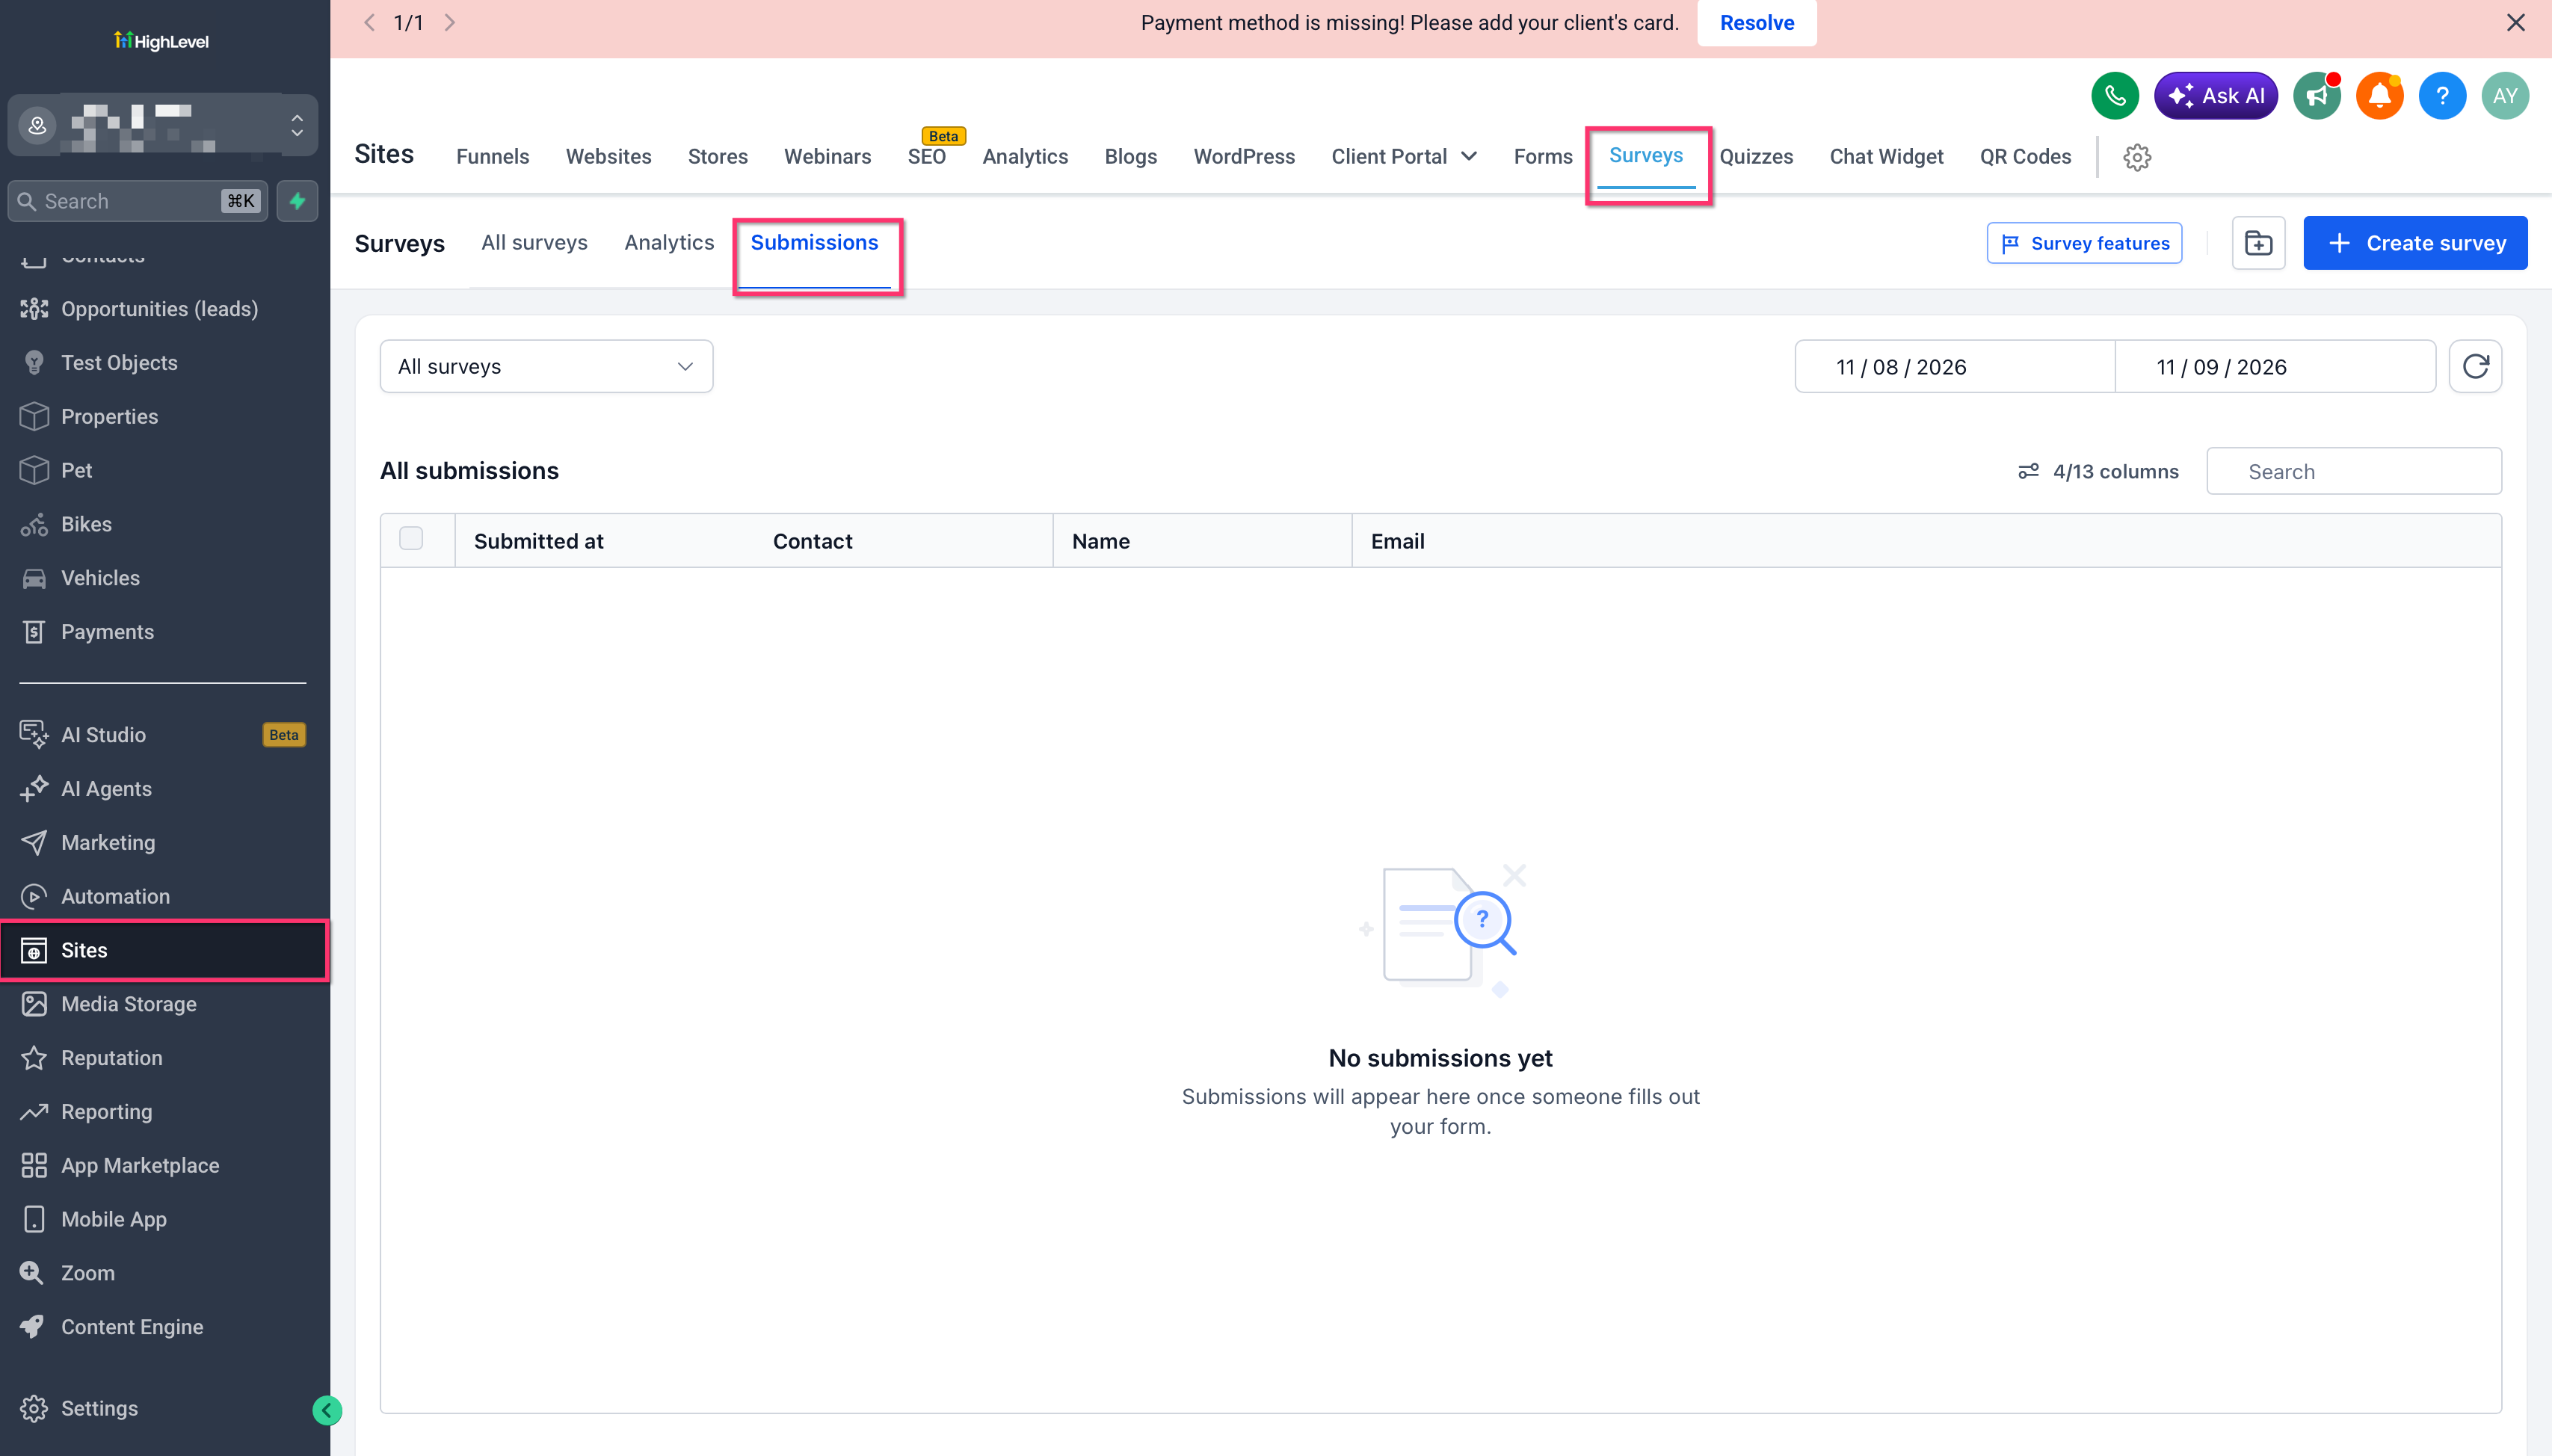
- Go to Sites.
- Open Surveys → Submissions.
- Use the survey filter to select the required survey.
- Click Export.
Chat To Clients CRM sends a download link for the exported survey submissions to your email.
11. Troubleshooting
Use these checks if survey submissions are not appearing in the expected Google Sheet.