
Using Field Services on the Mobile App
Field staff spend most of their day on site, not at a desk. The Chat To Clients CRM mobile app lets your team run Field Services from their phone: open Jobs, work the schedule, create requests and estimates, update visit statuses, and keep the office in sync.
This article shows how to get the app, open Field Services on mobile, and complete common day-to-day tasks.
Note: Field Services is currently in private beta and is available to selected accounts. Features and screens may change as we improve them. Field Services must be set up on the web before it appears on mobile.
TABLE OF CONTENTS
- Before you start
- How to get the mobile app
- How to open Field Services on mobile (Jobs)
- Mobile navigation
- Create a request, job, or estimate
- Create and manage a job
- Use Schedule on mobile
- Search jobs, requests, estimates, and invoices
- Frequently Asked Questions
- Related Articles
Before you start
- Your sub-account must have Field Services available. On web, you should see Field Services with a Beta tag in the left navigation. See Field Services - Overview & How to Get Started.
- Finish the basic web setup (staff, service areas, and services) so there is work for the field team to open. See Field Services Home Overview.
- Sign in to the mobile app with the same login you use on the web, then select the correct location.
Tip: On mobile, Field Services does not use a separate "Field Services" label. After setup on web, it shows up as Jobs.
How to get the mobile app
If you do not have the app installed
- On web, open Field Services > Home.
- Open the Setup guide. New accounts may also see install options on the welcome page.
- Under Get the mobile app, scan the App Store or Google Play QR code.
- Install the app and sign in with the same login you use on the web.
- Select the location where Field Services is set up.
You can also search for the Chat To Clients CRM app in the App Store or Google Play, install it, and sign in.
How to open Field Services on mobile (Jobs)
If you already have the app installed
- Open the app and select the location where Field Services is set up.
- Tap Apps in the bottom navigation.
- Under Sales & Operations, tap Jobs.
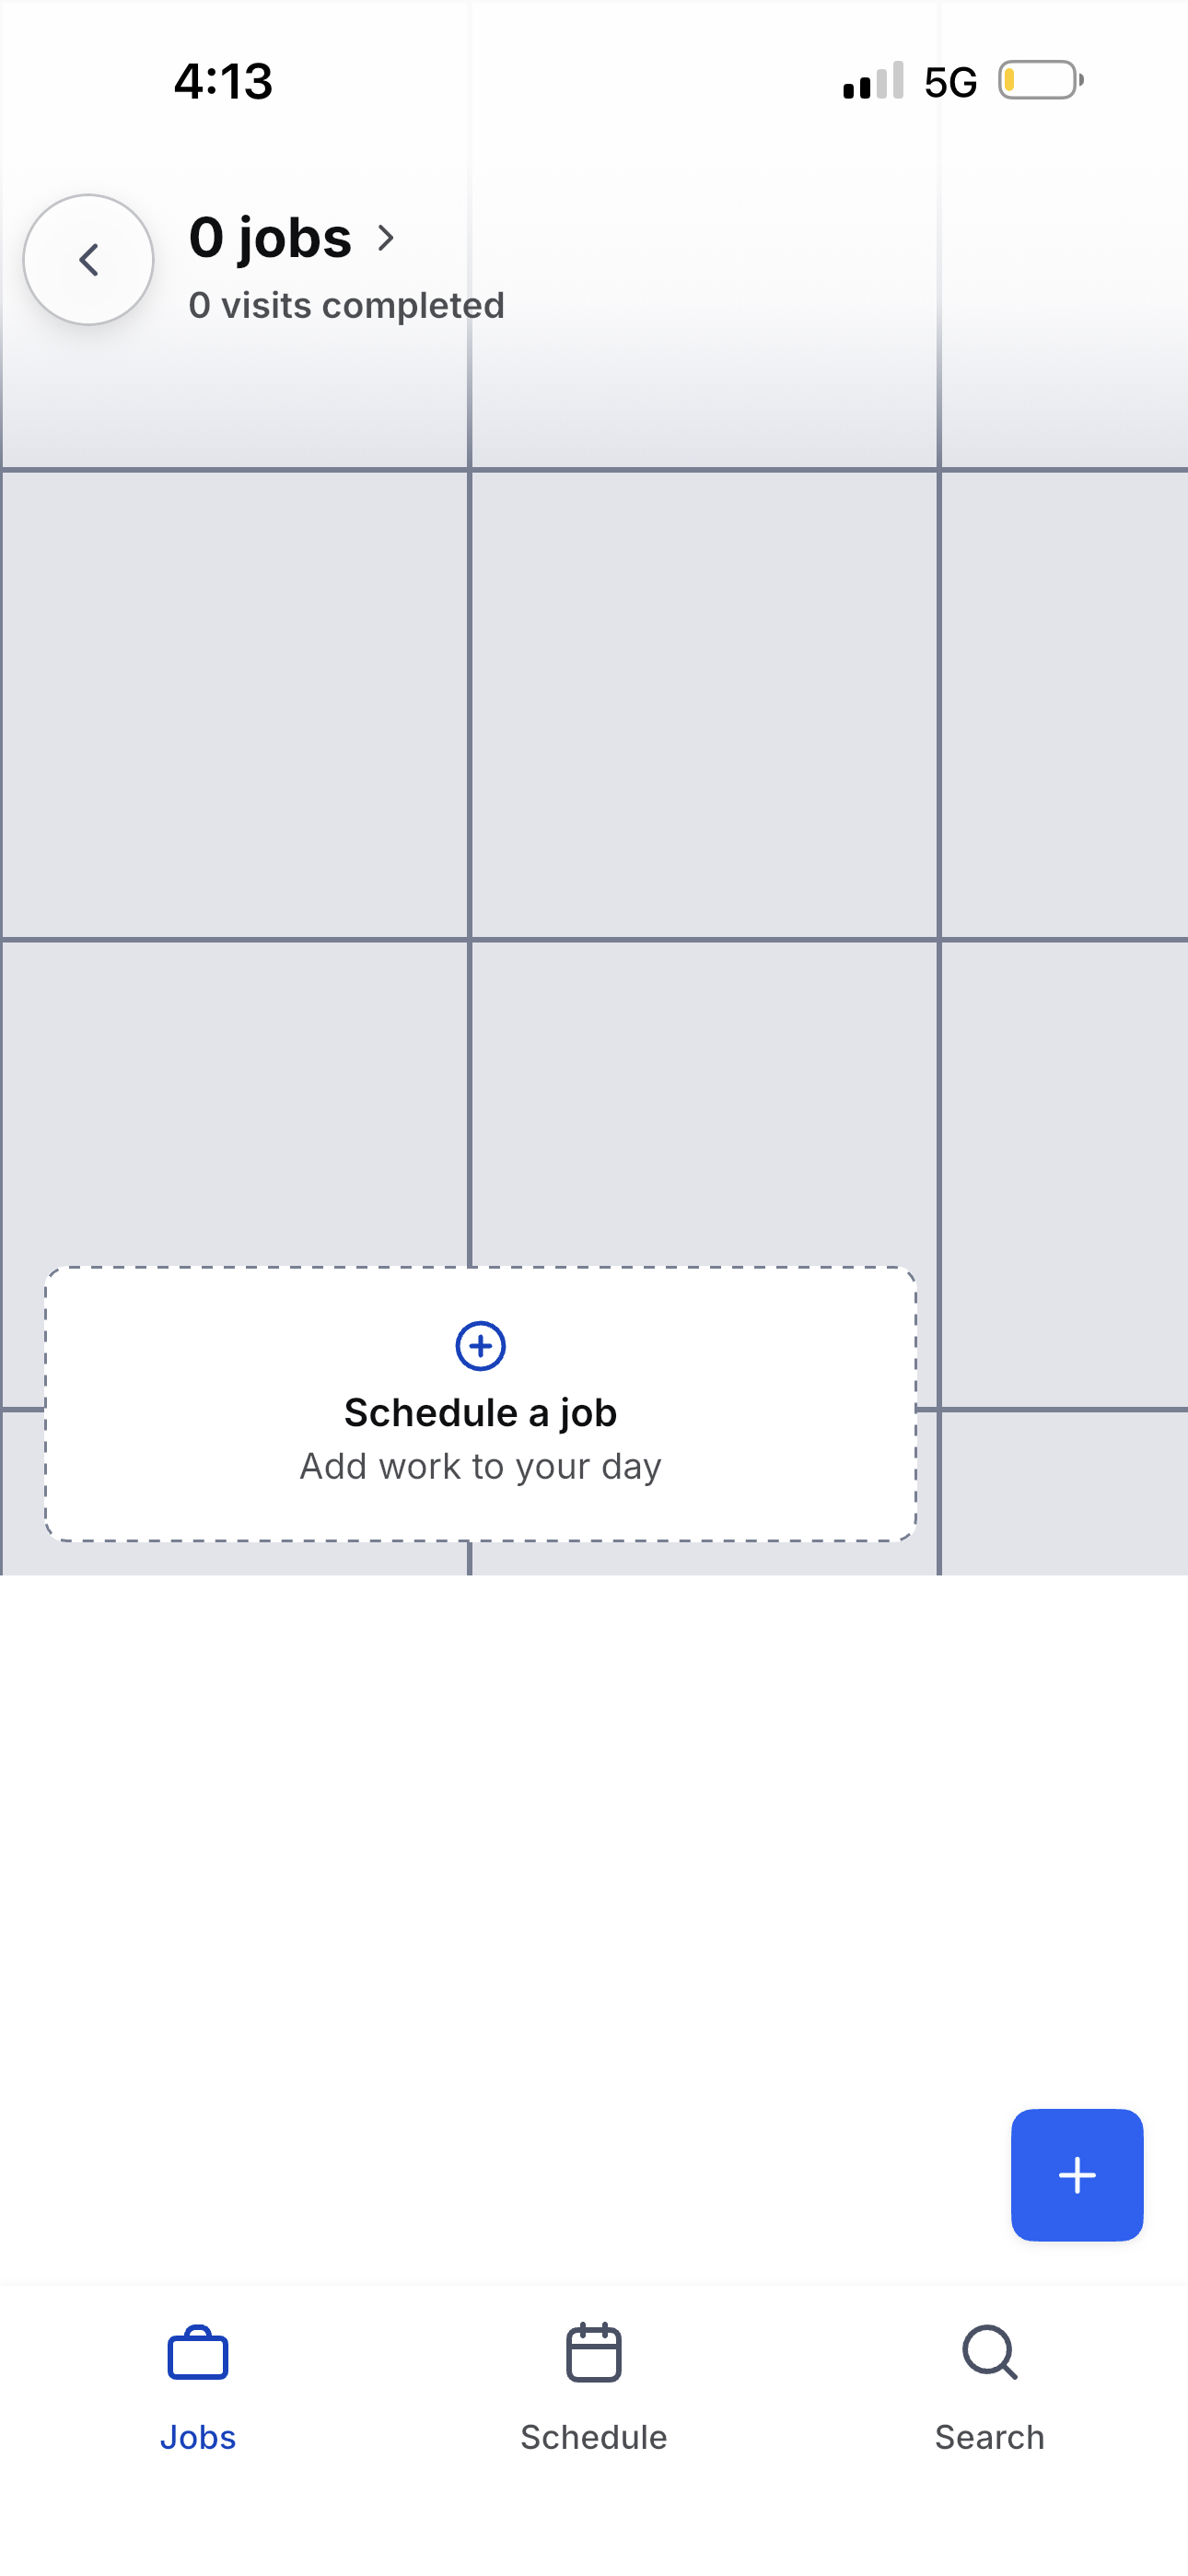
- You will land on the Jobs screen. The bottom navigation switches to Jobs, Schedule, and Search.
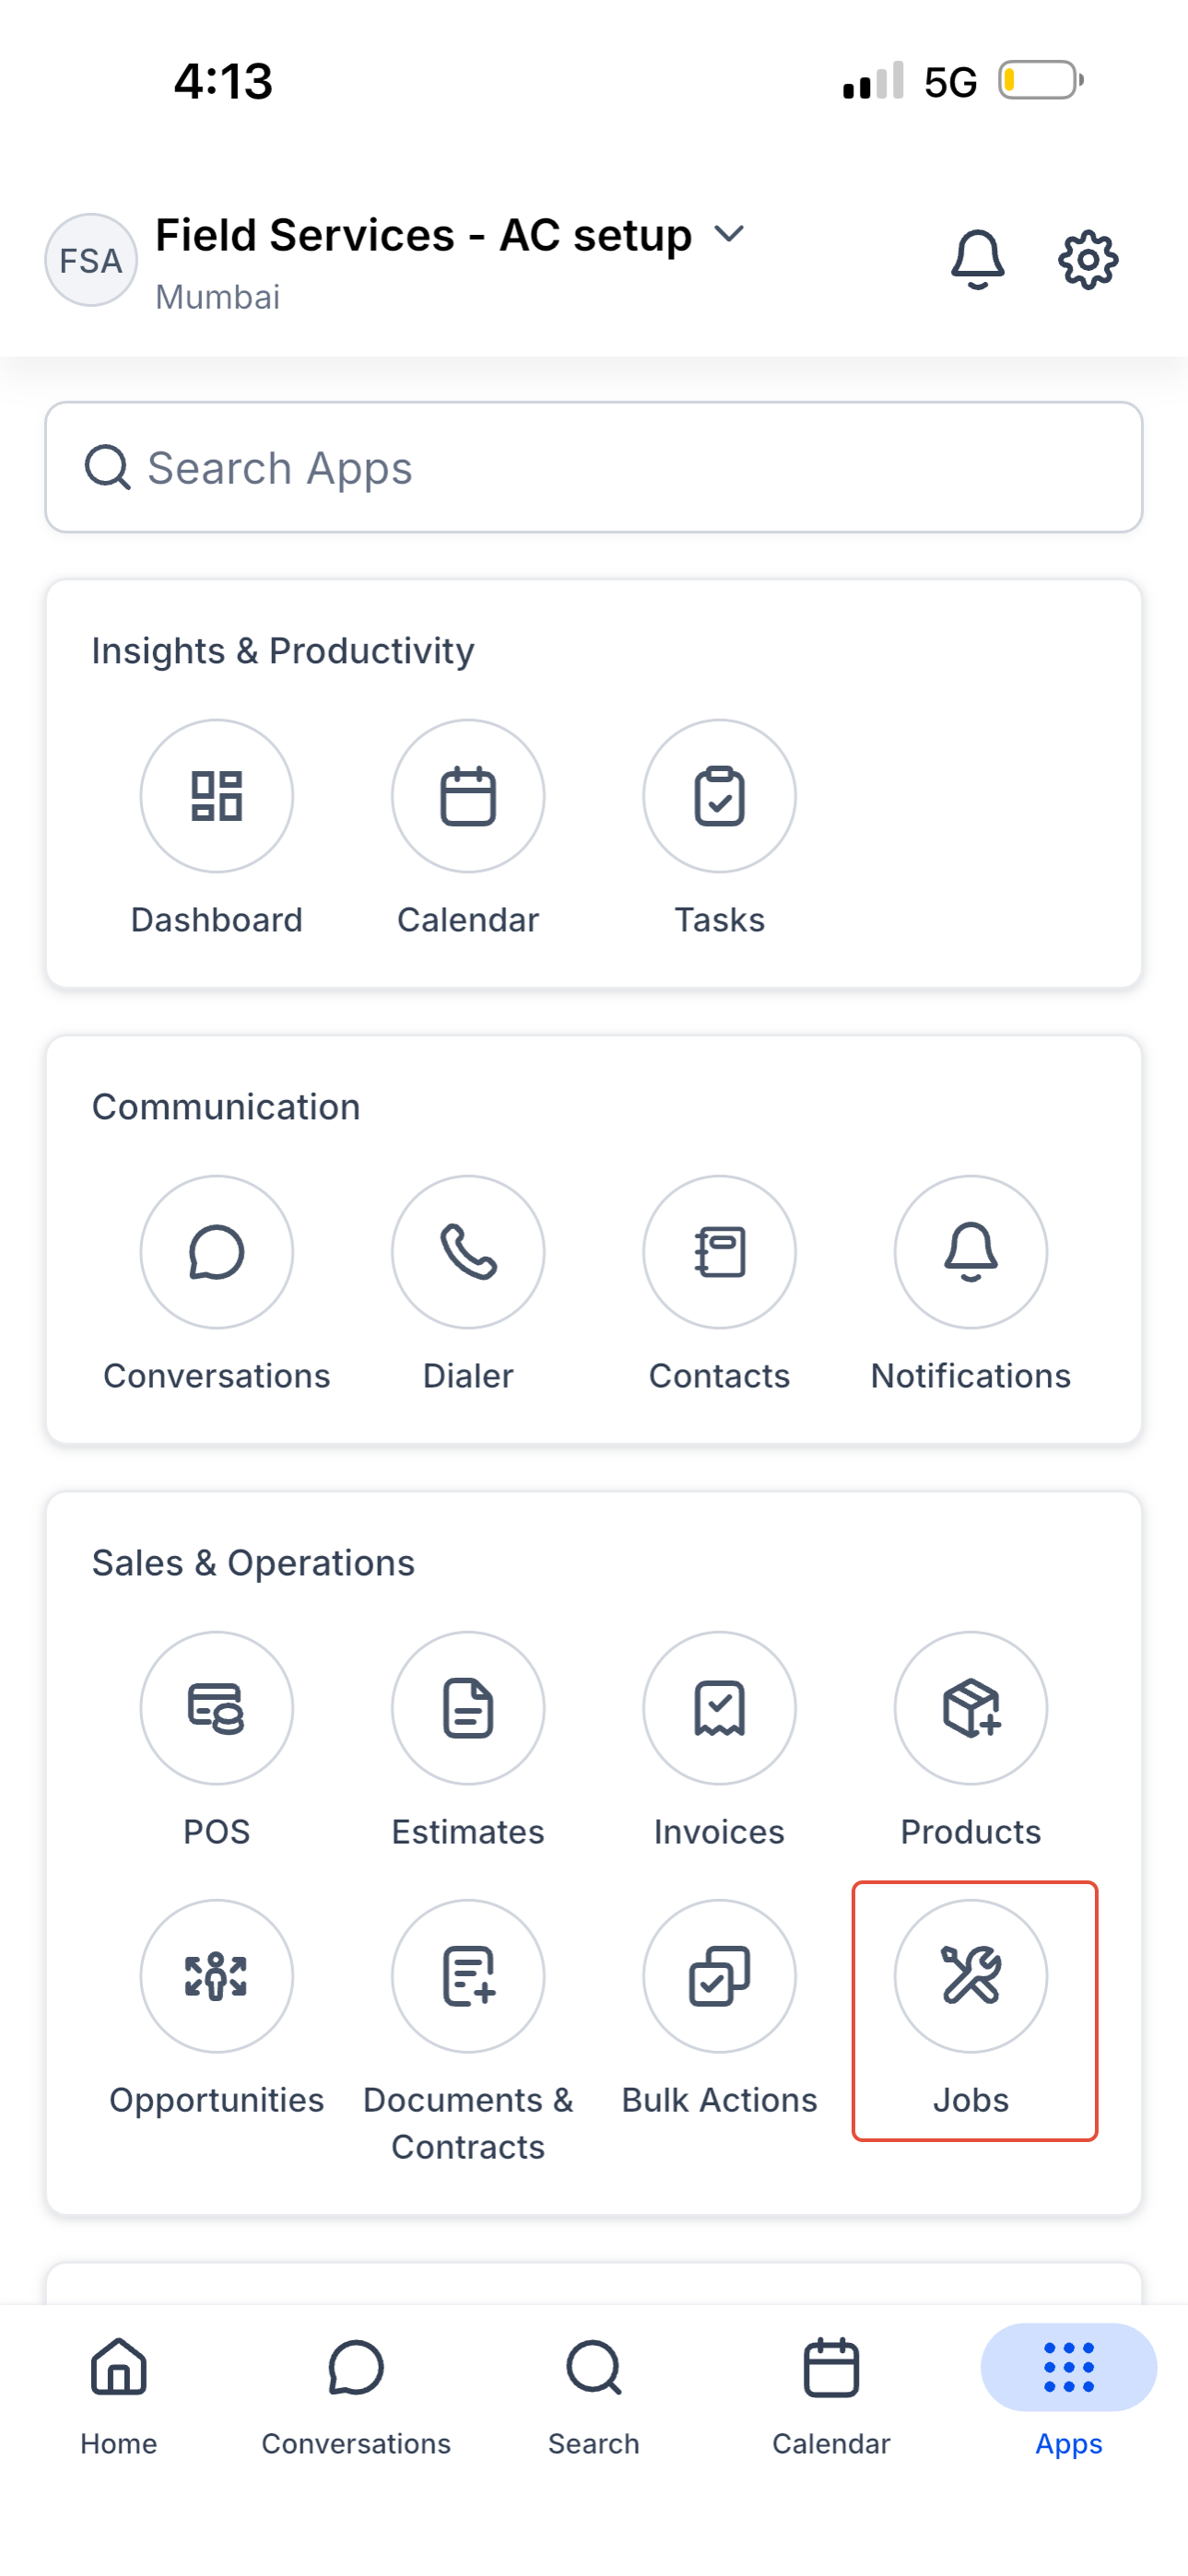
Tip: If you do not see Jobs under Apps, confirm Field Services is available for that location on the web, then pull to refresh or sign out and back in.
Mobile navigation
After you open Jobs, use these tabs:
| Tab | What you will find |
|---|---|
| Jobs | Your jobs list. From an empty state you can tap Schedule a job, or use + to create work. |
| Schedule | Visits in List, Week, or Map view, with status, time, address, and service details. |
| Search | Find Jobs, Requests, Estimates, and Invoices with filters. |
Changes you make on mobile sync with the web, so the office and the field stay aligned.
Create a request, job, or estimate
- On the Jobs, Schedule, or Search screen, tap the blue + button.
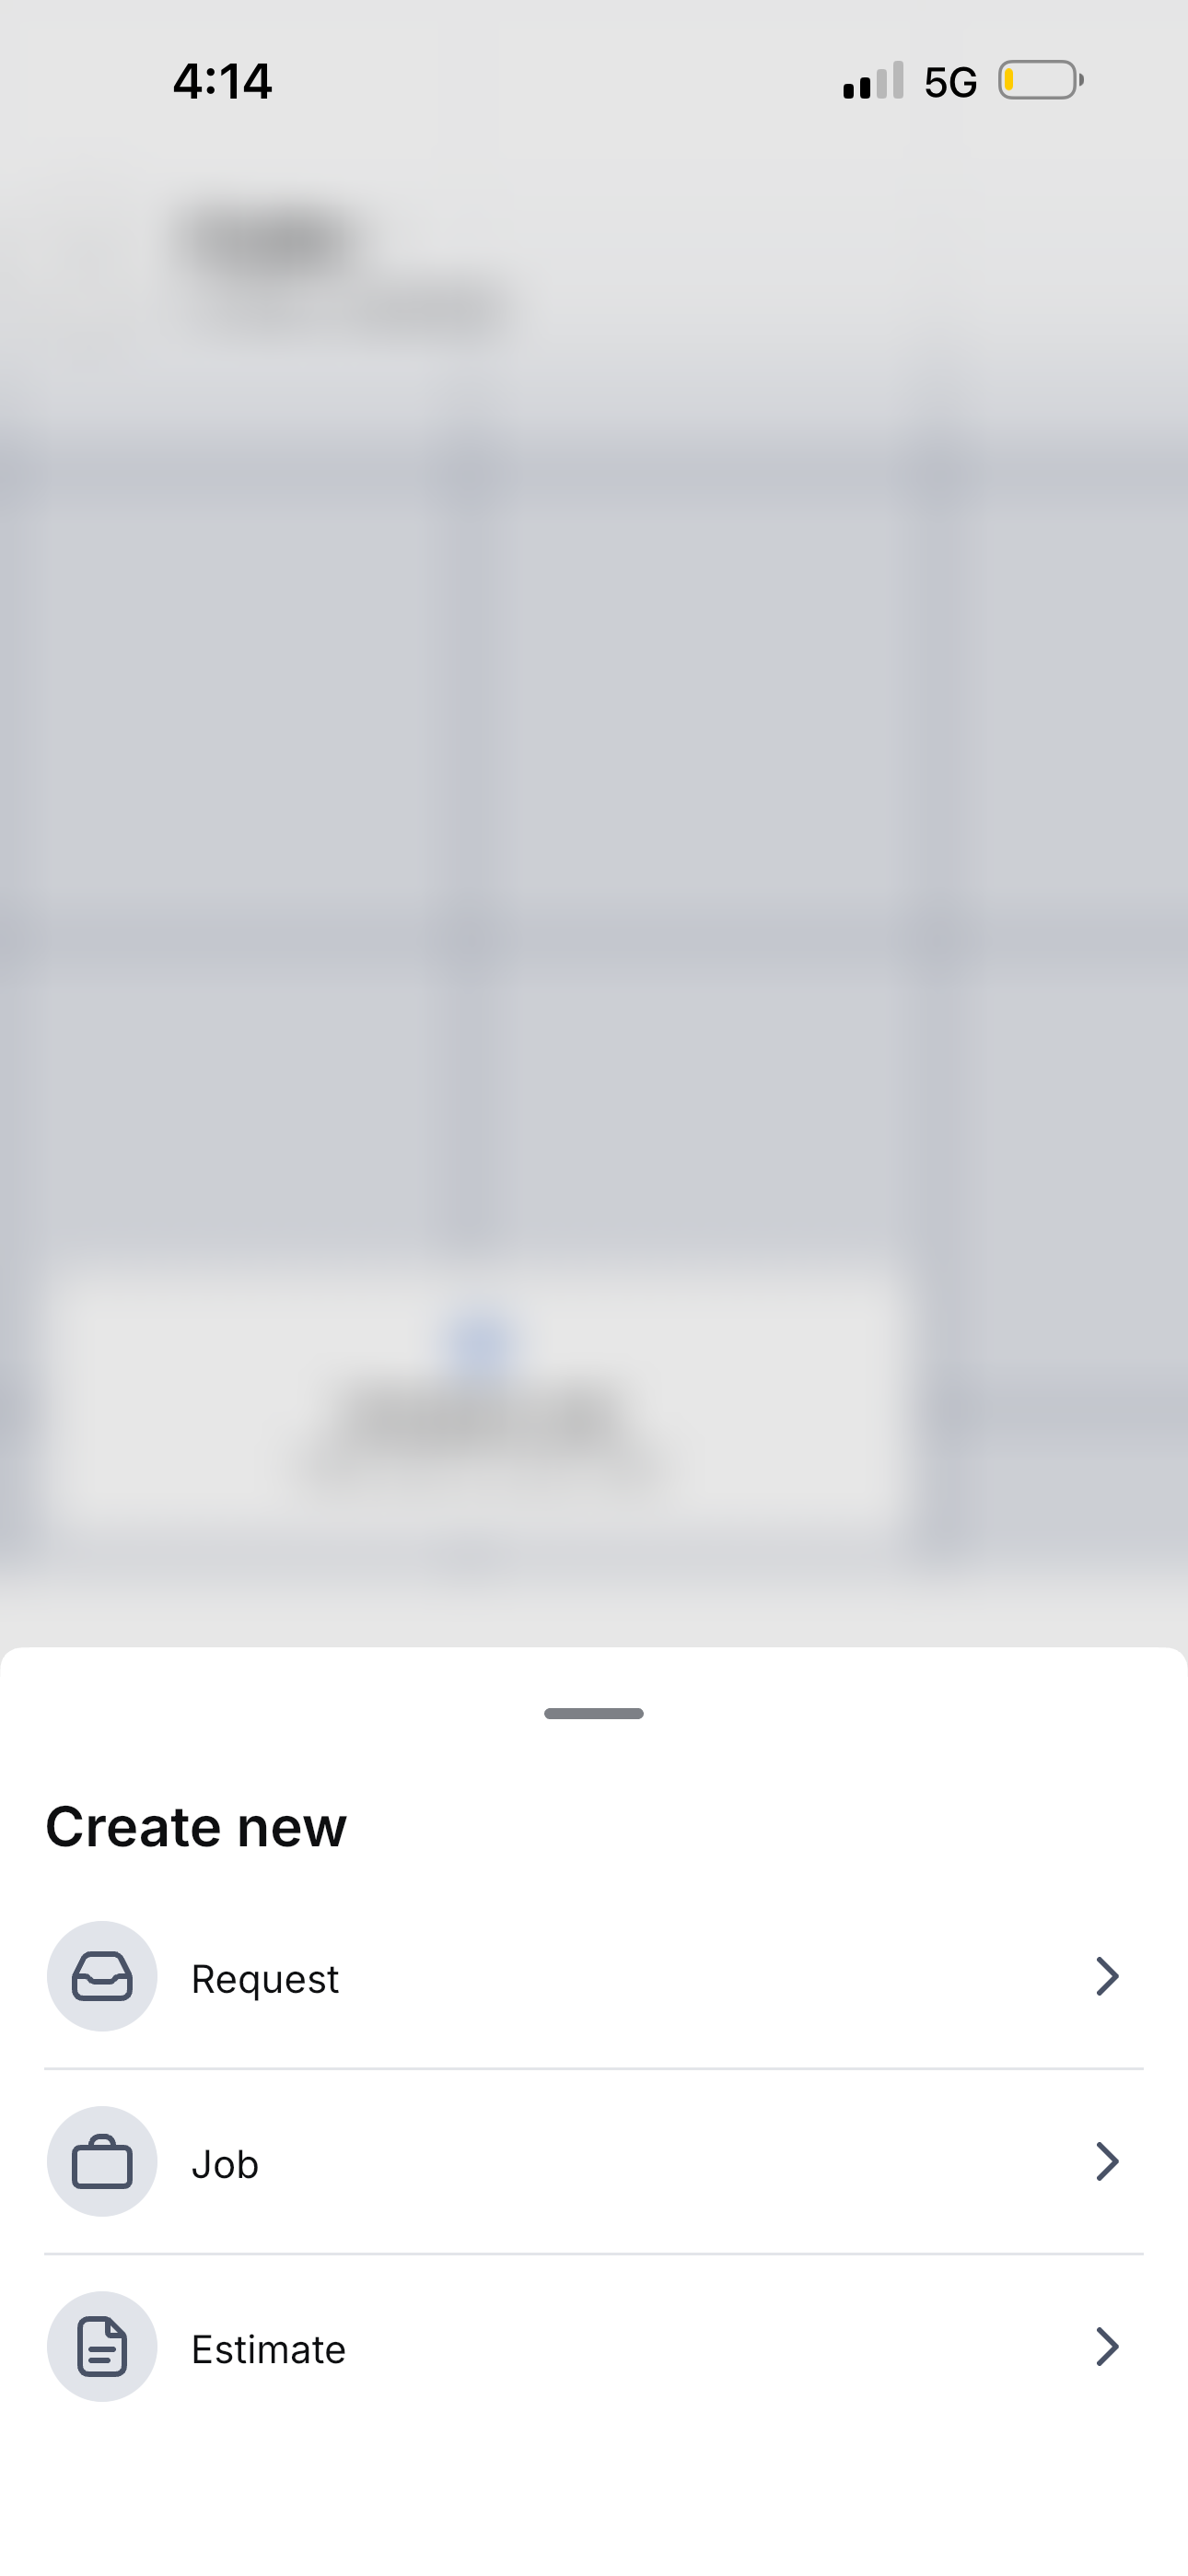
- Under Create new, choose one of the following:
- Request — capture a customer's ask for work.
- Job — create the work for a customer at a service address.
- Estimate — create a quote.
Create and manage a job
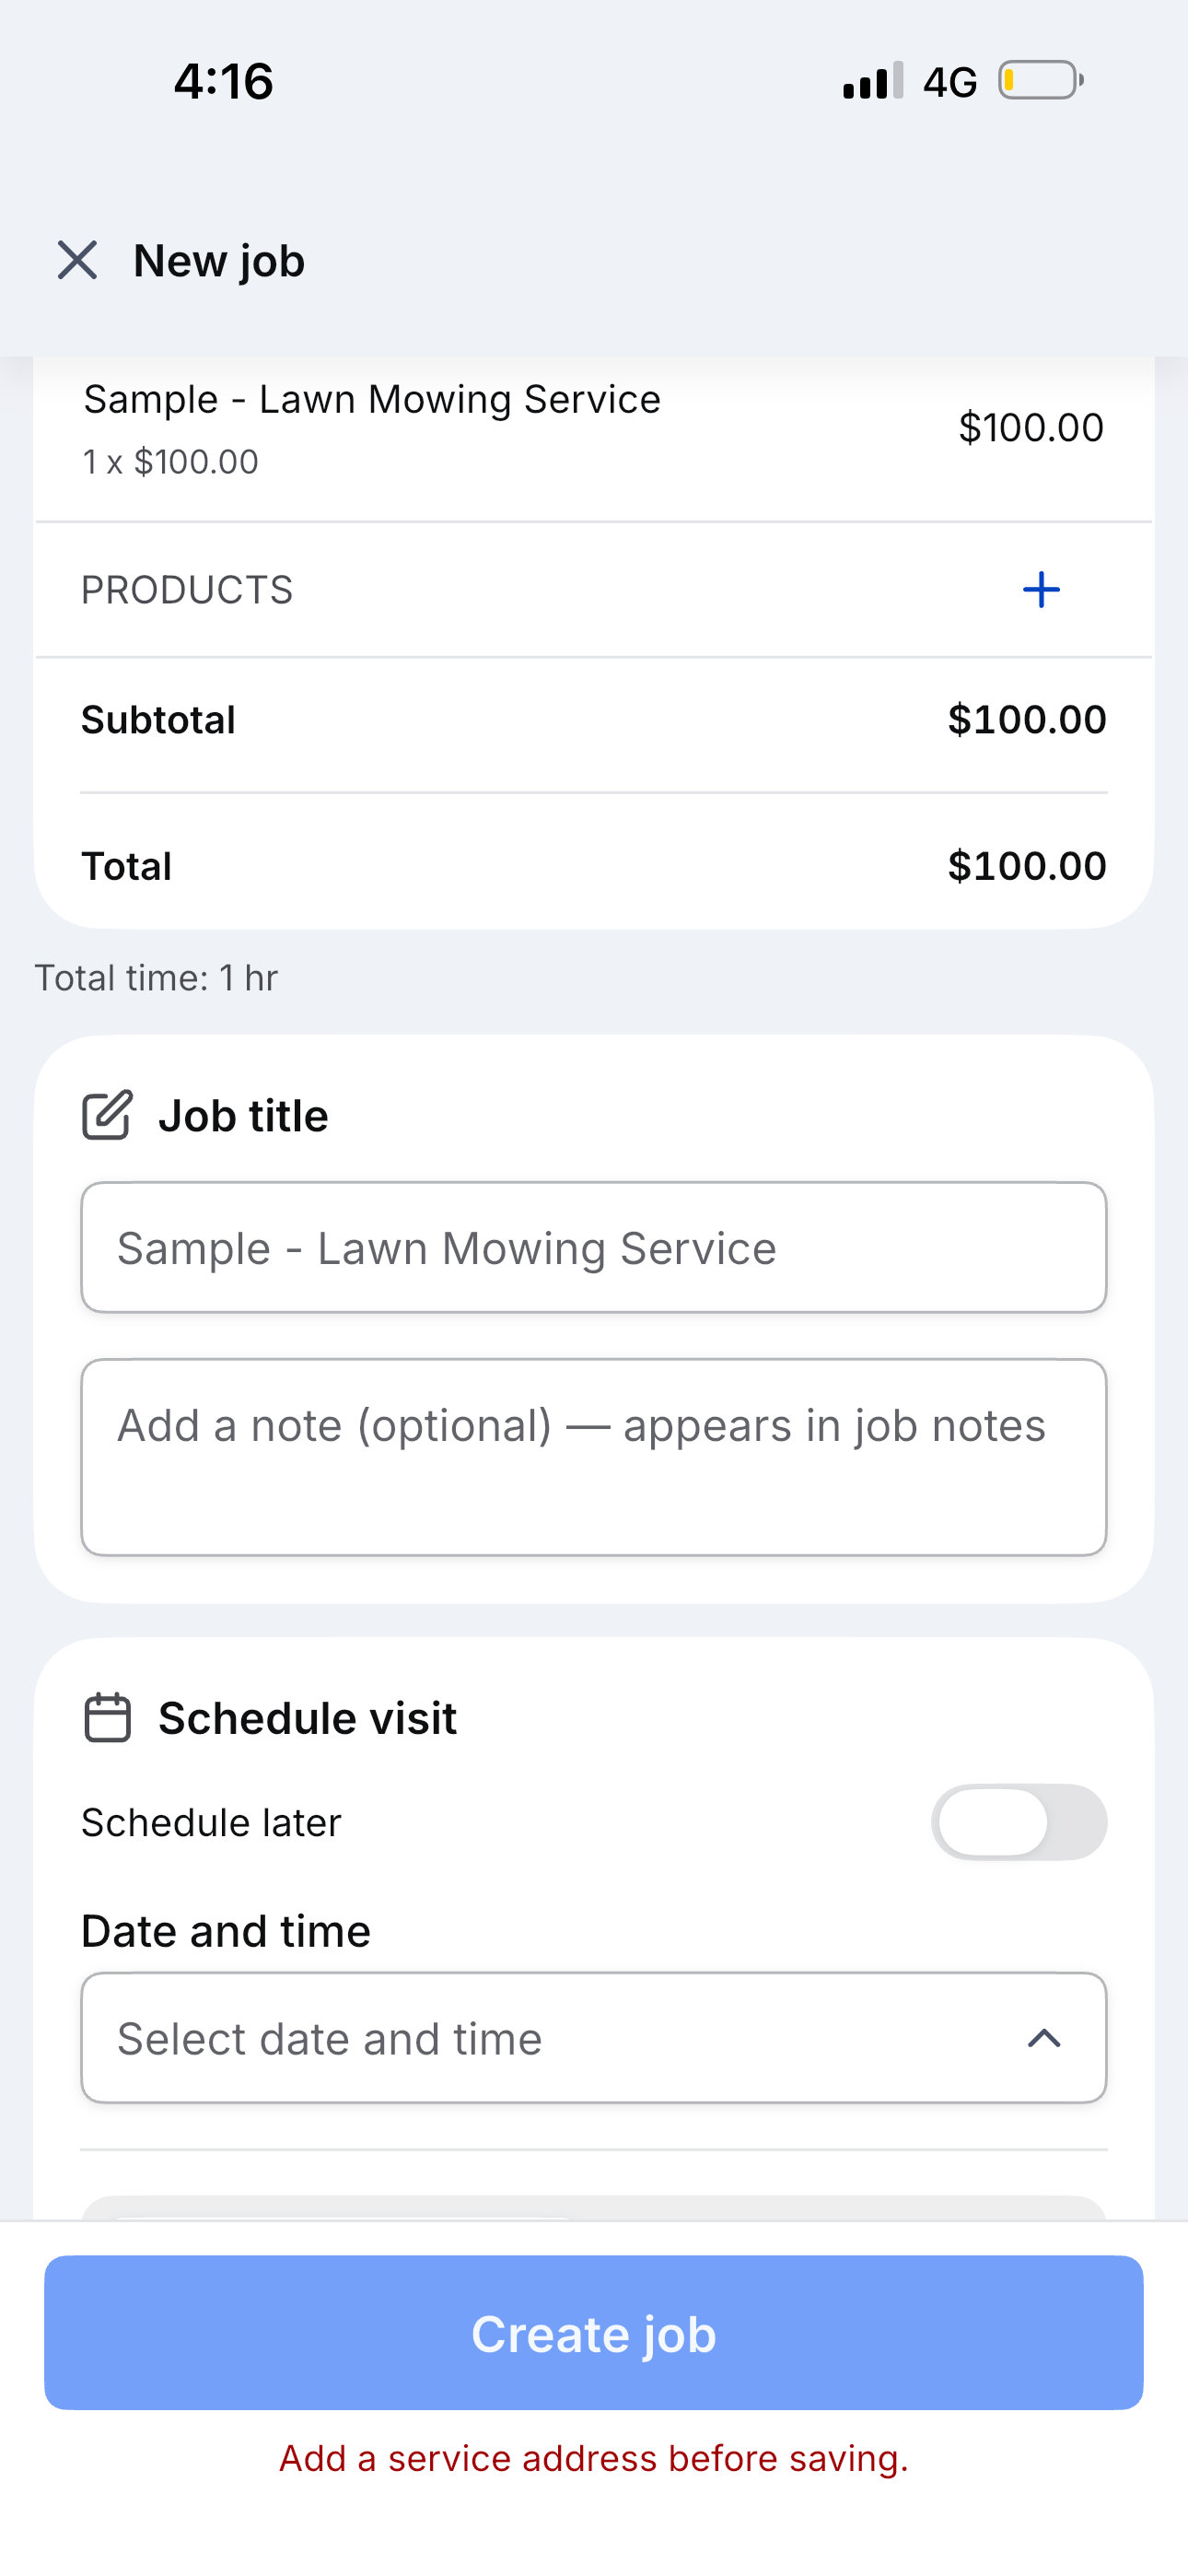
- Tap +, then choose Job (or tap Schedule a job from the empty Jobs screen).
- Under Job for, select an existing contact.
- Add the service address. You cannot save the job until an address is added.
- Add Services and optional Products. Duration and pricing come from your catalog; you can adjust quantity and unit price where editing is allowed.
- Enter or confirm the Job title and add an optional note.
- Under Schedule visit, either pick a date and time, turn on Schedule later, or use Find a time / Manual scheduling. You can assign staff and set the visit status (for example Not started or On my way).
- Add checklists if needed, then tap Create job.
Note: A visit needs at least one service so Field Services can work out duration and which staff can do the work. See Jobs in Field Services.
On an existing job or visit, staff can update statuses, work through checklists, add notes, and (when Timesheets is on) start and stop timers.
Use Schedule on mobile
- Open Jobs, then tap Schedule.
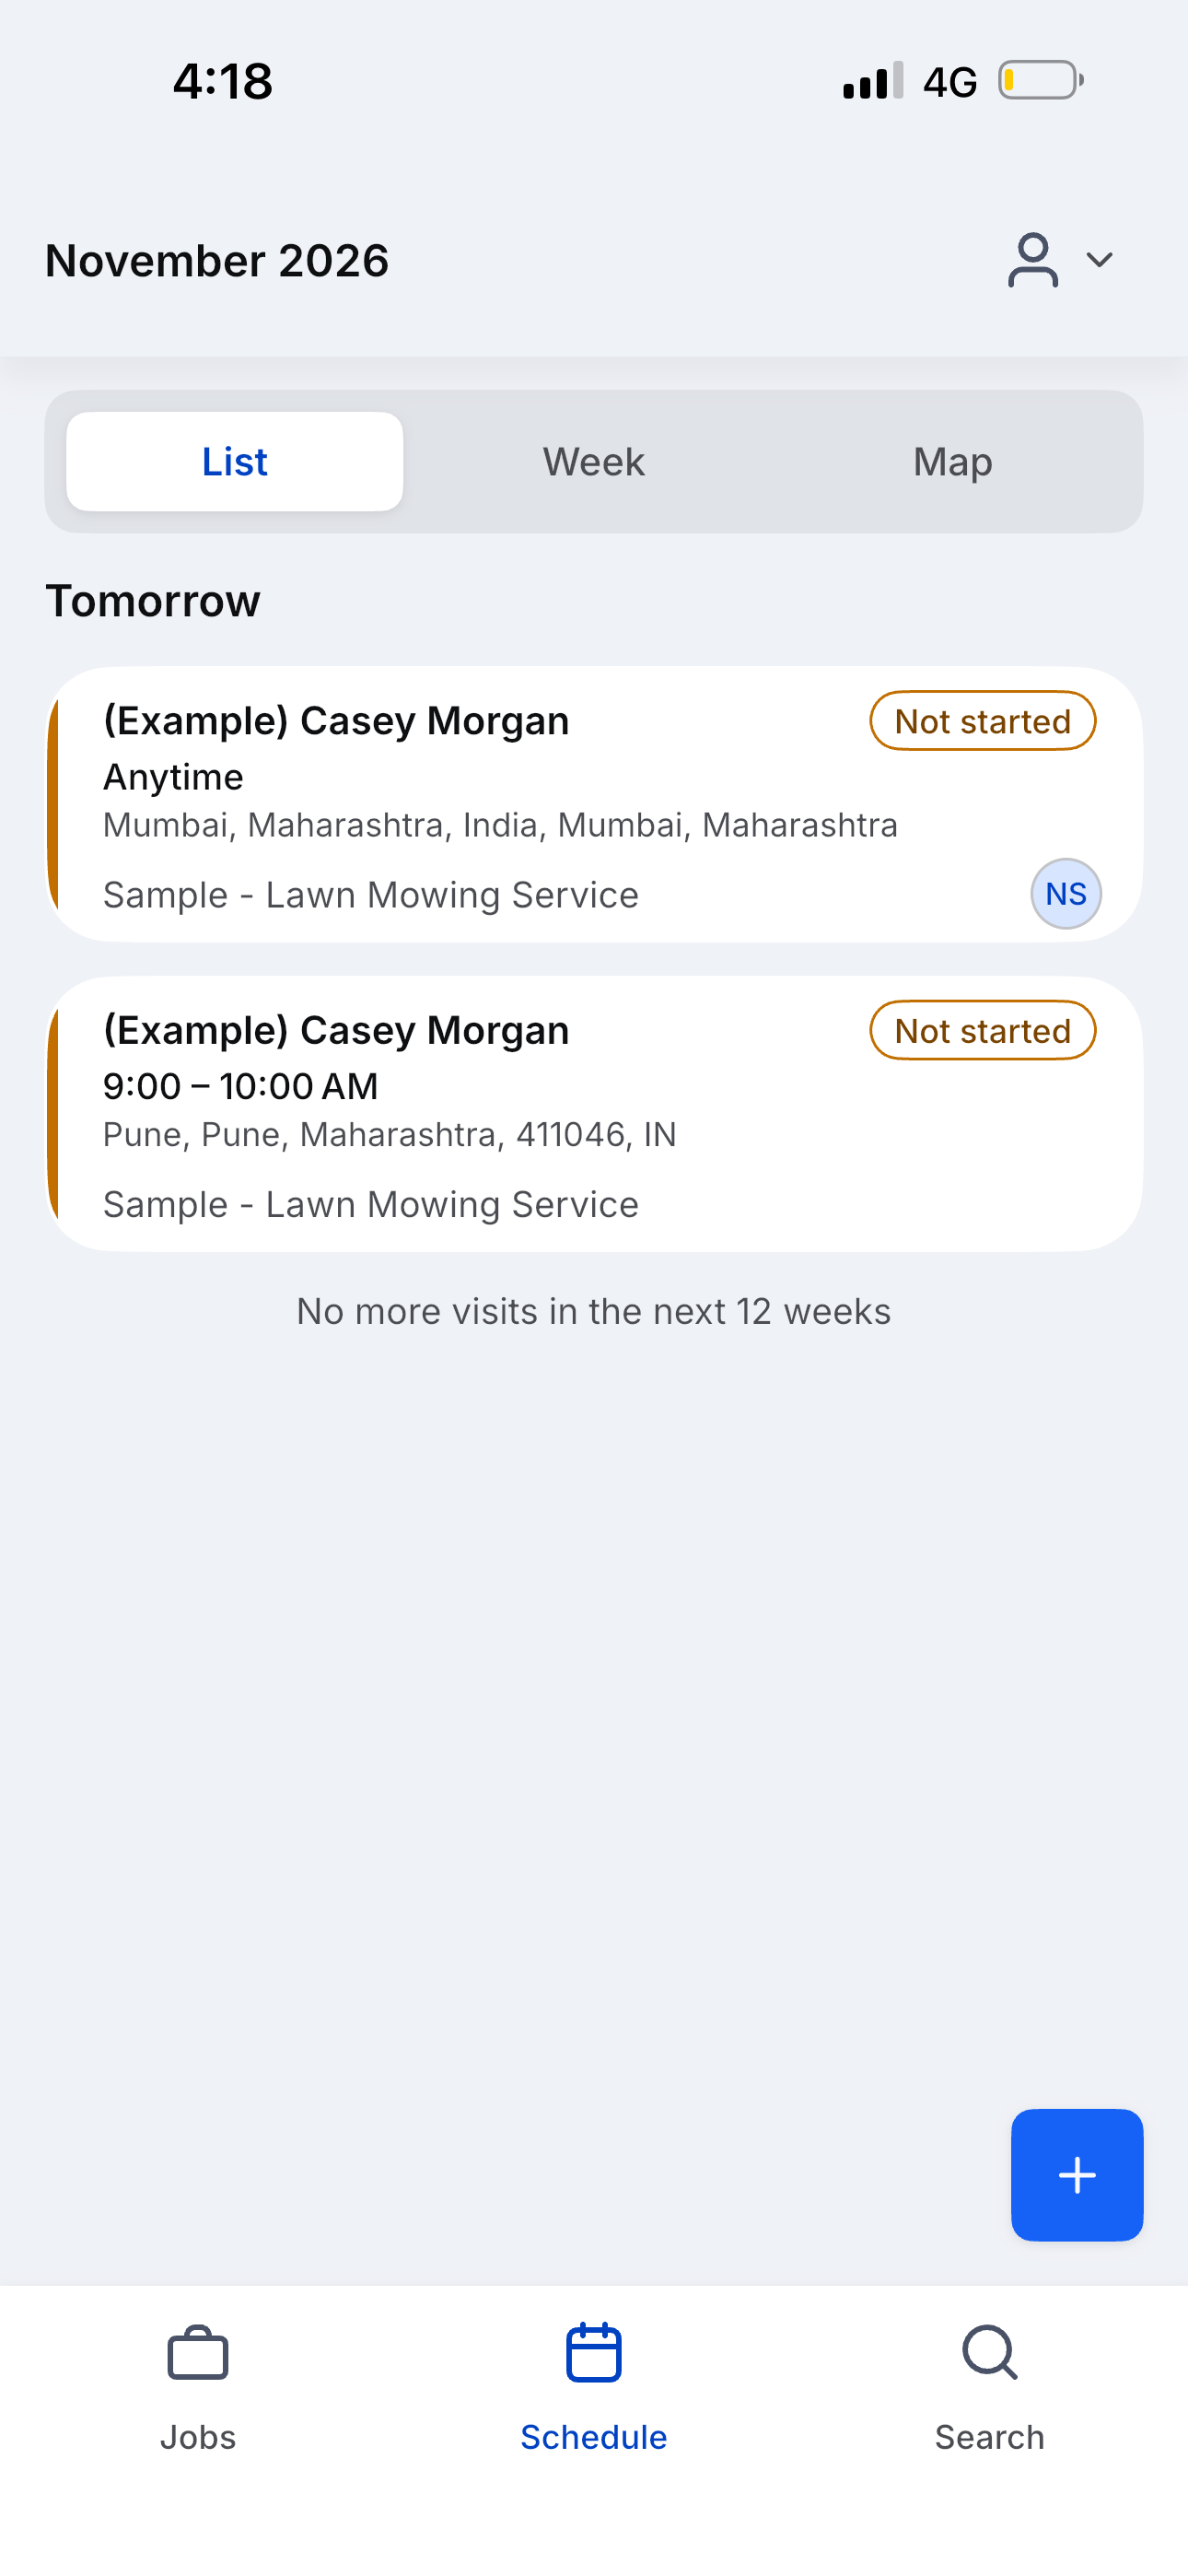
- Switch between List, Week, and Map views.
- Tap a visit card to open details. Cards show status (for example Not started), time or Anytime, address, service, and assigned staff.
Use Schedule to see the day ahead, move between visits, and keep statuses current while you are in the field. See Scheduling Visits and Finding Availability in Field Services and Visit Statuses in Field Services.
Search jobs, requests, estimates, and invoices
- From Jobs, tap Search.
- Use the filters for Jobs, Requests, Estimates, or Invoices.
- Tap a result to open it.
Frequently Asked Questions
Q: Why do I not see Field Services in the app?
On mobile it appears as Jobs under Apps > Sales & Operations. If Jobs is missing, confirm Field Services is available for that location on the web, refresh the app, or sign out and back in.
Q: Do I need the app if I only work on web?
No. Office staff can run Field Services fully on web. The mobile app is for field staff and anyone who needs Jobs and Schedule on the go.
Q: Does mobile work with white-label apps?
Availability can depend on your app build and location setup. If you use a white-label app and do not see Jobs, confirm Field Services is enabled for the location on web and that your app version includes Field Services. If it still does not appear, contact support or your agency admin.
Q: Why can I not create a job?
Common blockers: no contact selected, missing service address, or missing service when you are trying to schedule a visit. The app shows a validation message (for example "Add a service address before saving").
Q: Do mobile changes show up on web?
Yes. Changes sync between the mobile app and the web so the field stays in step with the office.