
Getting Started - Launch a Website From Template
Launching a website in Chat To Clients CRM involves building the site, connecting and assigning a domain, and publishing the final version. Following this order helps prevent broken URLs, unpublished changes, and domain errors. Complete the final checklist before sharing the website with visitors.
TABLE OF CONTENTS
- What Is a Website Launch in Chat To Clients CRM?
- Key Benefits of Following the Correct Launch Process
- Before You Begin
- How To Set Up and Launch a Website on Your Domain
- Final Live-Site and Domain Verification Checklist
- Frequently Asked Questions
- Related Articles
What Is a Website Launch in Chat To Clients CRM?
A website launch moves your saved website from a draft to a live version that visitors can access through an assigned domain. Save stores your latest changes without updating the public website, while Publish makes the saved version live.
Key Benefits of Following the Correct Launch Process
A structured launch process helps ensure your website is complete, accessible, and ready for visitors.
- Clear setup: Complete each launch task in the correct order.
- Safer publishing: Review changes before making them public.
- Branded web address: Connect the website to your own domain or subdomain.
- Fewer launch issues: Verify the domain, pages, forms, and mobile layout before sharing the site.
Before You Begin
Preparing your website content and domain access in advance helps prevent delays during setup.
Confirm that you have:
- Access to the Chat To Clients CRM sub-account containing the website.
- Your logo, images, written content, and required pages.
- A domain purchased through Chat To Clients CRM or another domain provider.
- Access to your domain provider’s DNS settings when manual setup is required.
- A decision to use a root domain, such as
example.com, or a subdomain, such aswww.example.com. - A designated homepage and URL paths for the remaining pages.
Important: DNS changes may take up to 24 hours to update. Chat To Clients CRM automatically provisions SSL after the domain is connected and the required DNS records are verified.
How To Set Up and Launch a Website on Your Domain
A successful website launch follows five steps: create, customize, connect, assign, and publish.
Step 1: Create the Website
Creating the website establishes the design and page structure you will customize before launch.
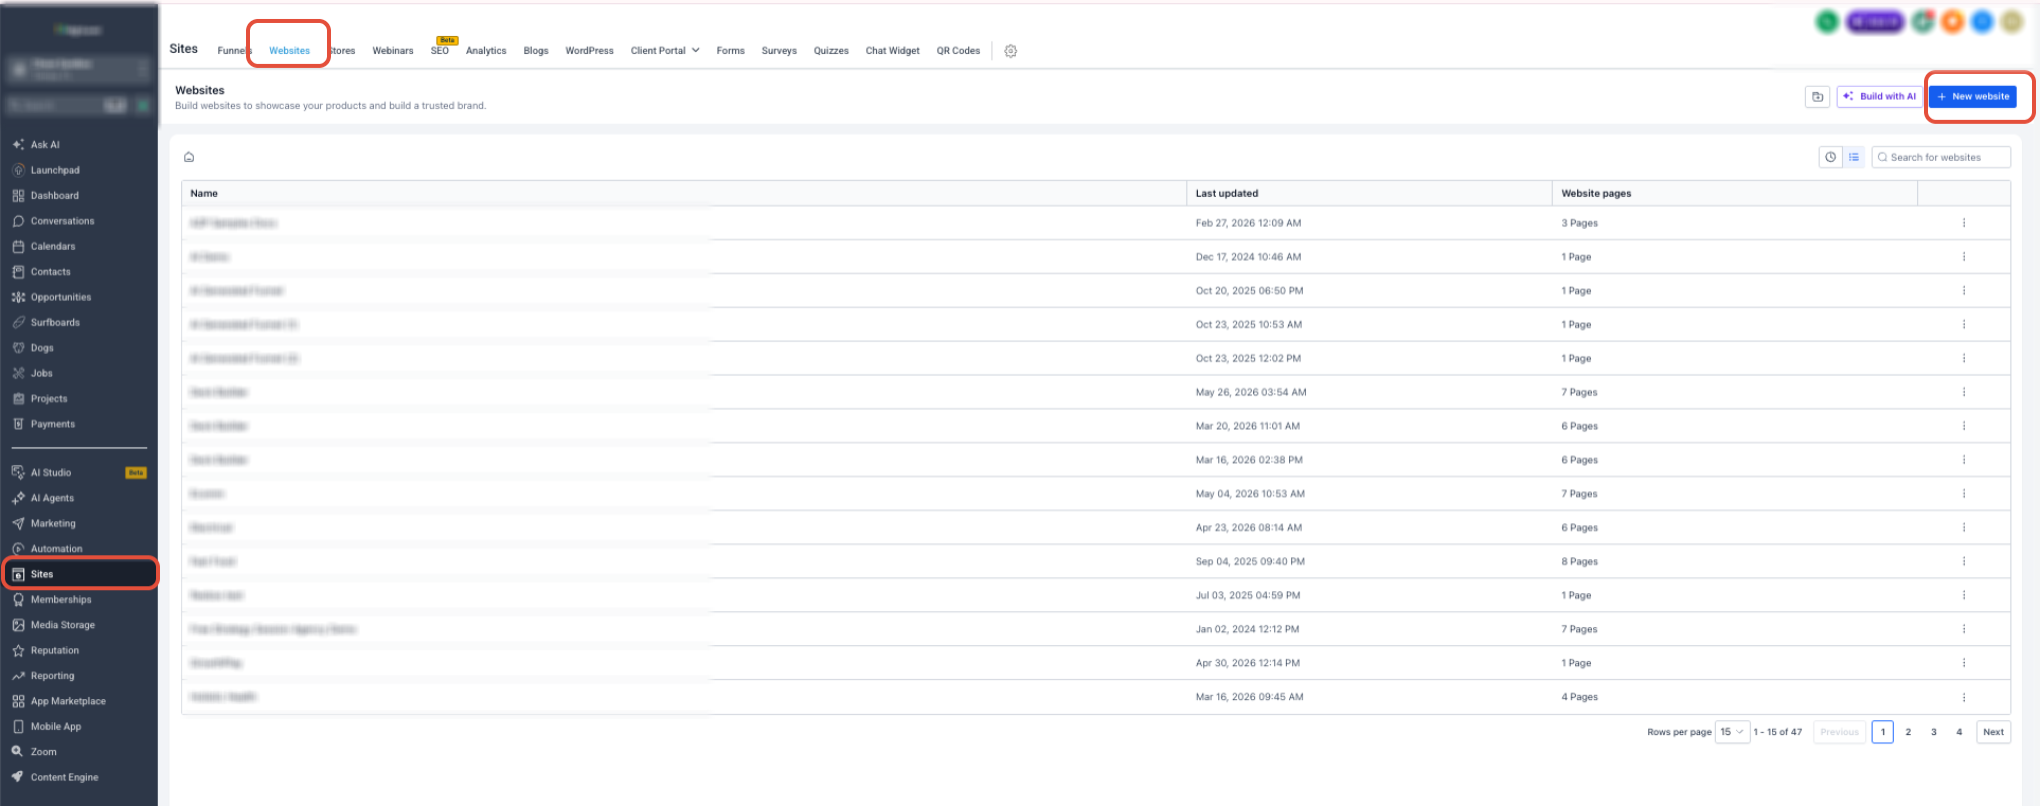
- Go to Sites → Websites.
- Click + New Website.
- Choose a starting point:
- From Blank: Build the website from scratch.
- From Templates: Start with a prebuilt design.
- From Blank: Build the website from scratch.
- Enter the website name.
- Click Create.
- When using a template, preview the available designs and select the one you want to use.
Step 2: Customize and Save the Website
Reviewing the content and responsive layouts before connecting the domain helps prevent incomplete pages from reaching visitors.
- Open each page in the Website Builder.
- Update the text, images, colors, navigation, buttons, forms, and other elements.
- Confirm that navigation links point to the correct pages.
- Review the desktop and mobile layouts.
- Use Preview to test the page as a visitor.
- Add the page title and meta description under the page’s SEO settings.
- Click Save.
Important: Saving does not update the public website. The saved version becomes live only after you click Publish.
Step 3: Connect the Domain
Connecting the domain allows Chat To Clients CRM to verify that the website address points to the correct location.
- Exit the Website Builder.
- Open the website’s Settings tab.
- Under Domain, click Connect Domain.
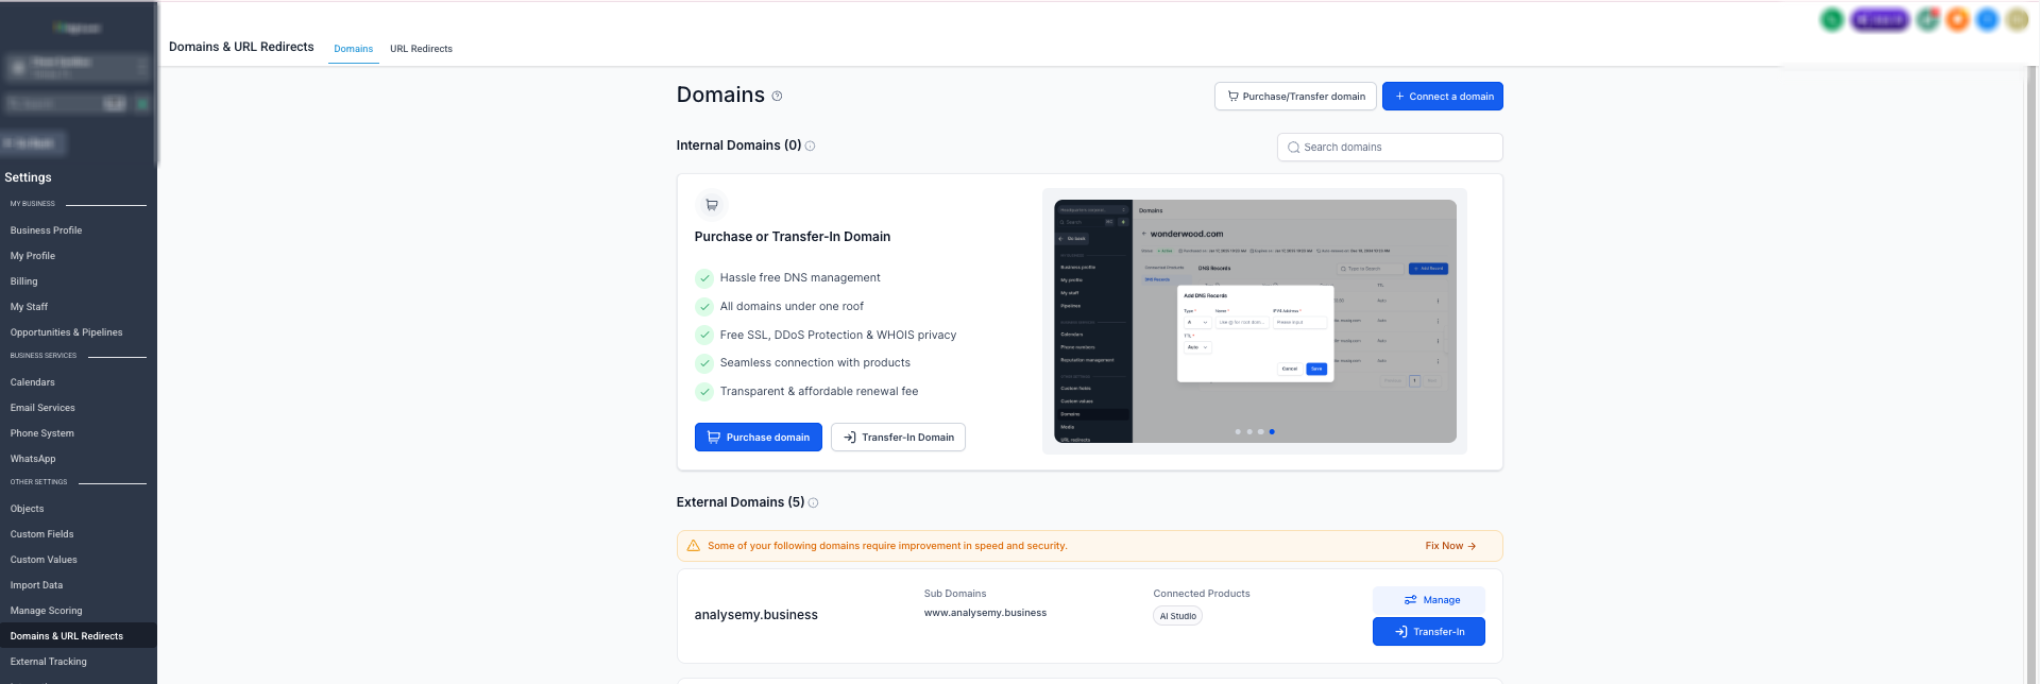
- If Chat To Clients CRM opens the Domains page, click + Connect a domain.
- Select Connect beside Funnel/Website/Store/Blog/Webinar.
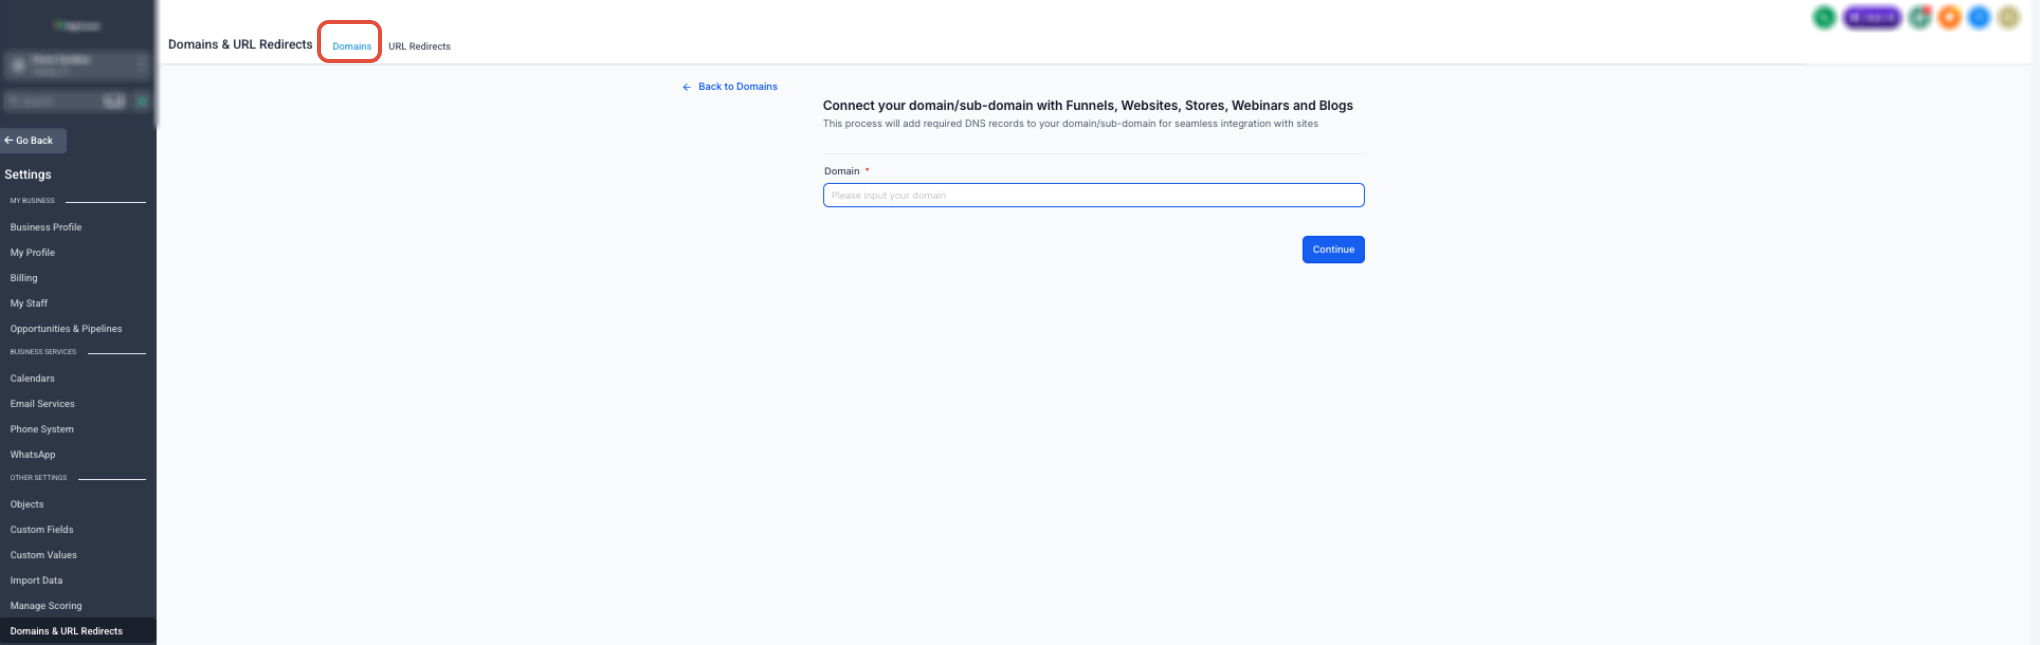
- Enter the root domain or subdomain visitors will use.
- Click Continue.
- Complete the connection using the option Chat To Clients CRM provides:
- Automatic connection: Sign in to the supported domain provider and authorize Chat To Clients CRM to add the required records.
- Manual connection: Copy the DNS records provided by Chat To Clients CRM and add them through your domain provider.
- Automatic connection: Sign in to the supported domain provider and authorize Chat To Clients CRM to add the required records.
- Wait for the domain to show as connected or verified.
Cloudflare users: Set the website’s A or CNAME record to DNS only, not Proxied.
Domain still pending? Allow up to 24 hours for DNS changes. After that, compare every record with the values provided by Chat To Clients CRM and remove conflicting records.
Step 4: Assign the Domain to the Website
Assigning the connected domain links the verified address to the correct website.
- Return to Sites → Websites.
- Open the website.
- Select the Settings tab.
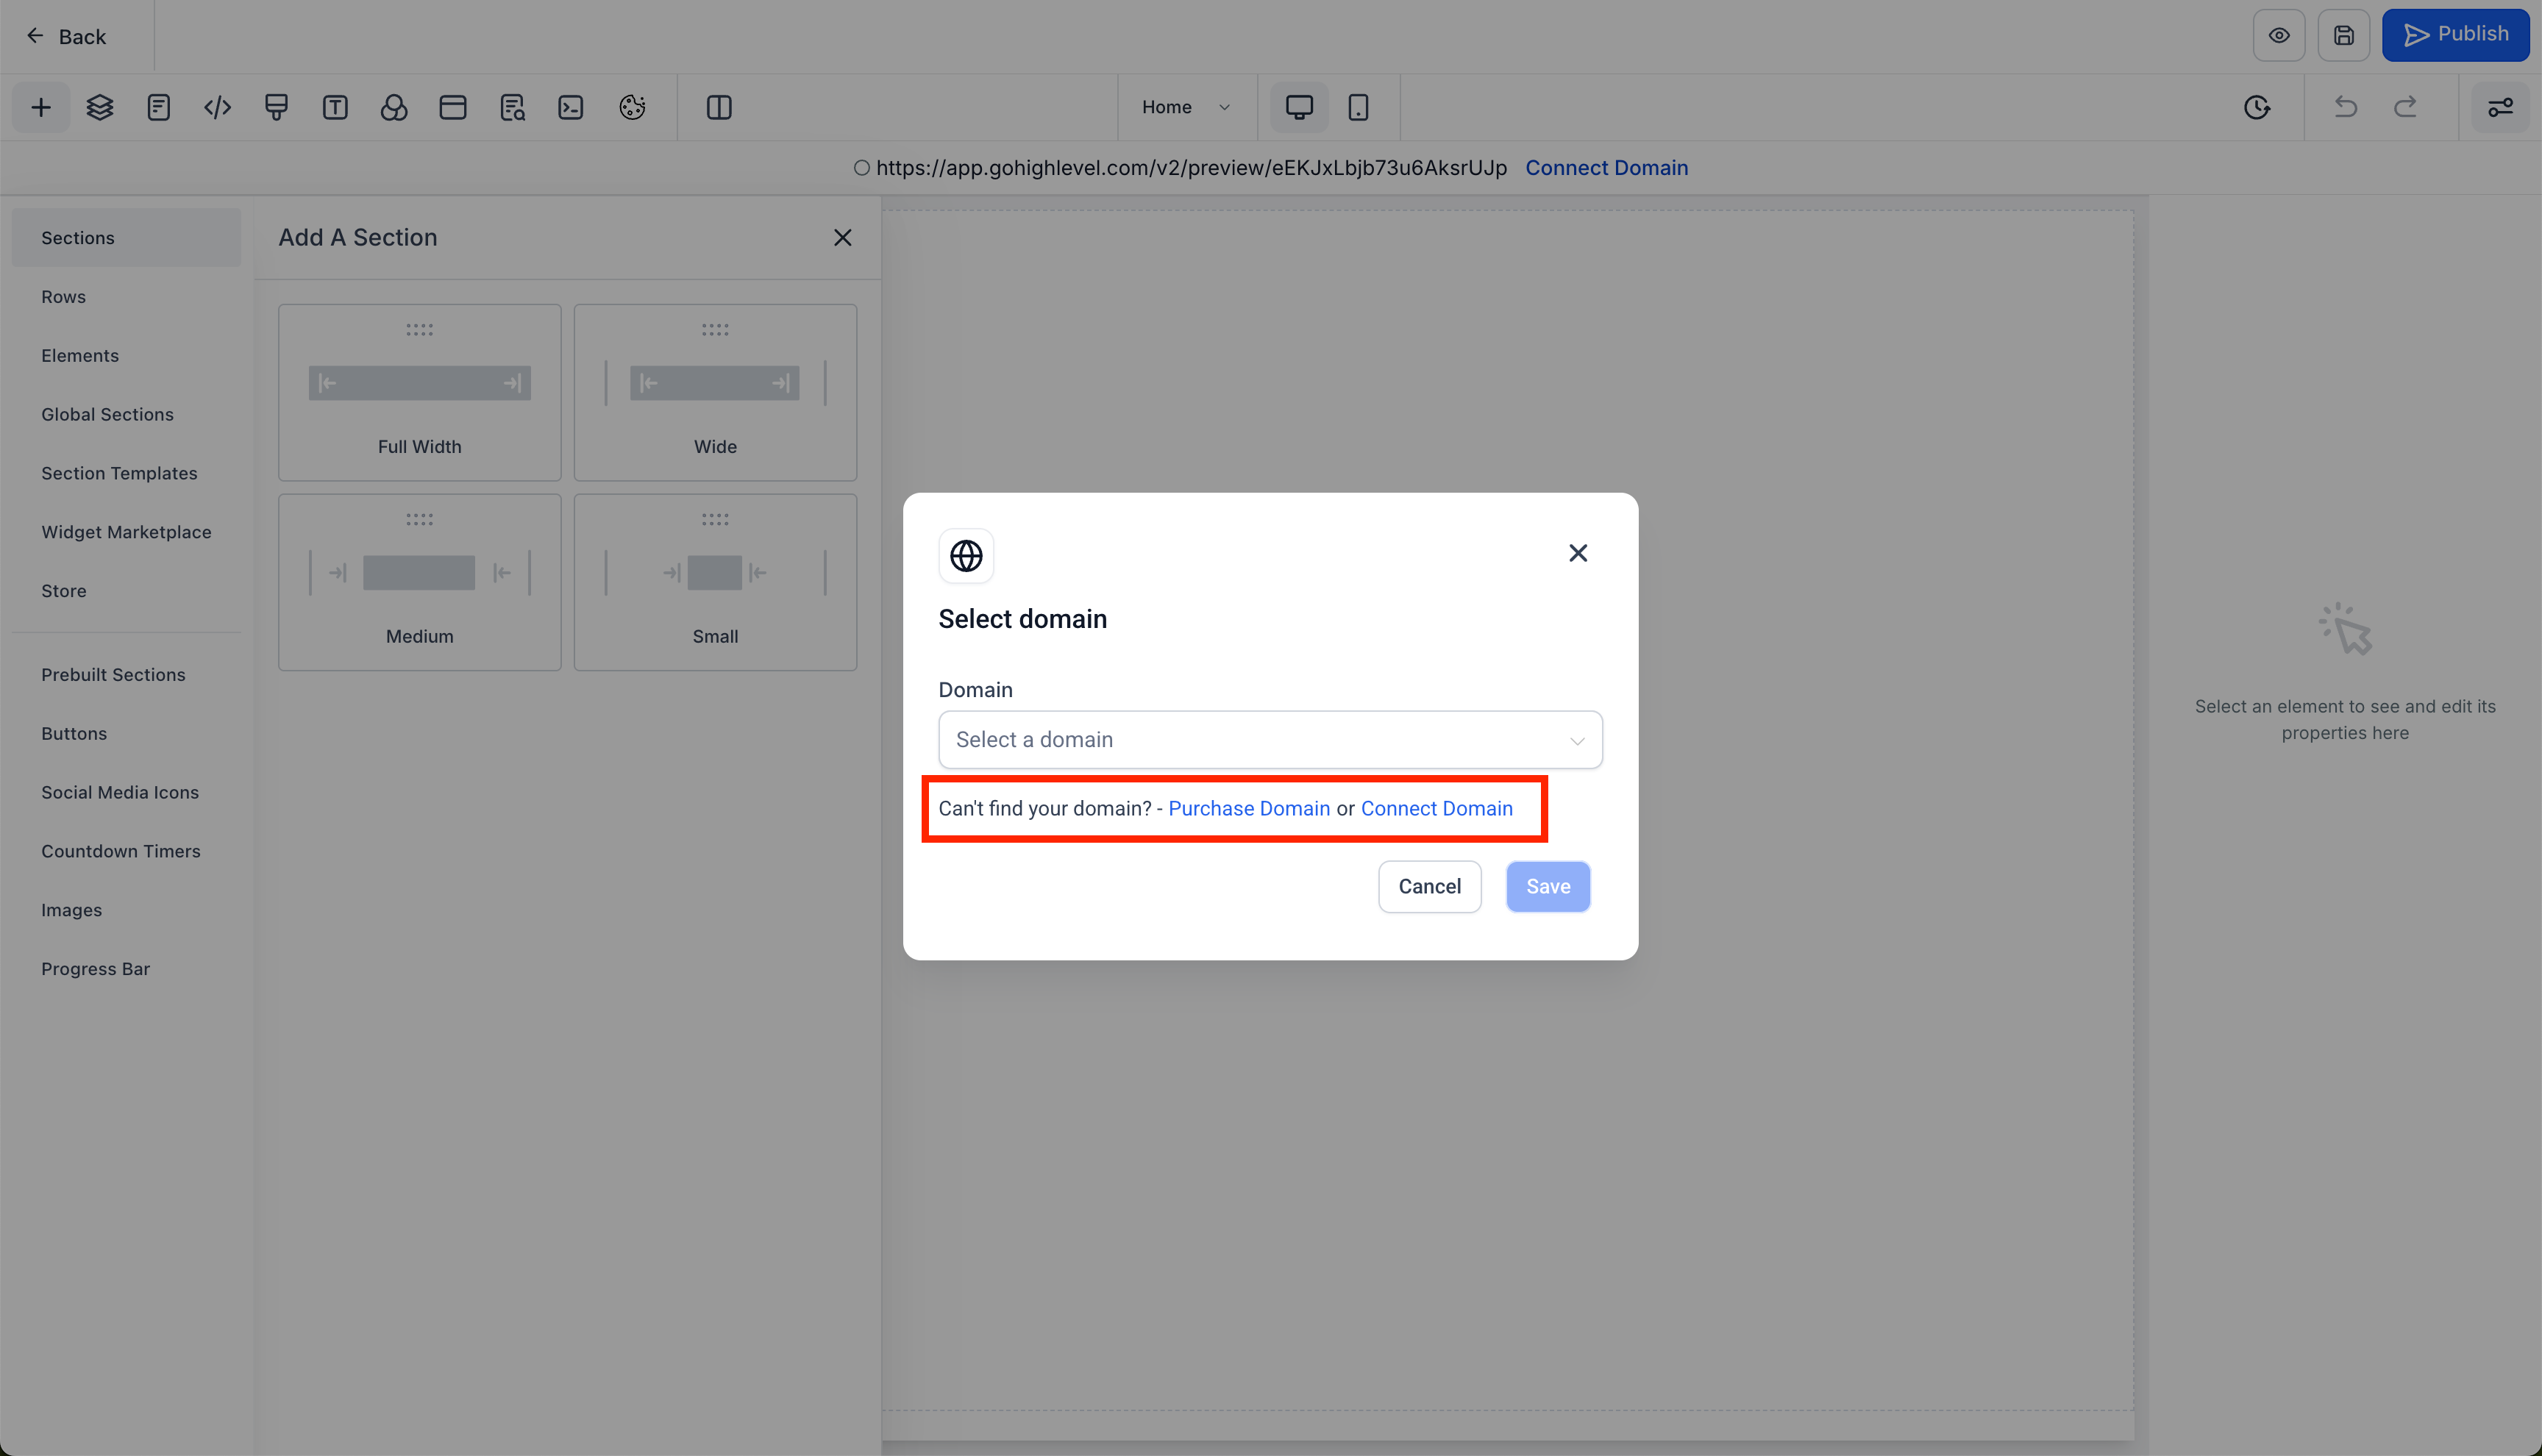
- Open the Domain dropdown.
- Select the connected domain.
- Review the Path:
- Keep a path such as
/serviceswhen the website should open at example.com/services. - Use the intended homepage as the domain’s default page when it should open directly at
example.com.
- Keep a path such as
- Scroll to the bottom and click Save.
Step 5: Publish the Website
Publishing makes the current saved version available through the assigned domain.
- Return to the Website Builder.
- Preview the page one final time.
- Click Save.
- Click Publish.
- Publish every page that should be available on the live website.
Final Live-Site and Domain Verification Checklist
Opening the website in a private browser window confirms what visitors will experience without cached data or an active Chat To Clients CRM session.
- The domain shows as Connected, Verified, or Active in Chat To Clients CRM.
- The public URL opens in an incognito or private browser window.
- The site loads over
https://without a security warning. - The correct homepage appears instead of a 404 page.
- The root and
wwwversions behave as intended. - Navigation links and buttons open the correct pages.
- Forms, calendars, popups, and checkout elements work when applicable.
- A test form submission creates the expected record or notification.
- The desktop and mobile layouts display correctly.
- The latest published content appears on the live website.
- No placeholder text, template images, test prices, or broken links remain.
Frequently Asked Questions
Q: Why does the live website still show old content?
The latest version may have been saved but not published. Open the affected page, click Publish, and test the URL in an incognito window.
Q: Why is my domain still pending?
DNS changes may still be updating, or a record may not match the value provided by Chat To Clients CRM. Allow up to 24 hours, then review the record type, host, and value.
Q: Why does the website display an SSL or privacy warning?
Check for incorrect or conflicting DNS records. Cloudflare records should be set to DNS only. After correcting the records, allow time for Chat To Clients CRM to issue the SSL certificate.
Q: Why does the domain open a 404 page?
Confirm that the domain is assigned to the correct website, the intended page is published, and the default page or URL path is configured correctly.
Q: What should I do if automatic domain connection is unavailable?
Use the manual connection option and add the exact DNS records displayed by Chat To Clients CRM through the provider managing your domain.
Q: Do I need to verify a domain purchased through Chat To Clients CRM?
No. Domains purchased through Chat To Clients CRM are automatically verified. Configure them under Settings → Domains → Purchased Domains.