
Workflow Action - Appointment Booking Conversation AI Booking Bot
The Appointment Booking Conversation AI workflow action uses an AI-powered conversation to help contacts choose an available time and book directly on a selected calendar. This guide shows how to configure the action in a workflow, control the conversation, and route contacts based on whether they book, stop responding, or reach the message limit without booking.
What is the Appointment Booking Conversation AI Workflow Action?
The Appointment Booking Conversation AI workflow action connects conversational AI with a booking calendar so the AI can guide a contact toward scheduling an appointment without requiring a team member to manage every message.
When the action runs, the AI can use the selected calendar to check availability, suggest available time slots, and book the appointment after the contact chooses a time. The workflow then continues through one of three built-in outcomes—Timeout, Appointment Was Booked, or Appointment Was Not Booked—so you can automate the next step of the customer journey.
Key Benefits of the Appointment Booking Conversation AI Workflow Action
- Automated appointment scheduling: Let the AI guide contacts from conversation to a confirmed booking without requiring manual scheduling.
- Calendar-based availability: Use the selected calendar to surface available time slots and book the contact into an open time.
- Brand-aligned conversations: Customize Personality and Additional Instructions so the interaction reflects your business tone and booking goals.
- Conversation controls: Set message limits, timeout behavior, response delay, channel, and confirmation behavior to match your workflow.
- Outcome-based automation: Continue the workflow differently when a contact books, stops responding, or reaches the message limit without booking.
How to Set Up the Appointment Booking Conversation AI Workflow Action
A complete setup starts with the right workflow entry point, then defines how the AI should communicate, which calendar it should book, and what the workflow should do after each possible outcome. The example below follows an inbound SMS conversation, but your trigger filters and channel should match your own use case.
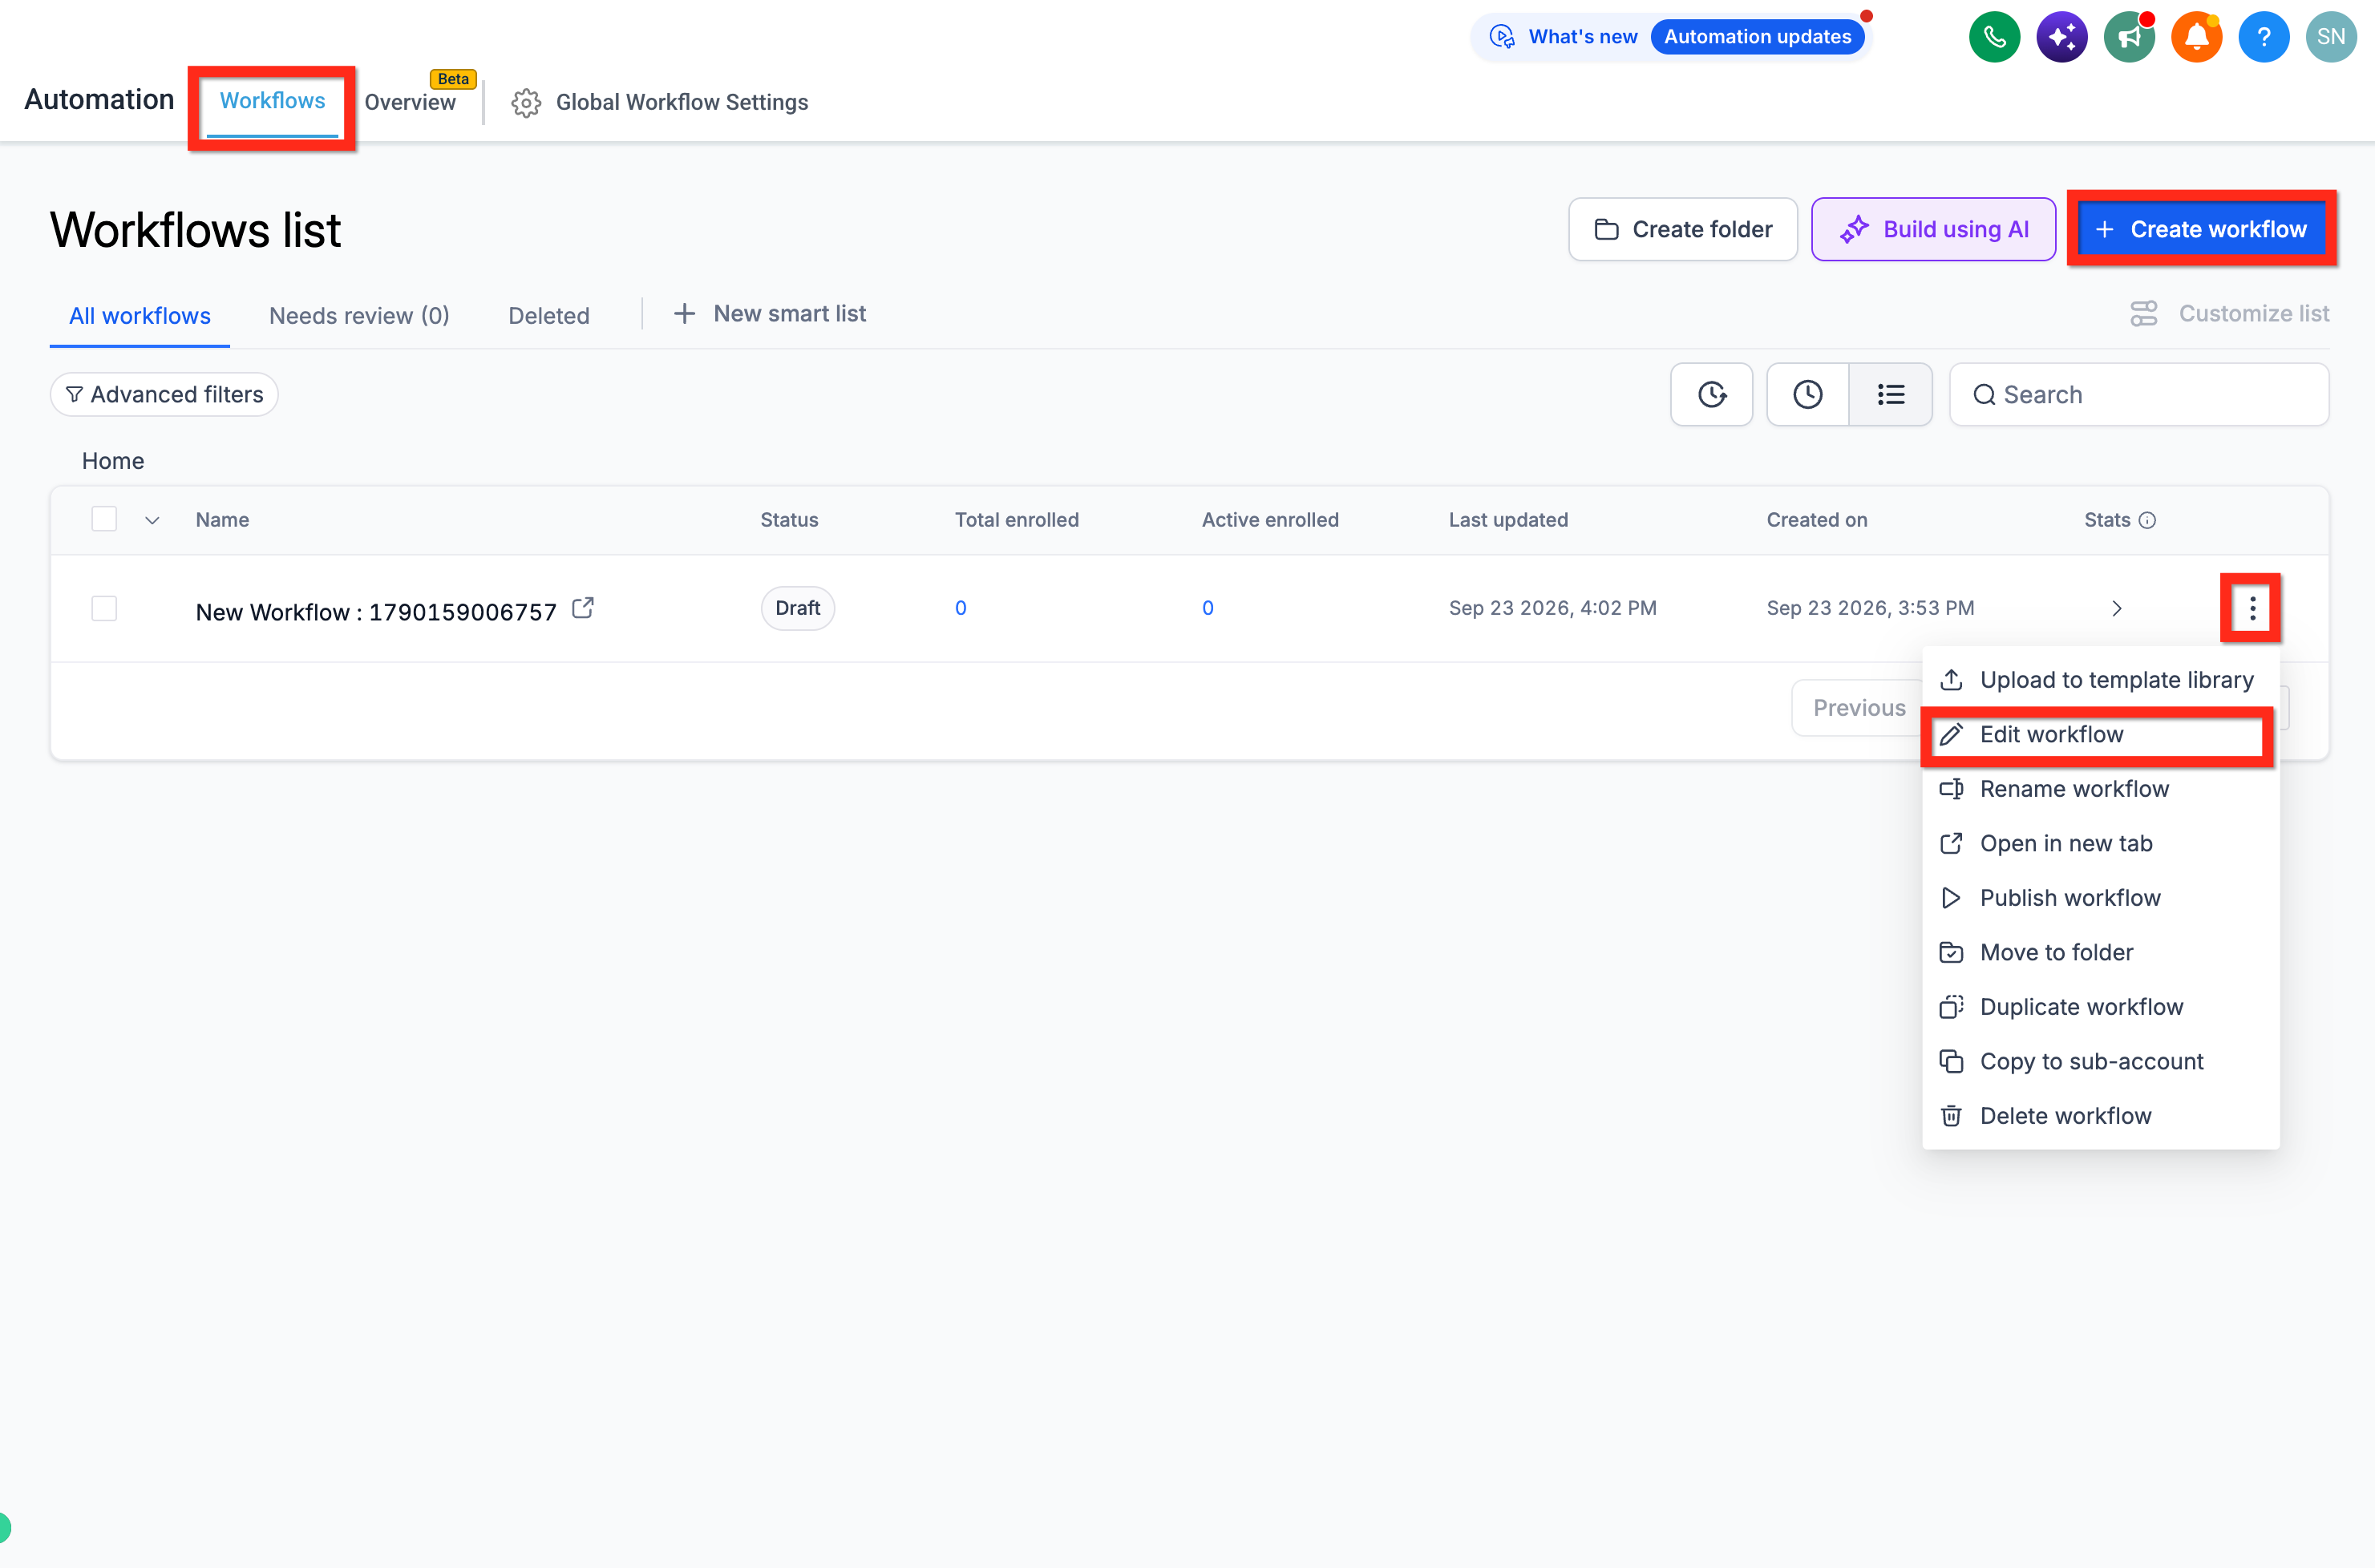
Step 1: Create or Open the Workflow
- Log in to your account.
- Go to Automations > Workflows.
- Create a new workflow or edit the workflow where you want to add appointment booking.
Step 2: Configure the Workflow Trigger
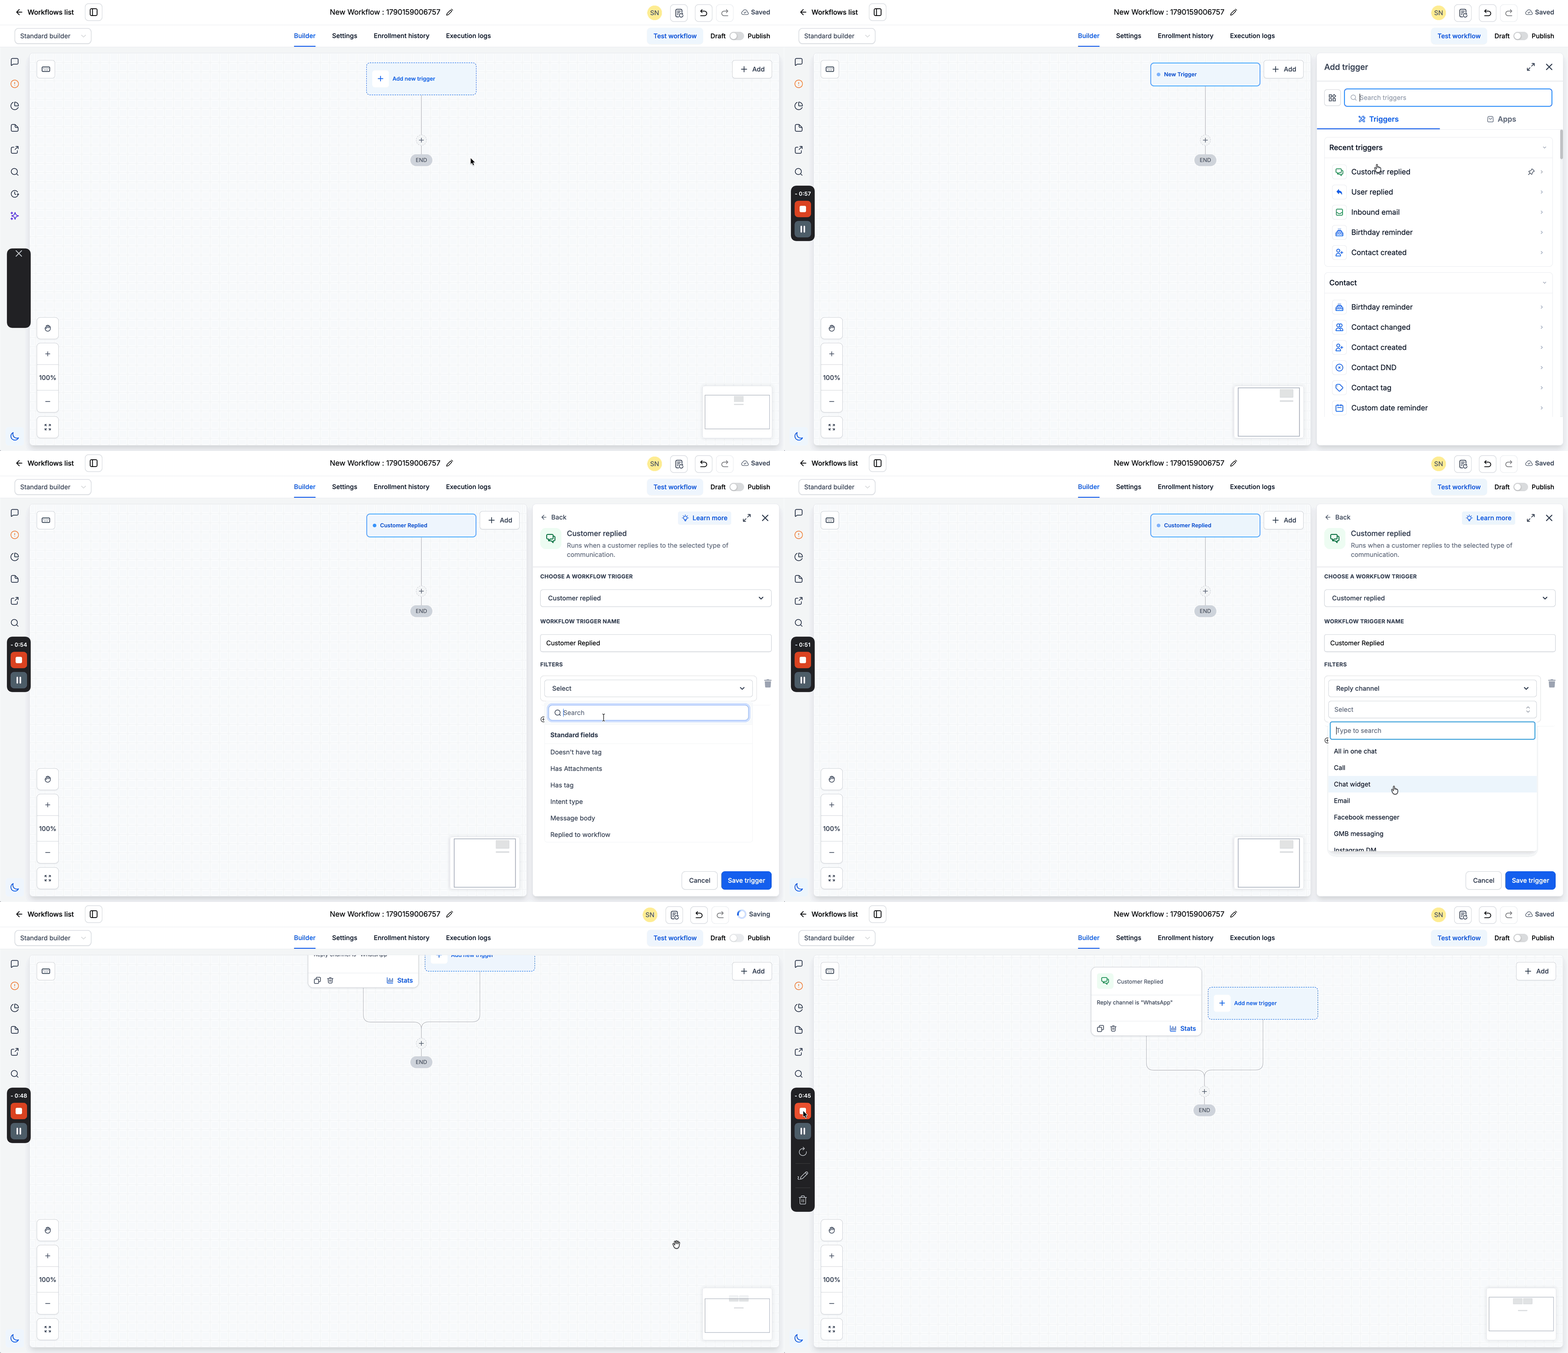
The trigger determines when a contact enters the workflow. In this example, Customer Replied is used so the appointment-booking conversation begins after an inbound reply.
Tip: Customer Replied is an example trigger, not a requirement for every appointment-booking workflow. Use the workflow trigger and filters that match the event you want to start the automation.
- Click + Add New Trigger.
- Select Customer Replied.
- Add a Reply Channel filter and select SMS for the example workflow.
- Add any additional filters needed for your use case.
- Click Save Trigger.
Step 3: Add the Appointment Booking Conversation AI Action
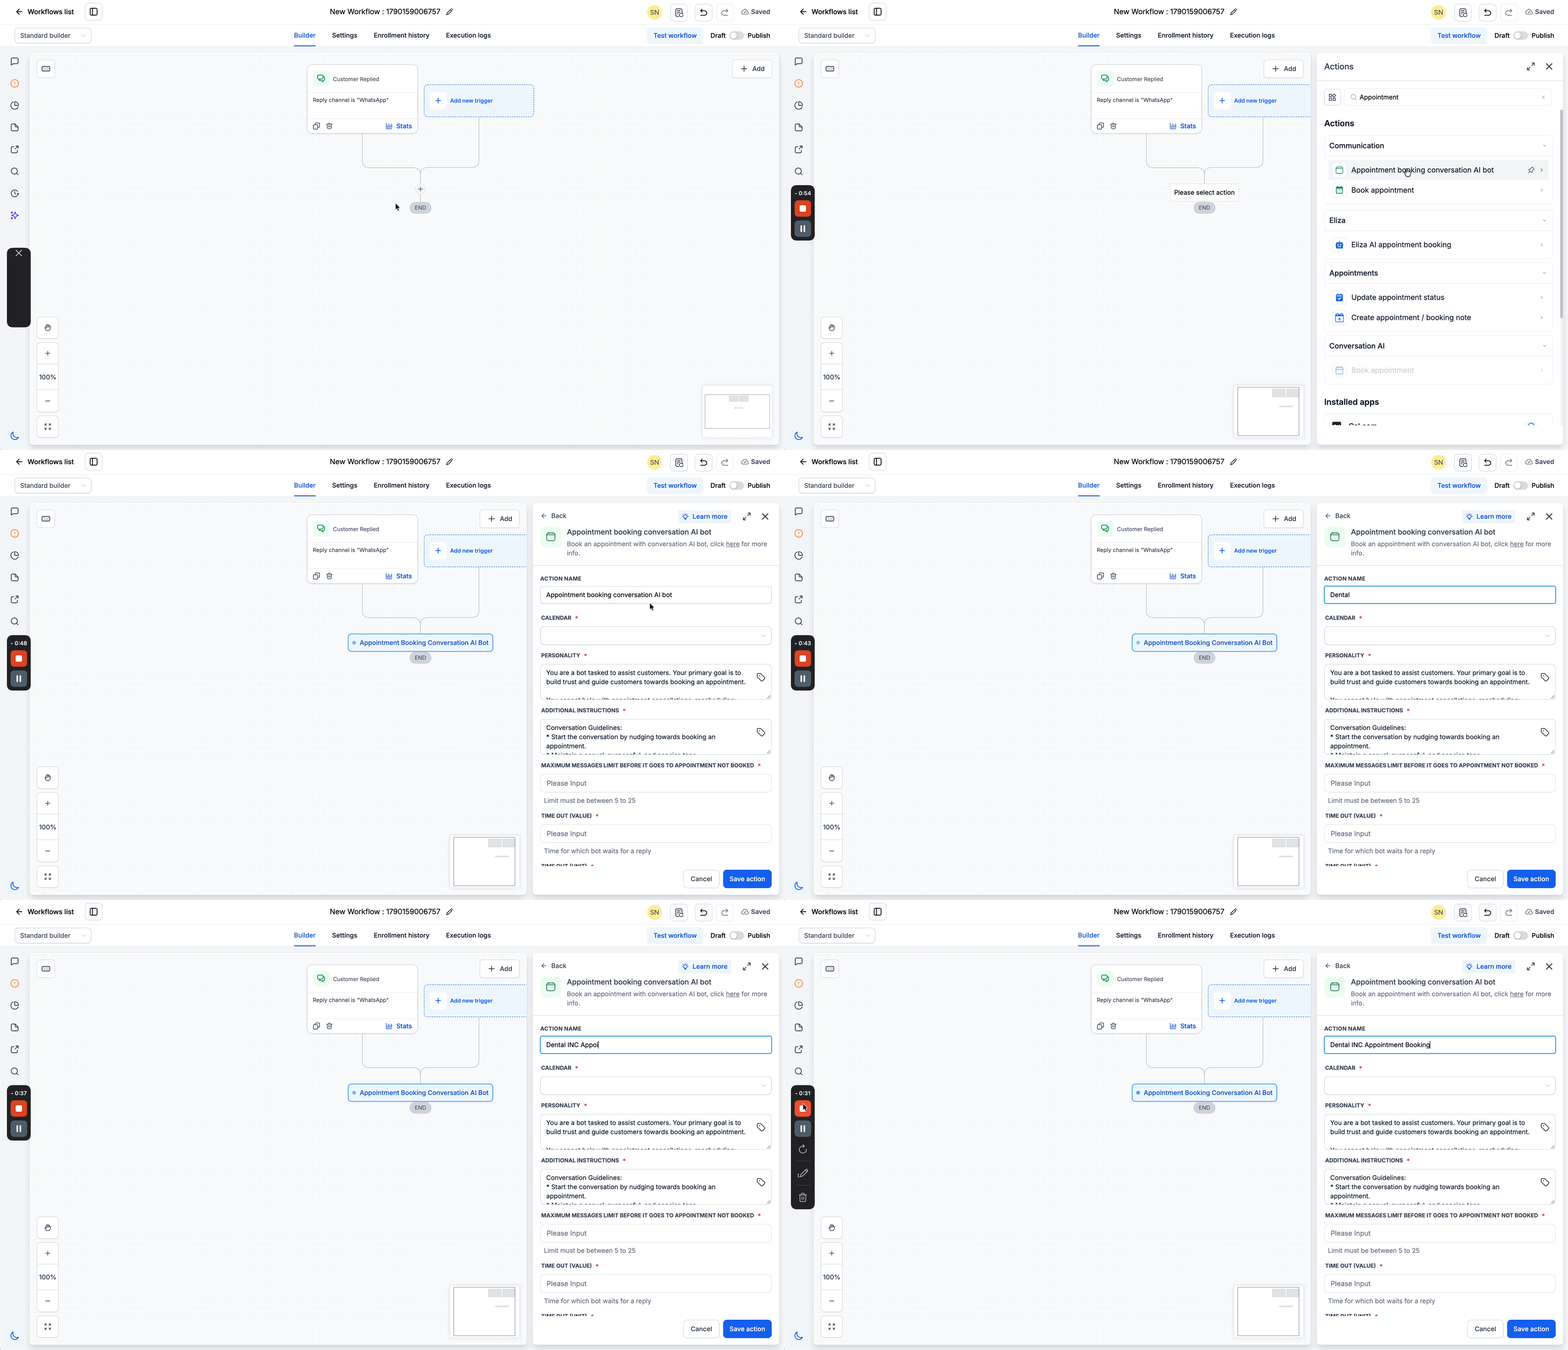
- Click the + icon below the trigger or at the point in the workflow where the AI booking conversation should begin.
- Search for Appointment Booking Conversation AI.
- Select Appointment Booking Conversation AI Bot from the available workflow actions.
- Enter a clear action name if you want the step to be easier to identify on the workflow canvas.
Step 4: Setup the Bot
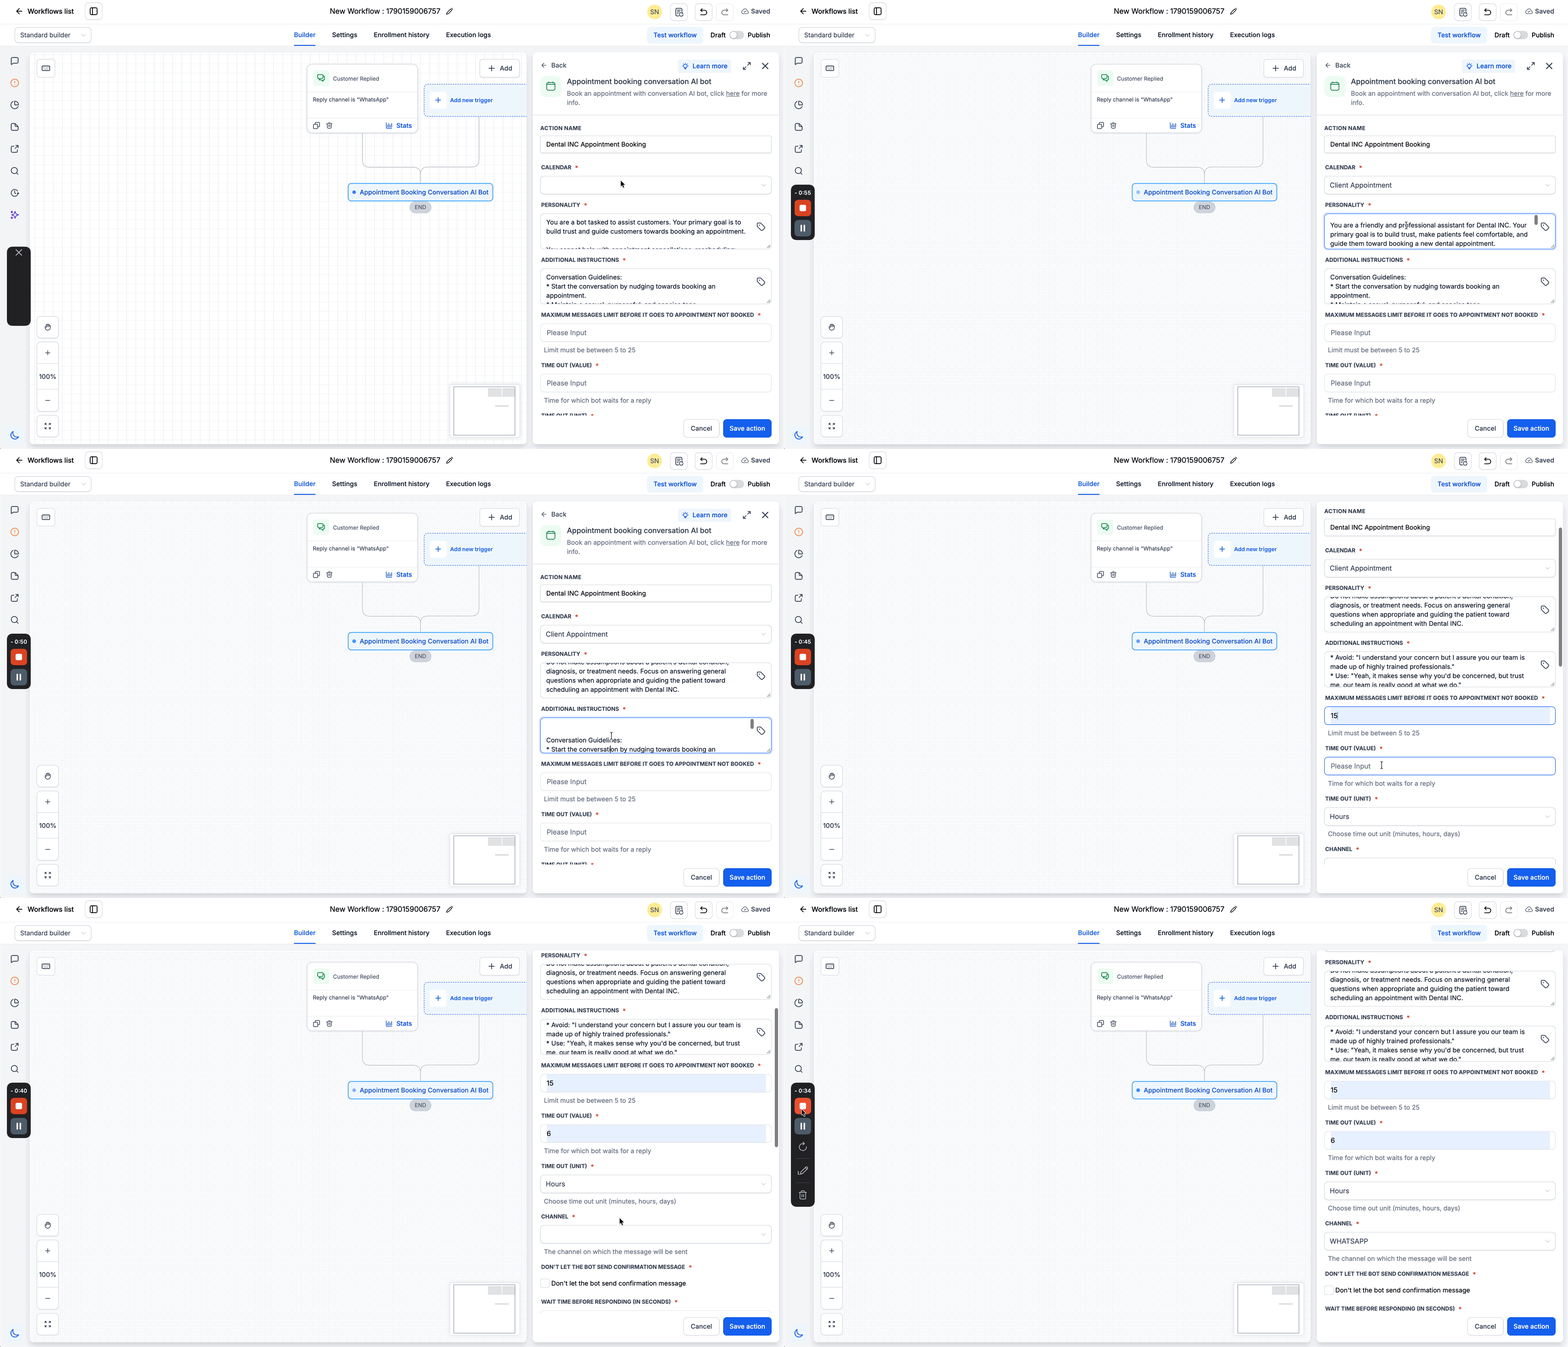
- Choose the calendar the AI should use to check availability and create the appointment. Available slots from this calendar can be suggested to the contact during the conversation.
Important: Recurring calendars are not supported by this workflow action and will not appear as selectable calendars. - Use Personality to define how the AI should sound and represent the business during the booking conversation. Keep the instructions specific enough to establish the desired tone, communication style, and overall approach to helping the contact schedule.
- Use Additional Instructions for workflow-specific rules or guidance that should shape the booking conversation. This can include how the AI should guide the contact, what information matters during the interaction, or other boundaries that are not part of the general personality.
- Set Maximum Messages Limit before it goes to Appointment Not Booked to control how many messages the AI can use while trying to complete the booking.
If the booking is not completed within this limit, the contact follows the Appointment Was Not Booked branch.- Minimum: 5 messages
- Maximum: 25 messages
- Set the Timeout Value and Timeout Unit to define how long the AI should wait for the contact to reply. The unit can be configured in minutes, hours, or days.
If the contact does not reply within the configured period, the workflow follows the Timeout branch.
Important: Timeout and Appointment Was Not Booked are different outcomes. Timeout is used when the contact does not reply within the configured time. Appointment Was Not Booked is used when the AI reaches the configured message limit without completing the booking. - Choose the channel the AI should use to respond to the contact from the available options: Facebook, Instagram, SMS, and WhatsApp.
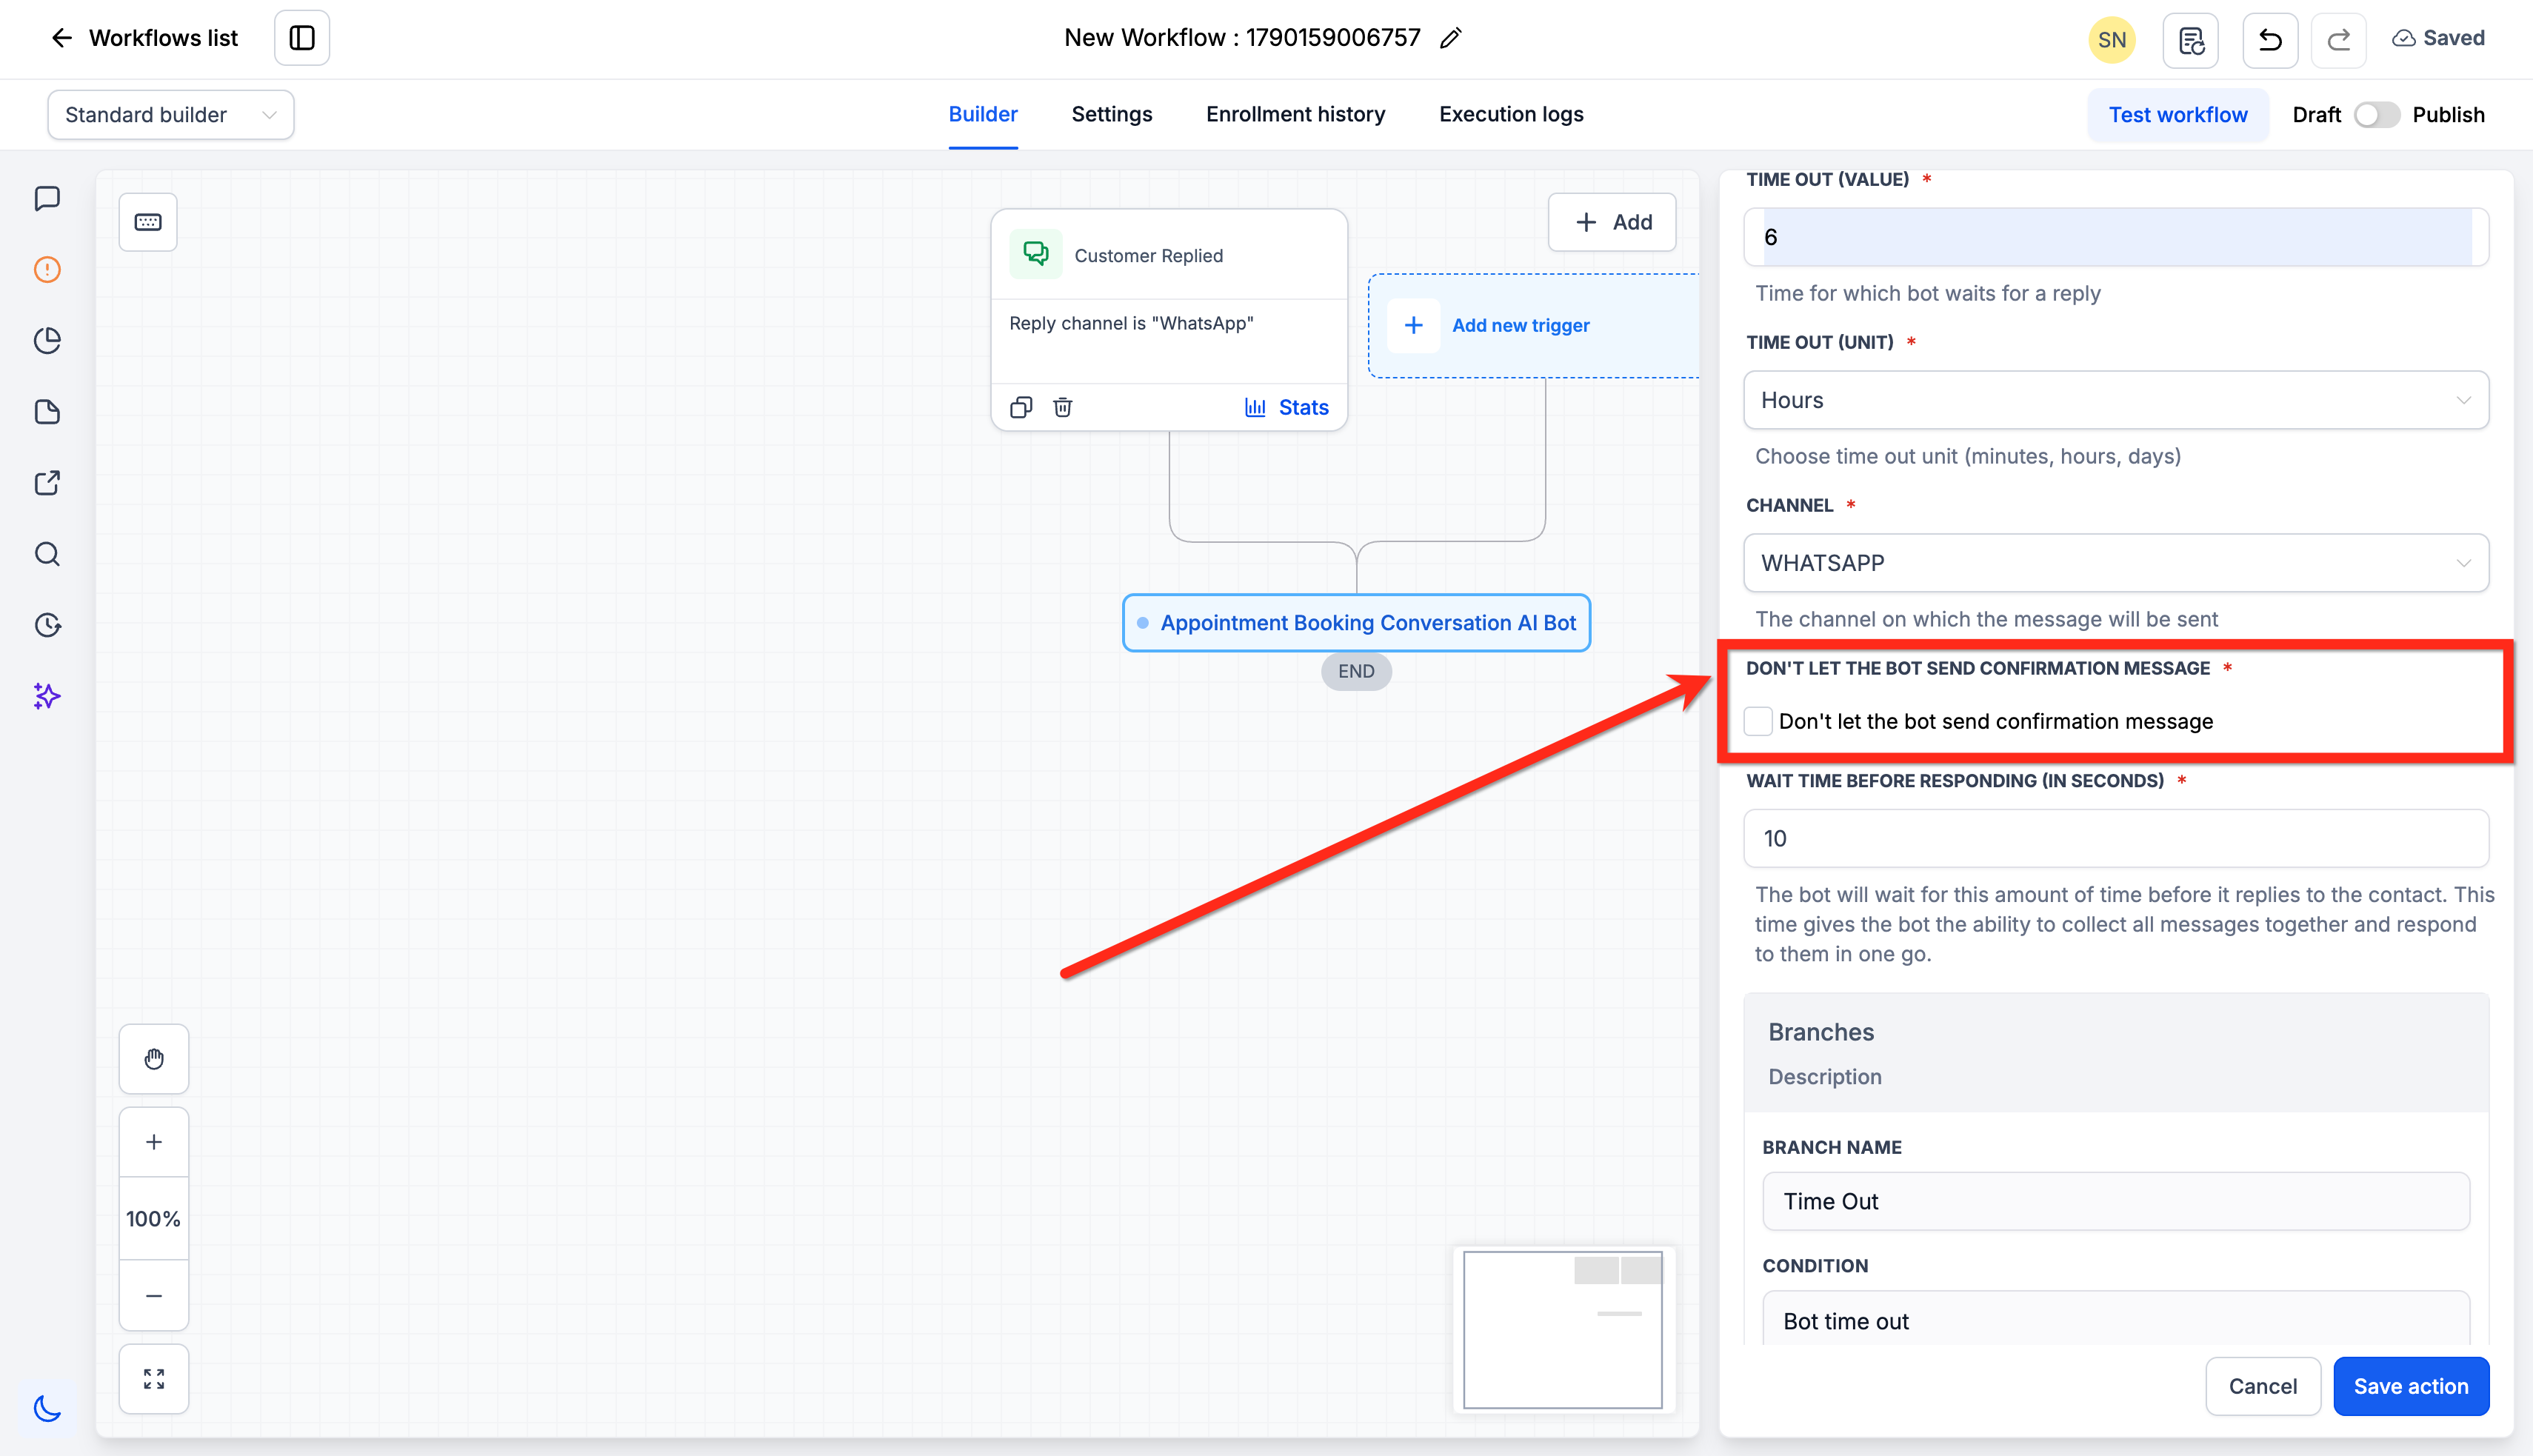
Step 10: Choose Whether the Bot Sends the Booking Confirmation
By default, the AI sends a confirmation message after it successfully books the appointment.
Enable Don't let the bot send confirmation message when you want the workflow—not the AI action—to handle the confirmation.
Important: If you disable the AI confirmation message, add an appropriate confirmation or follow-up action under Appointment Was Booked so the contact is informed after the booking is created.
Step 11: Set the Wait Time Before Responding
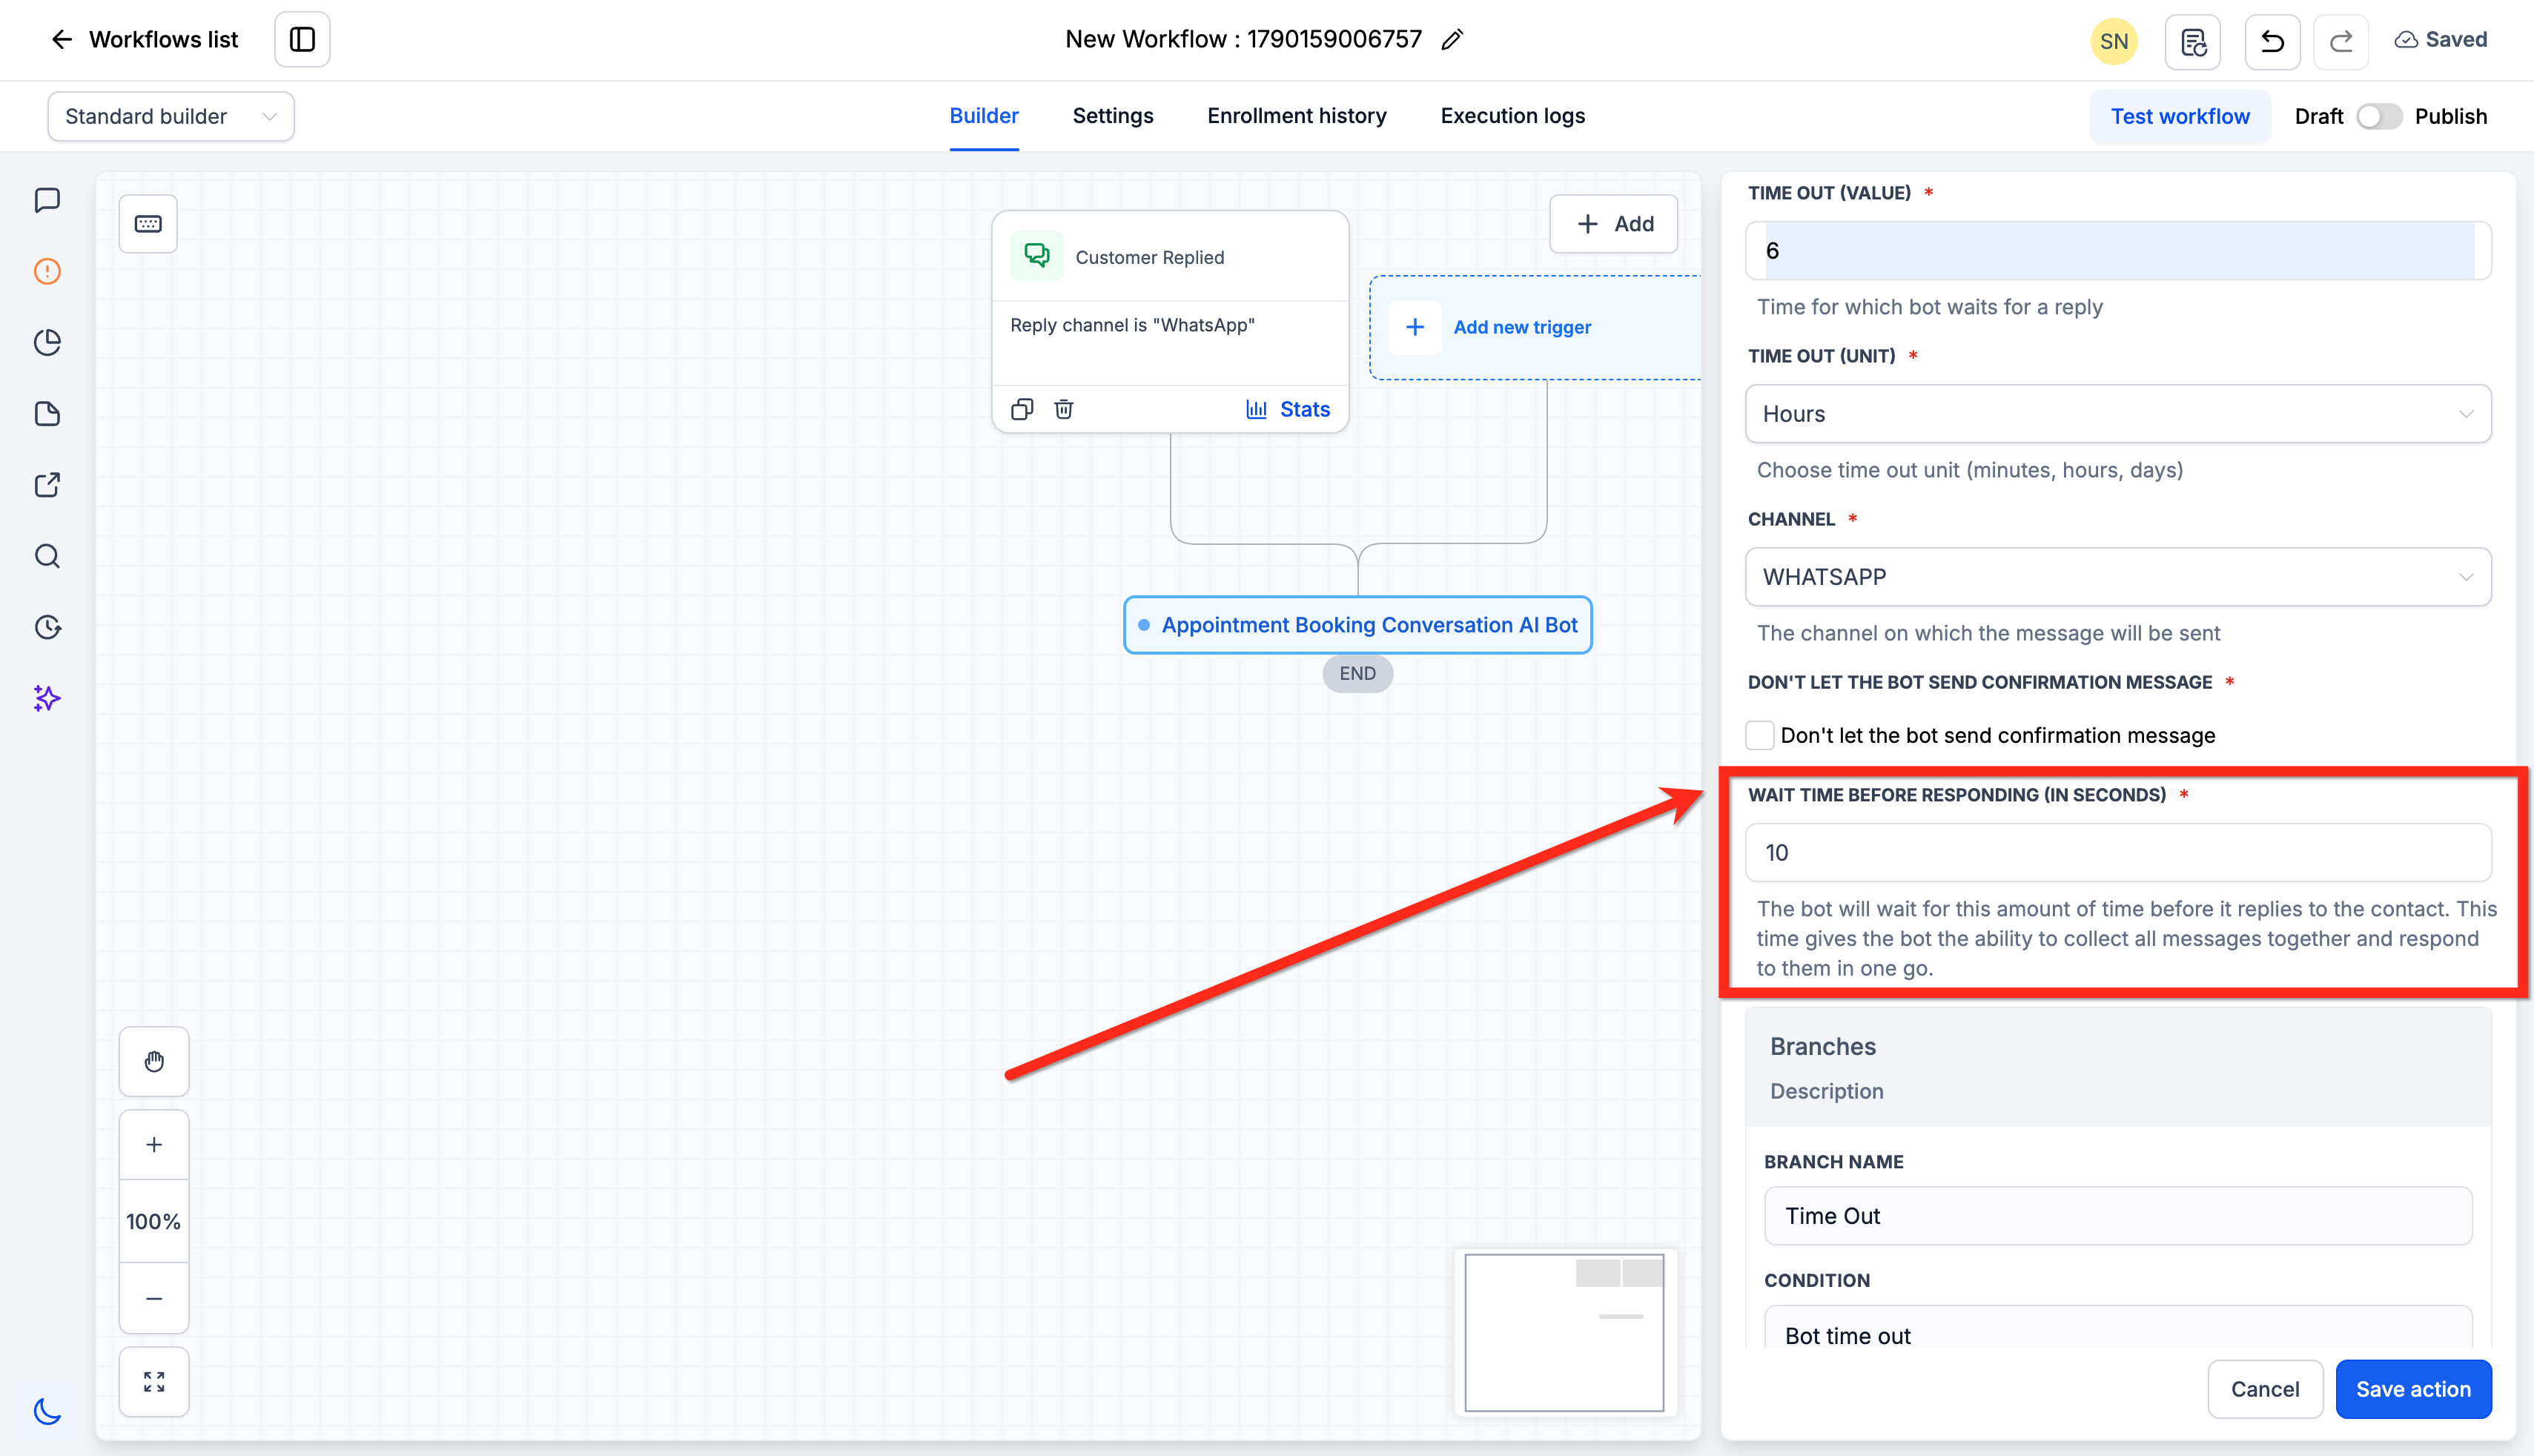
Use Wait time before responding in seconds to add a short delay before the AI replies.
This gives the bot time to collect consecutive messages from a contact and respond to the combined context instead of replying separately to each message.
For example, if a contact sends:
- “Hi”
- followed a few seconds later by “I want to book a consultation”
the response delay gives the AI an opportunity to consider both messages together before responding.
Step 12: Save the Action and Default Outcome Branches
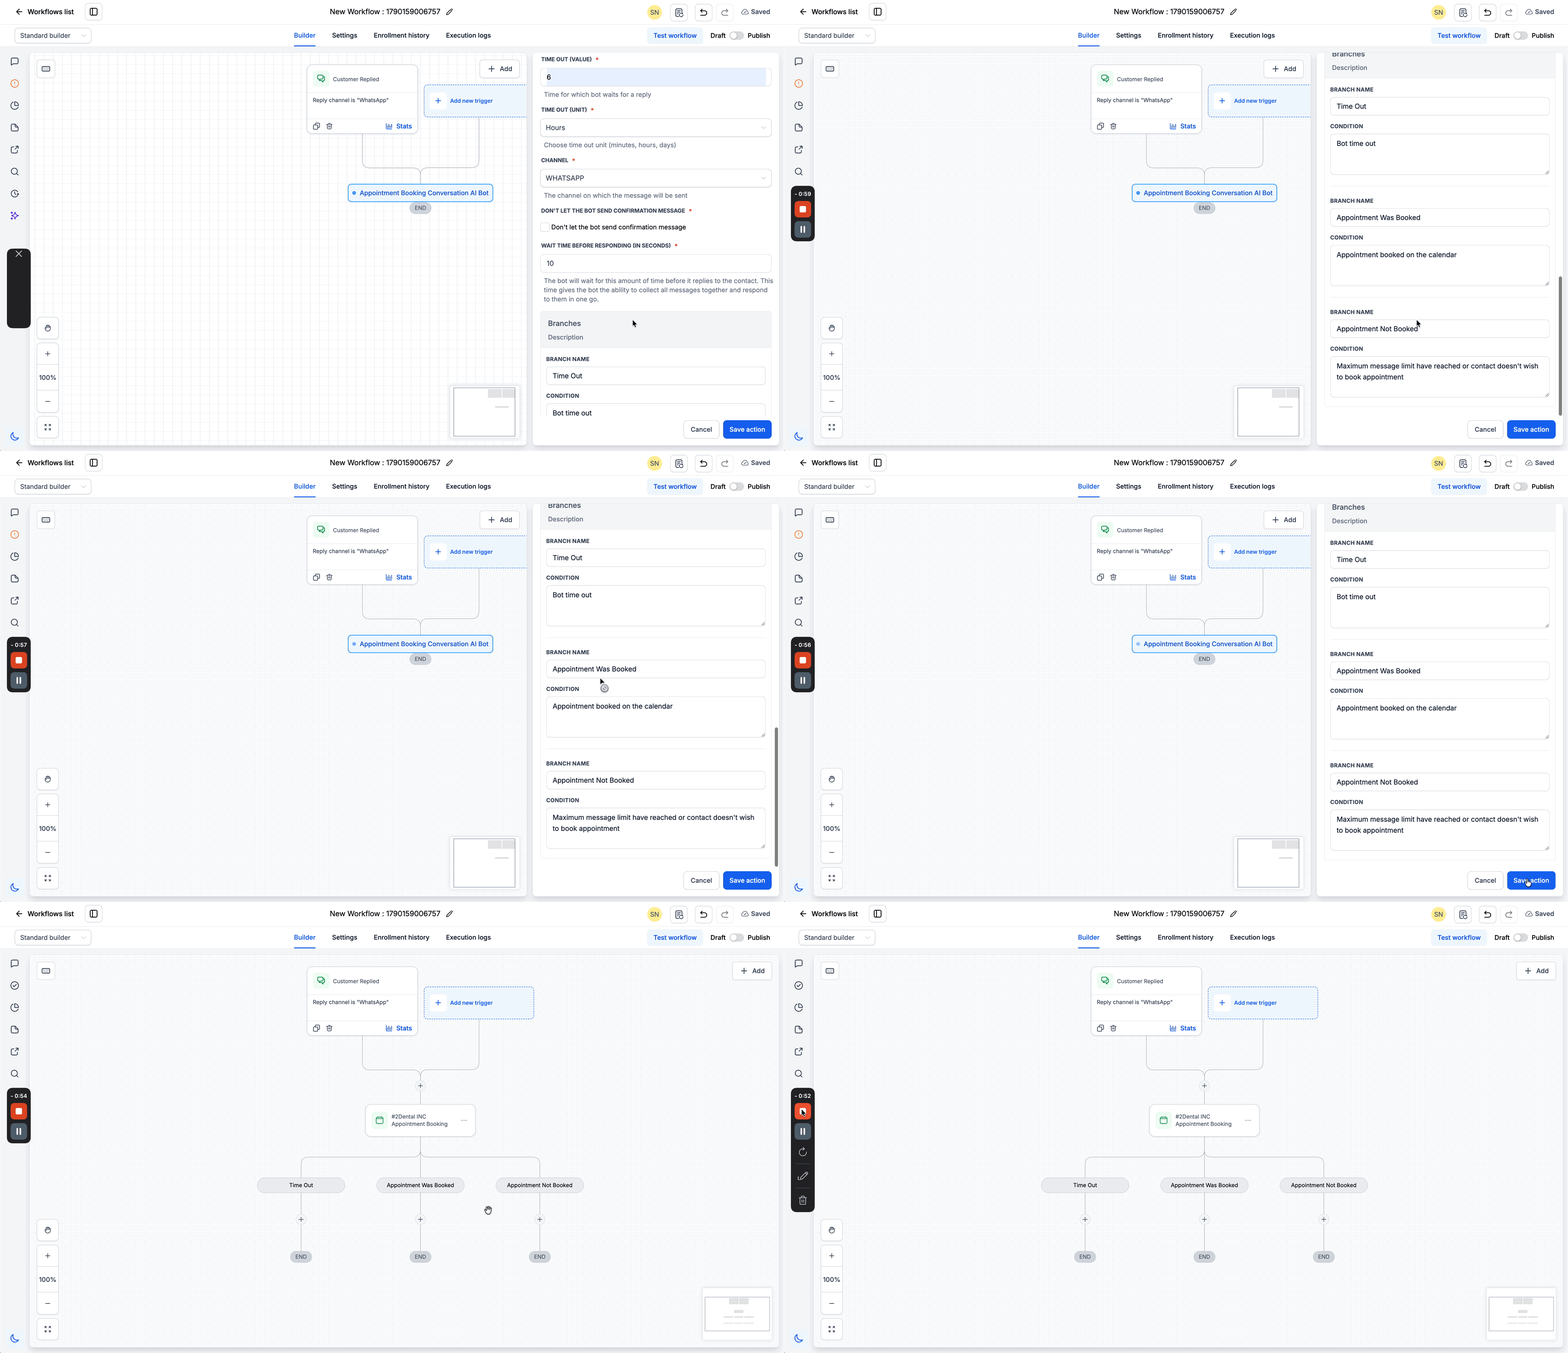
Click Save Action. Three built-in branches get added to the workflow.
Add the follow-up actions that should run under each outcome based on your customer journey.
Timeout
Used when the contact does not reply within the configured timeout. You can add follow-up messaging, internal actions, or another appropriate recovery path.
Appointment Was Booked
Used after the appointment is successfully created. You can add confirmation messaging when needed, internal notifications, reminders, or other post-booking workflow actions.
Appointment Was Not Booked
Used when the booking is not completed within the configured maximum message limit. You can add nurture, follow-up, tagging, or other actions that fit your process.
Note: These outcome branches are created by the Appointment Booking Conversation AI action and are not custom branch conditions that you need to build manually.
Step 13: Save, Publish, and Test the Workflow
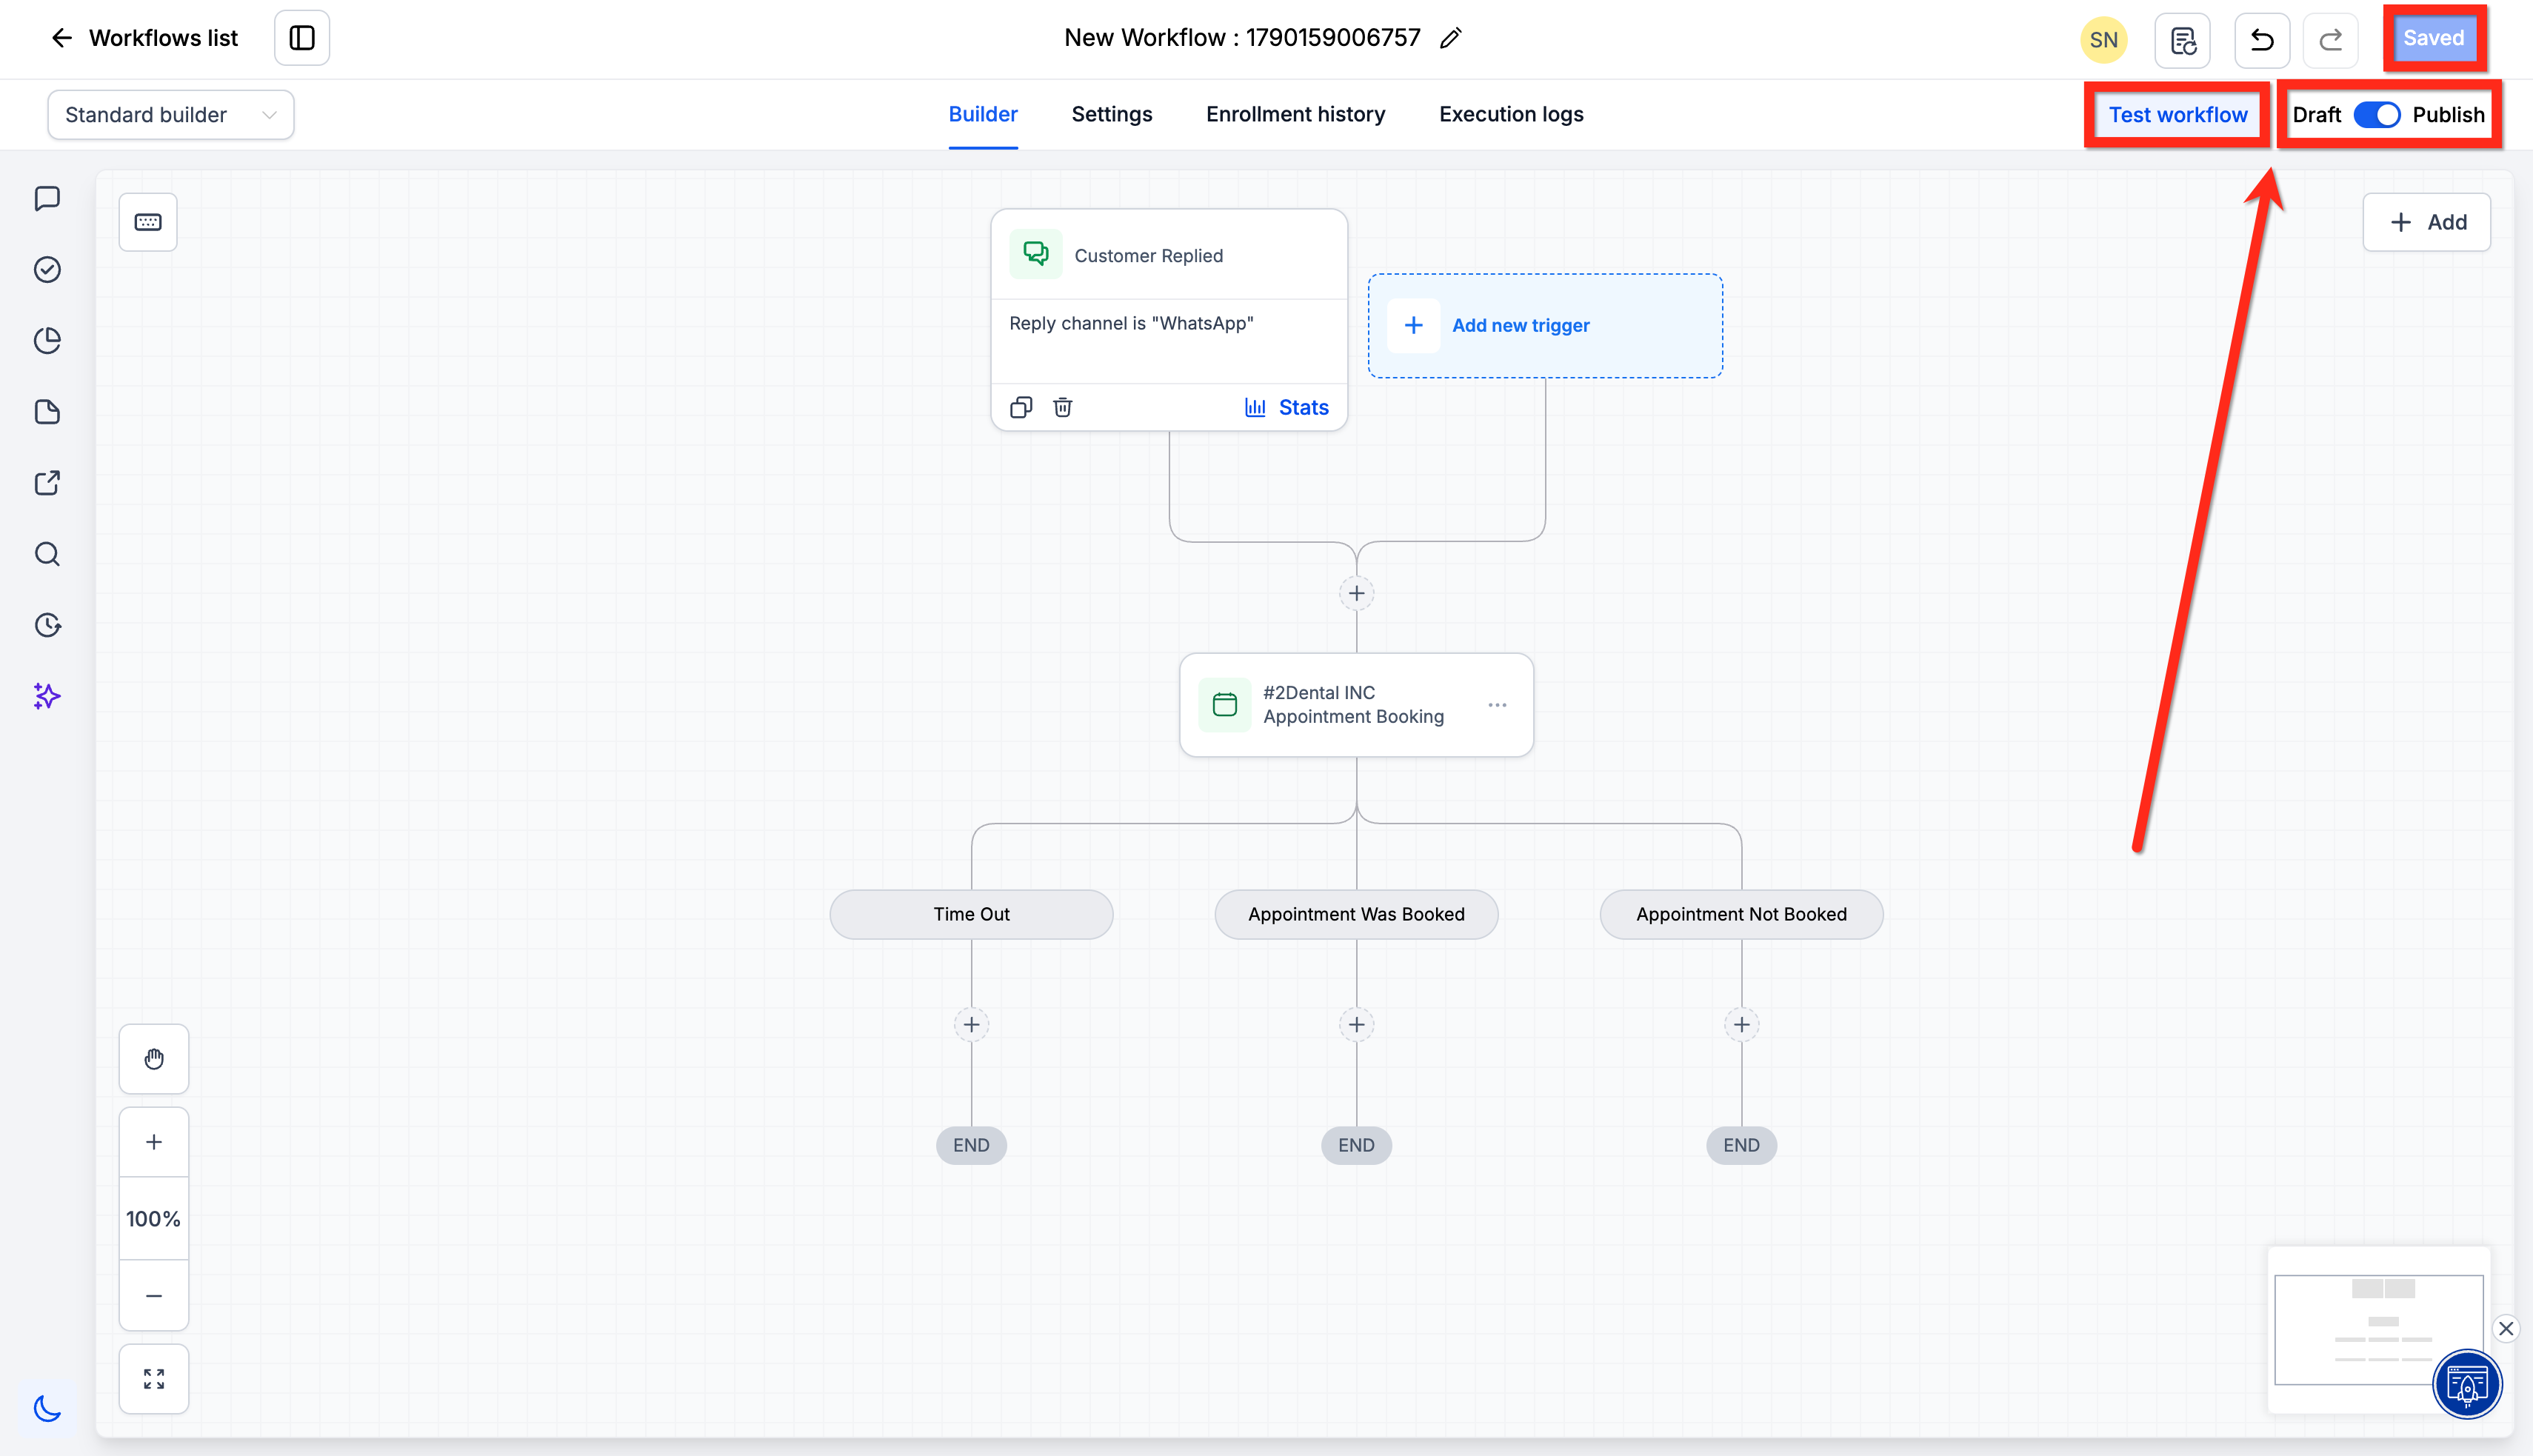
- Test the Workflow.
- Save the workflow and publish it when the trigger, action settings, and branch actions are ready.
Frequently Asked Questions
Q: Why is my recurring calendar not available in the Calendar field?
Recurring calendars are not supported by the Appointment Booking Conversation AI workflow action, so they do not appear as selectable calendars. Use a supported non-recurring booking calendar for this action.
Q: What is the difference between Timeout and Appointment Was Not Booked?
Timeout is used when the contact does not respond within the configured timeout period. Appointment Was Not Booked is used when the AI reaches the Maximum Messages Limit without successfully completing the booking.
Q: What happens if I enable Don't let the bot send confirmation message?
The AI does not send its normal booking confirmation after the appointment is created. The workflow continues through Appointment Was Booked, where you can add your own confirmation message or other post-booking actions.
Q: What value should I use for Maximum Messages Limit?
The supported range is 5 to 25 messages.
Q: Why does the AI wait before replying to a contact?
Wait time before responding adds a short delay so the AI can collect messages sent close together and respond with the combined context. This can prevent the bot from replying separately when a contact sends several short messages in quick succession.