How to Use Invoices in the Mobile App
We're thrilled to announce our latest update to Invoices on the mobile app - a brand new flow! Subaccount admins and users can now create invoices either from the dedicated Invoices section or from the Point-of-Sale section in a few easy steps. This update is available on Chat To Clients CRM, Chat To Clients CRM, and White-labelled (update needs to be requested) mobile apps.
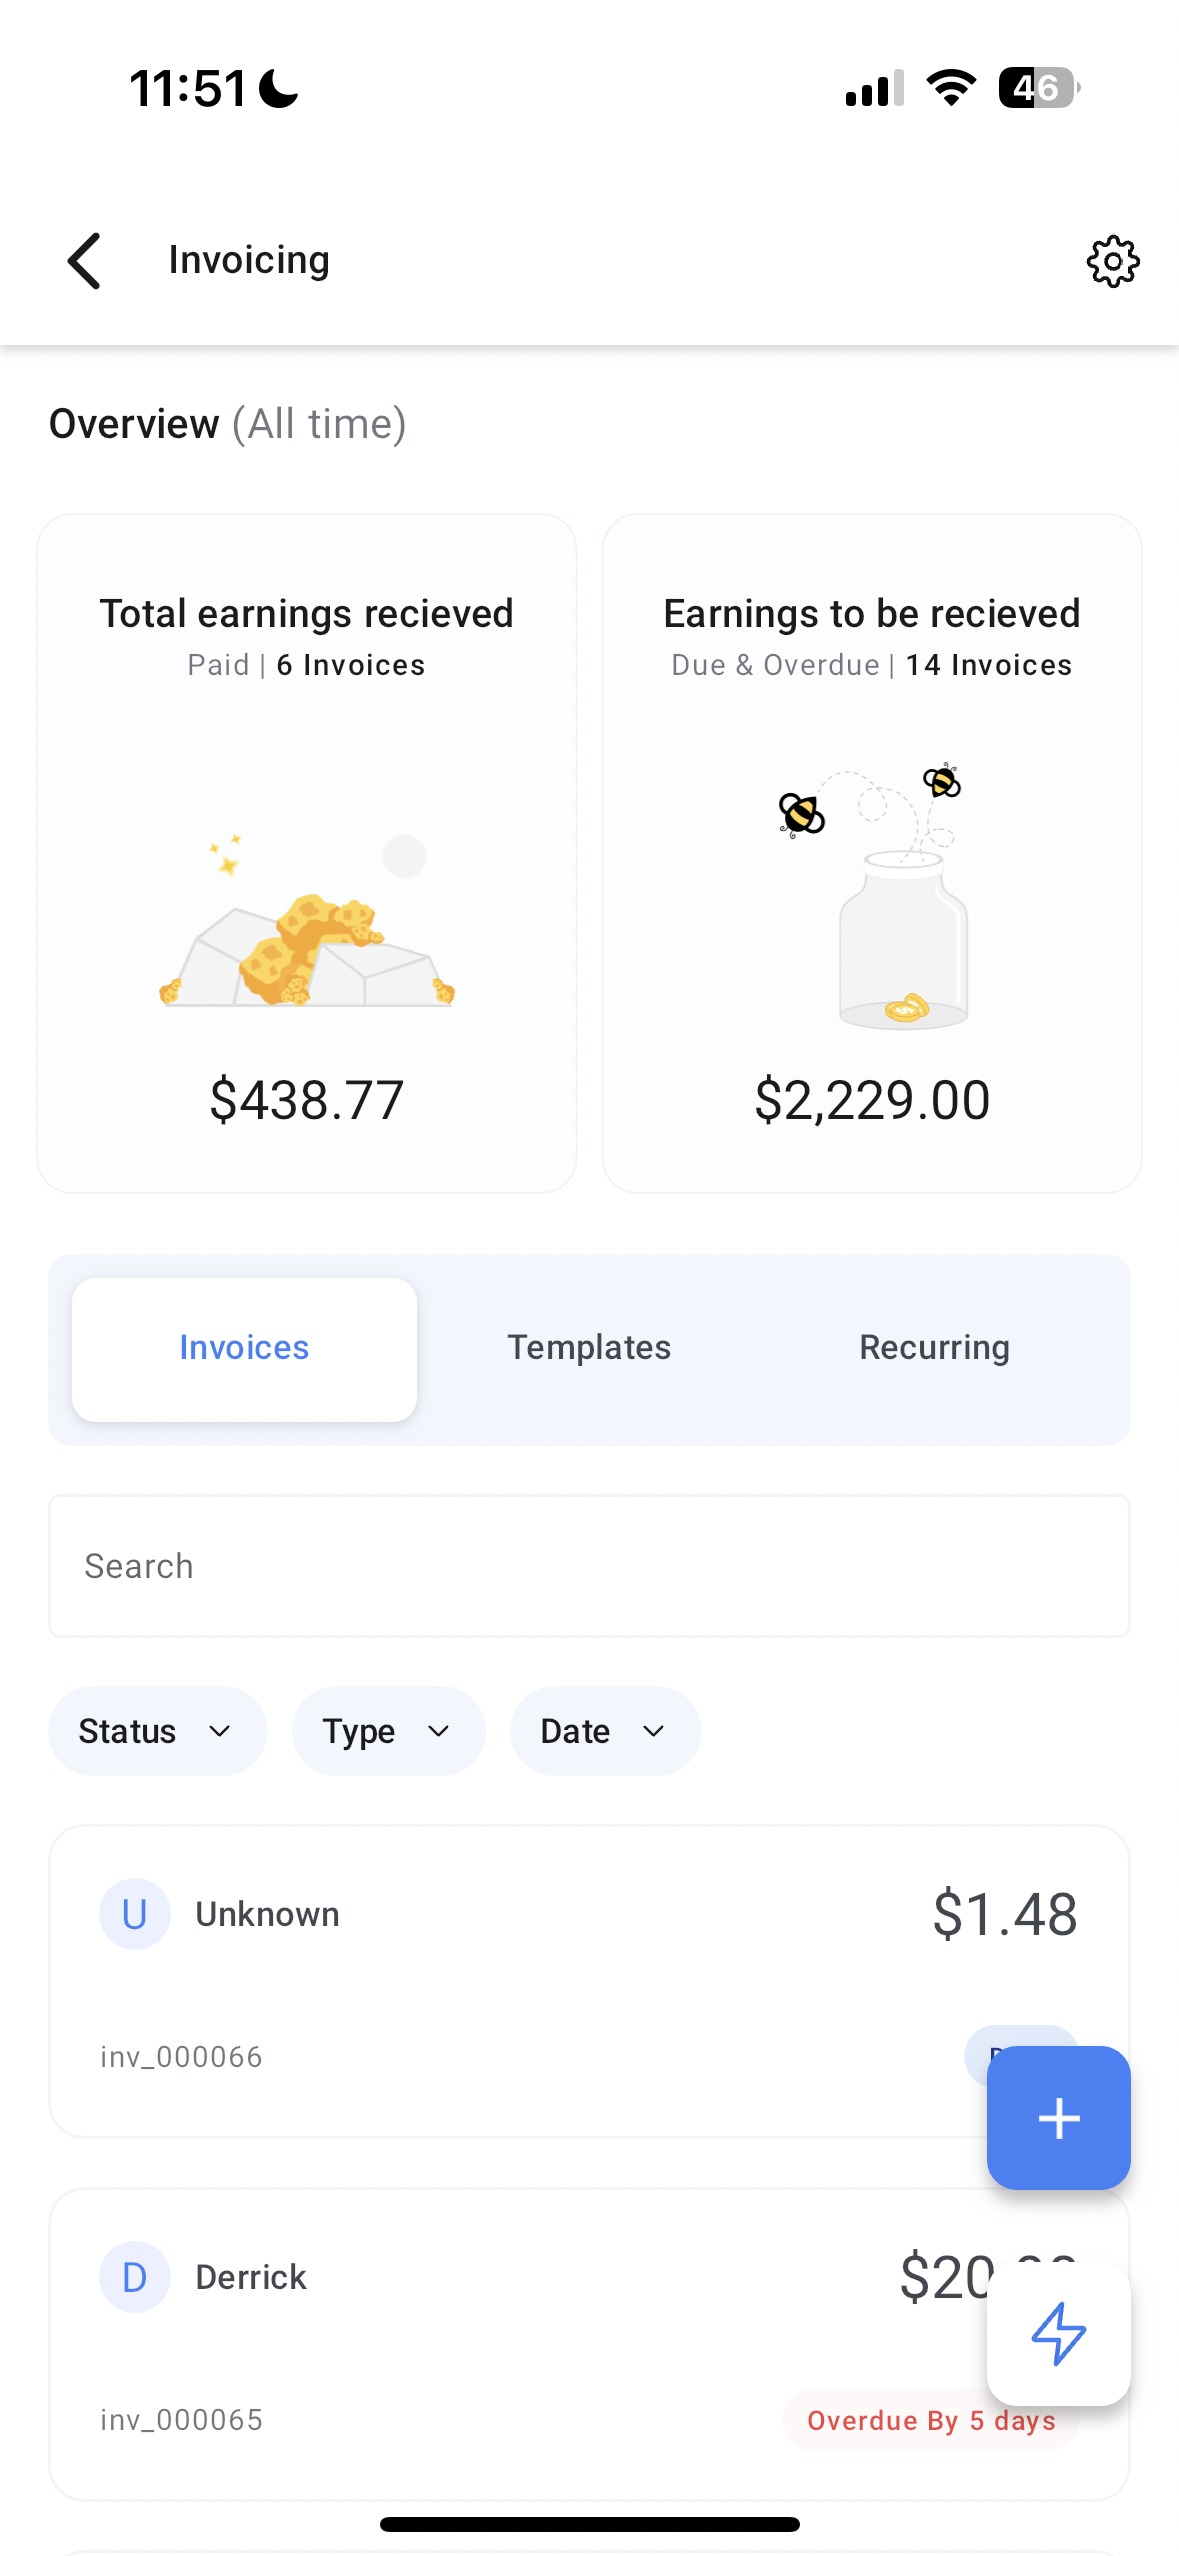
- New Invoice Dashboard - A new dashboard that displays the most important information you want to view - Earnings that have been collected vs Earnings yet to be collected.
- Invoice listing - A clean interface to see all of your invoices in every state (draft, due, paid, etc.), irrespective of whether the invoice was created on web or mobile.
- Invoice card interactions - A new way to interact with your invoice cards:
- Tap - Primary action for that invoice (E.g. edit invoice for a draft invoice)
- Long press - All the actions that can be performed for that invoice (E.g. Convert to template, Record payment, Edit, etc.)
- Left swipe - Reveal the two most significant actions along with more, an option to view all (E.g. For a due invoice, you will see options to record payment, edit, and more)
- Invoice builder improved flow - A 4-step flow to create an invoice in under 45 seconds:
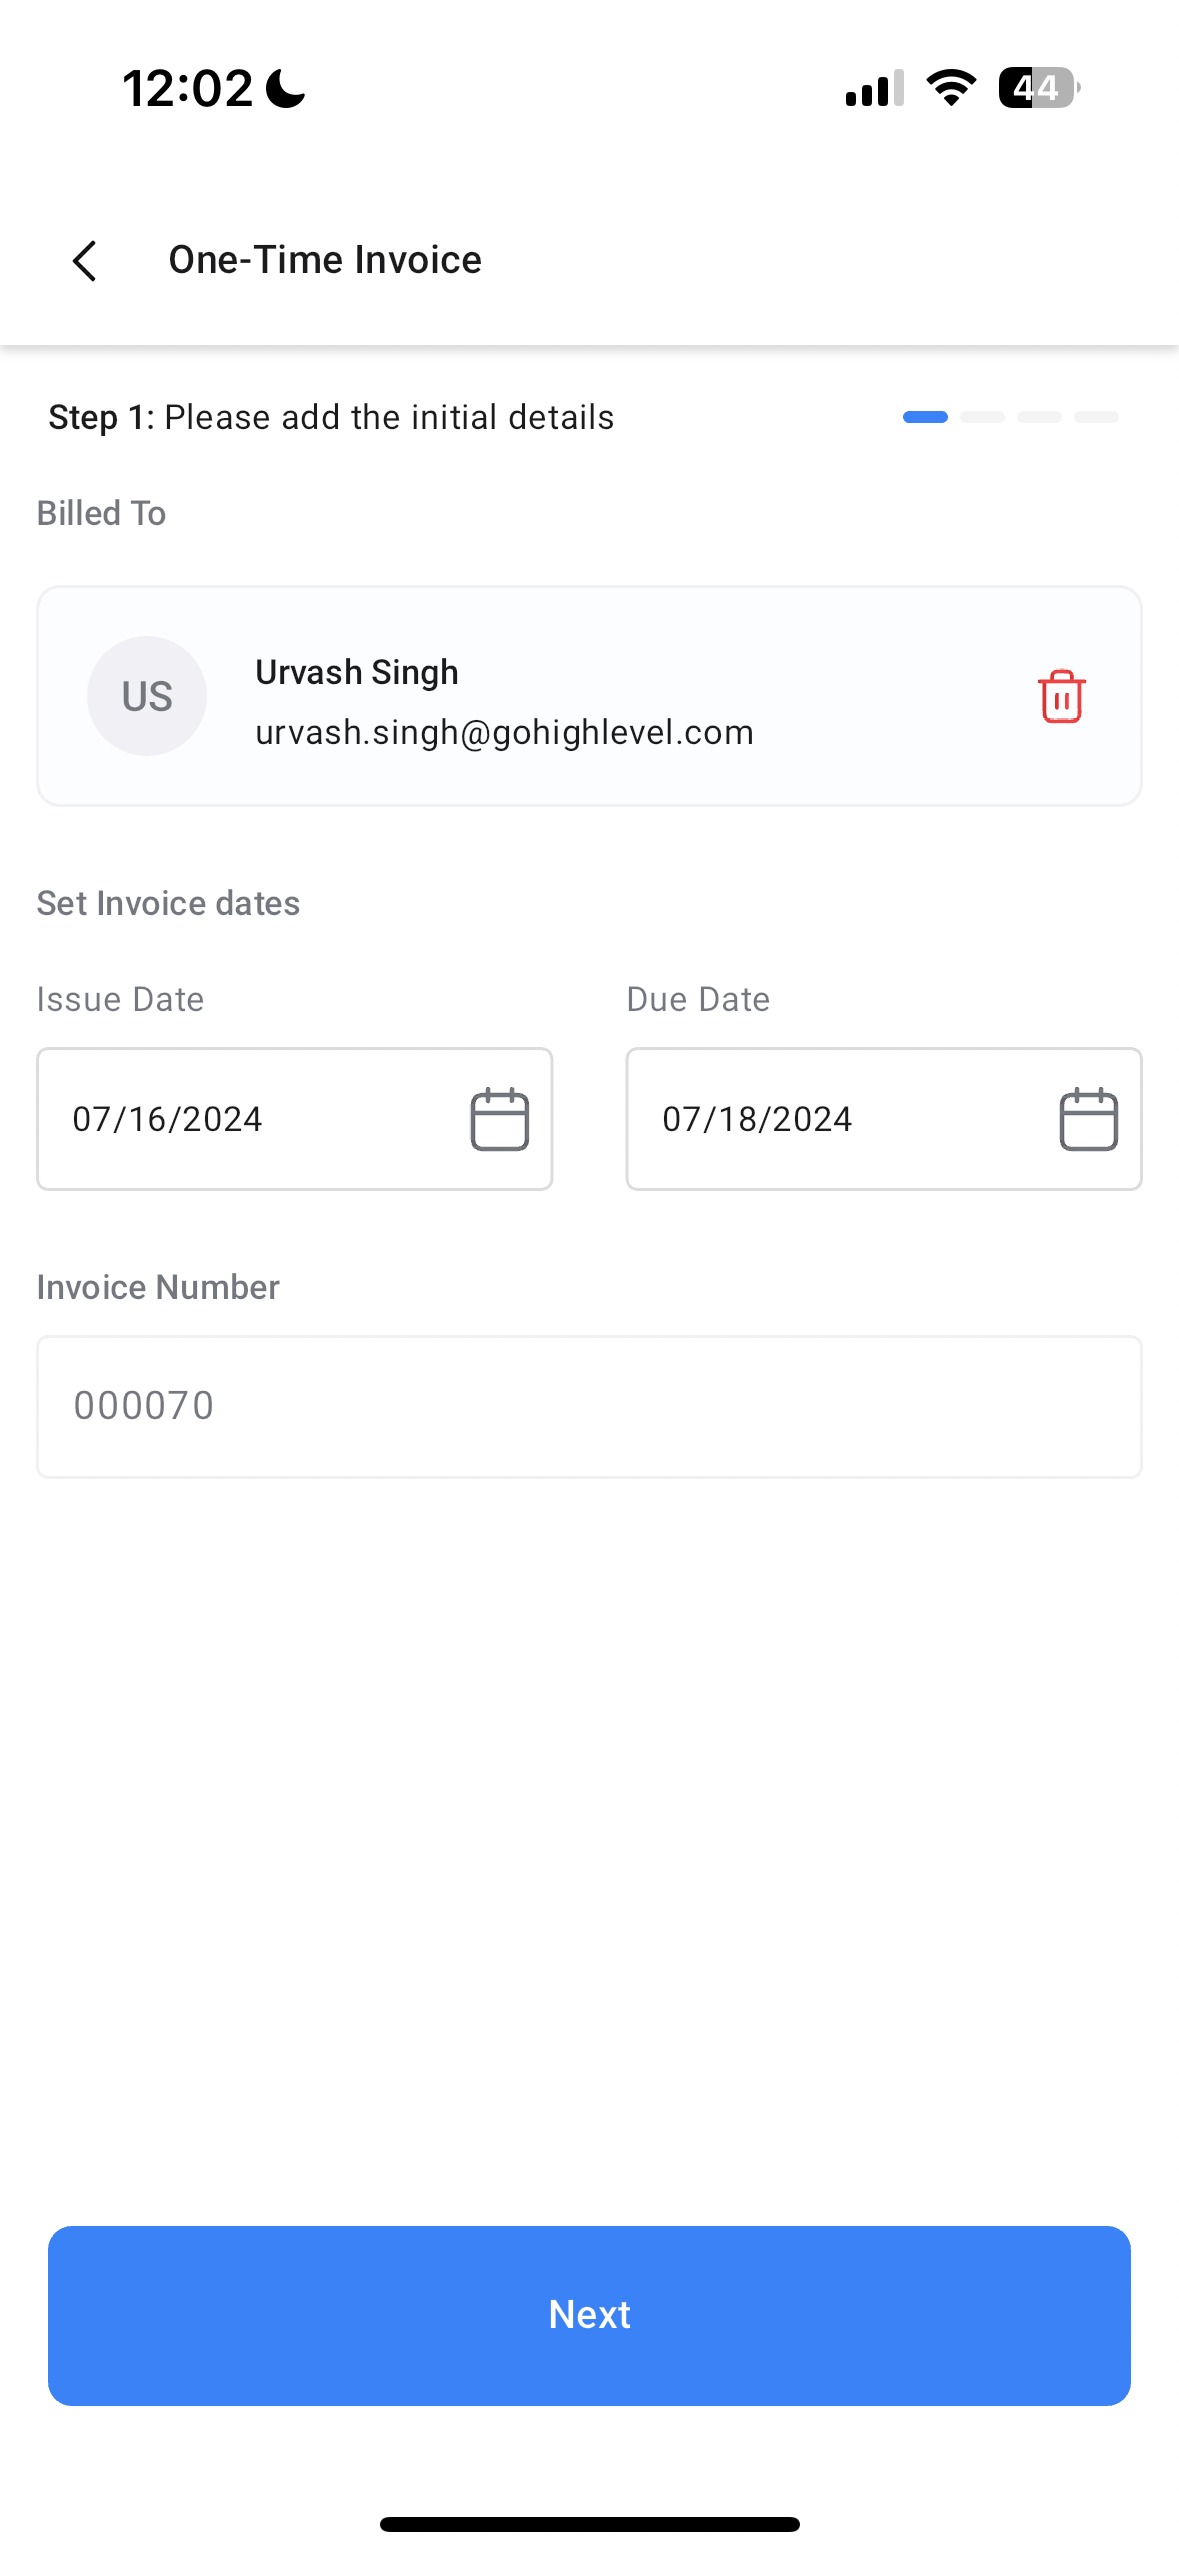
- Initial details - Invoice recipient, Start date, Due Date, and Frequency (applicable only for recurring invoices).
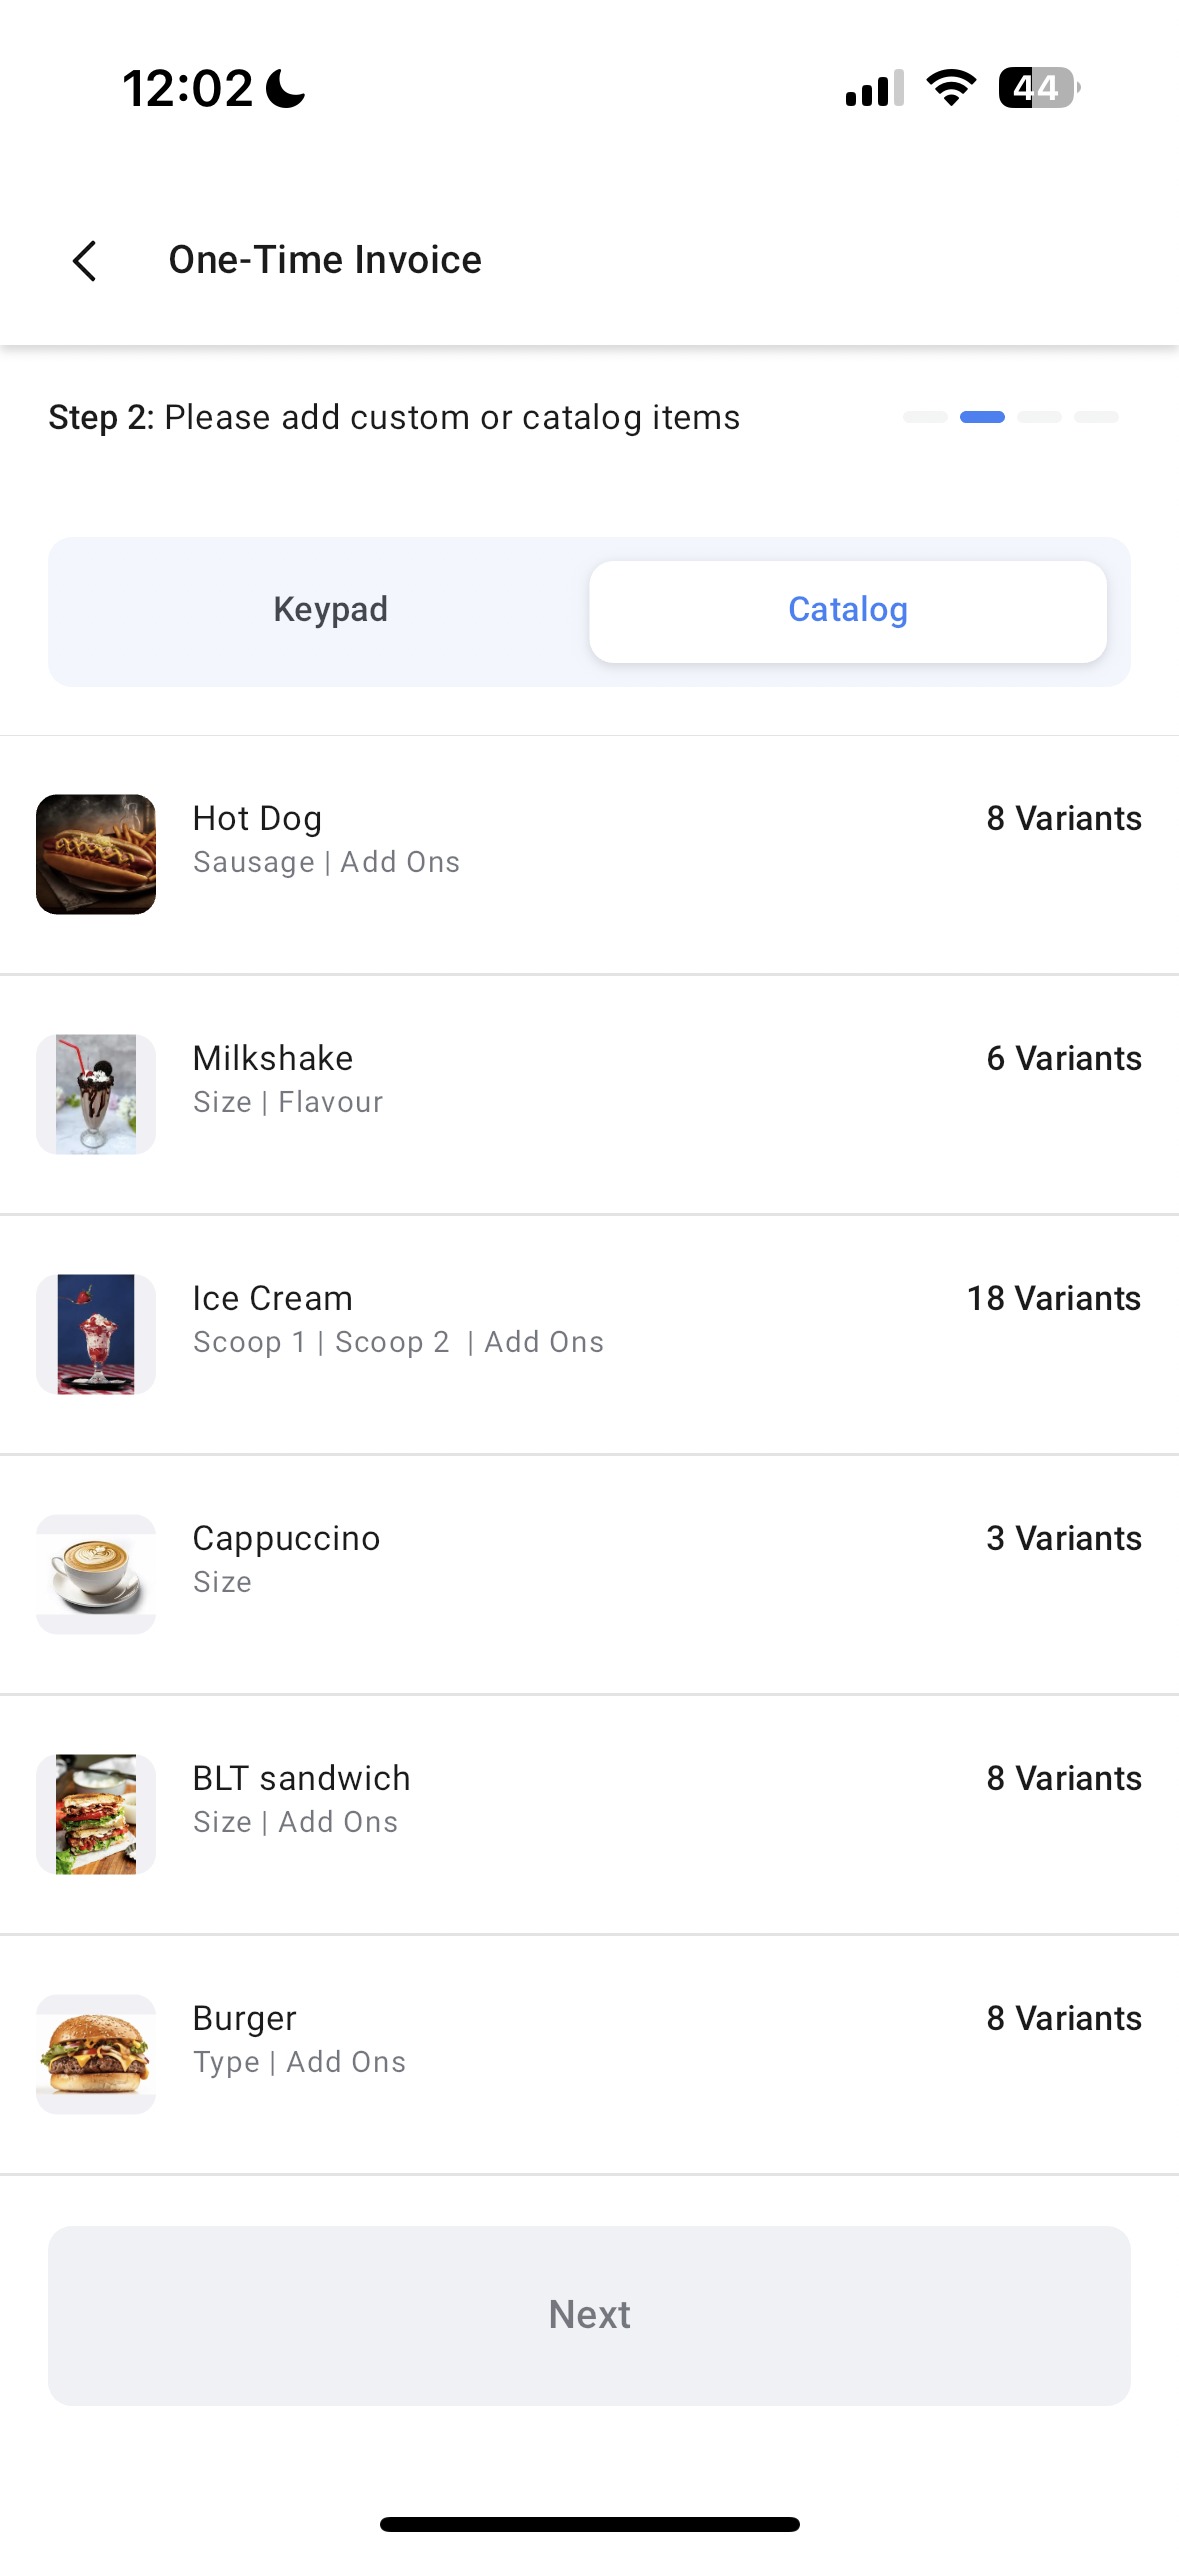
- Items - Catalog items, Custom items (using keypad).
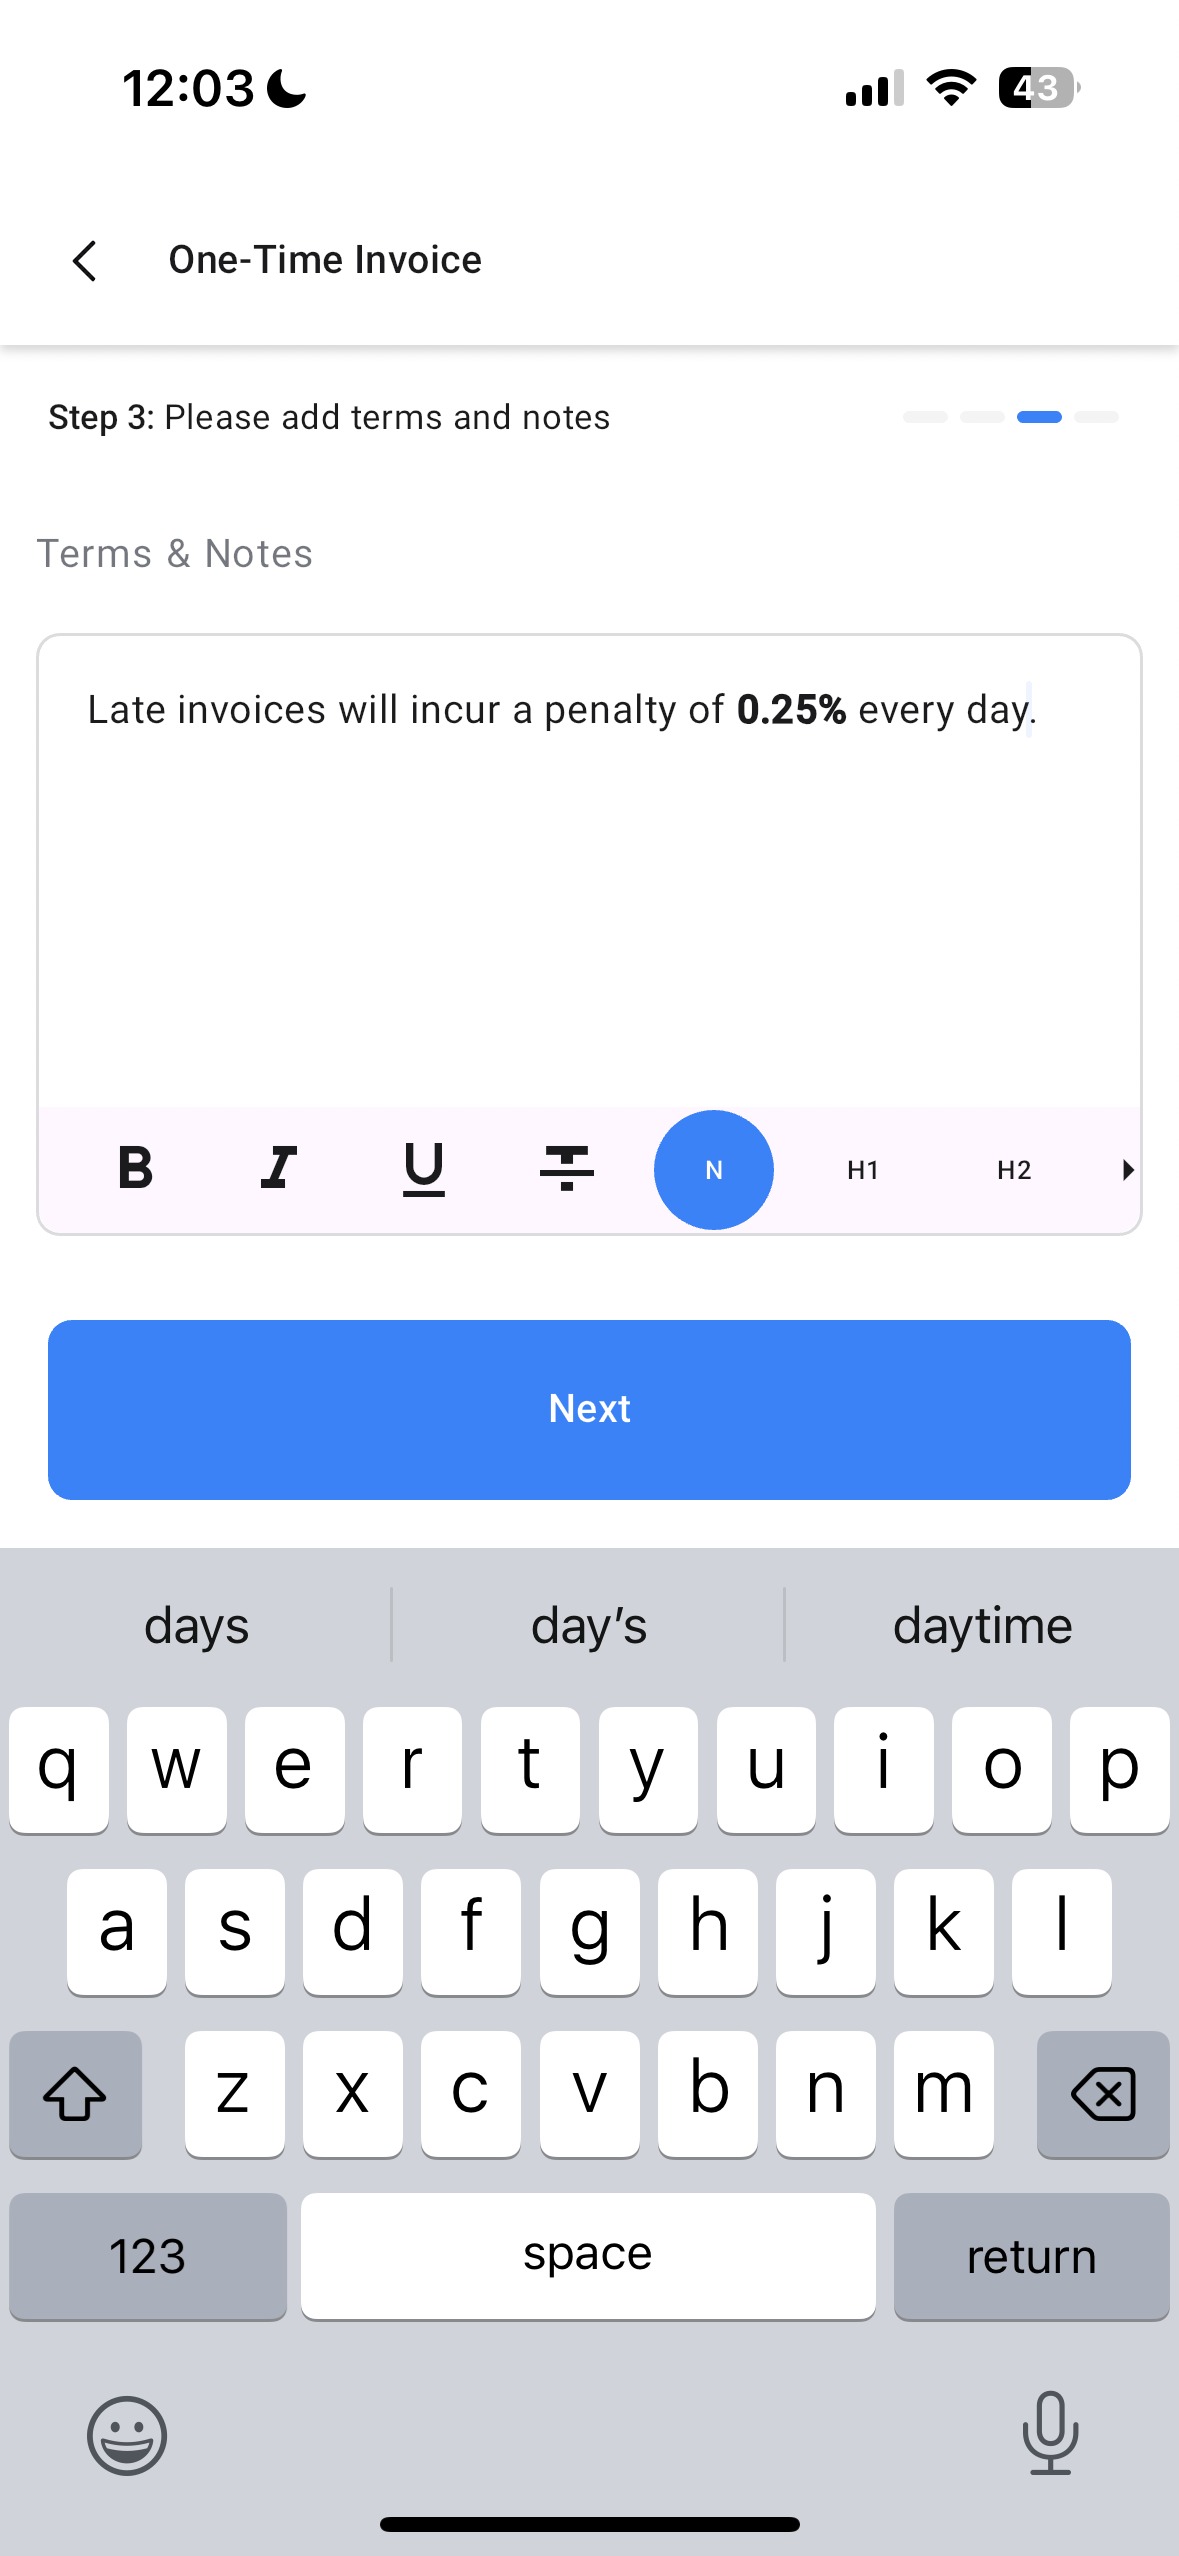
- Terms and Notes - Review your invoice terms.
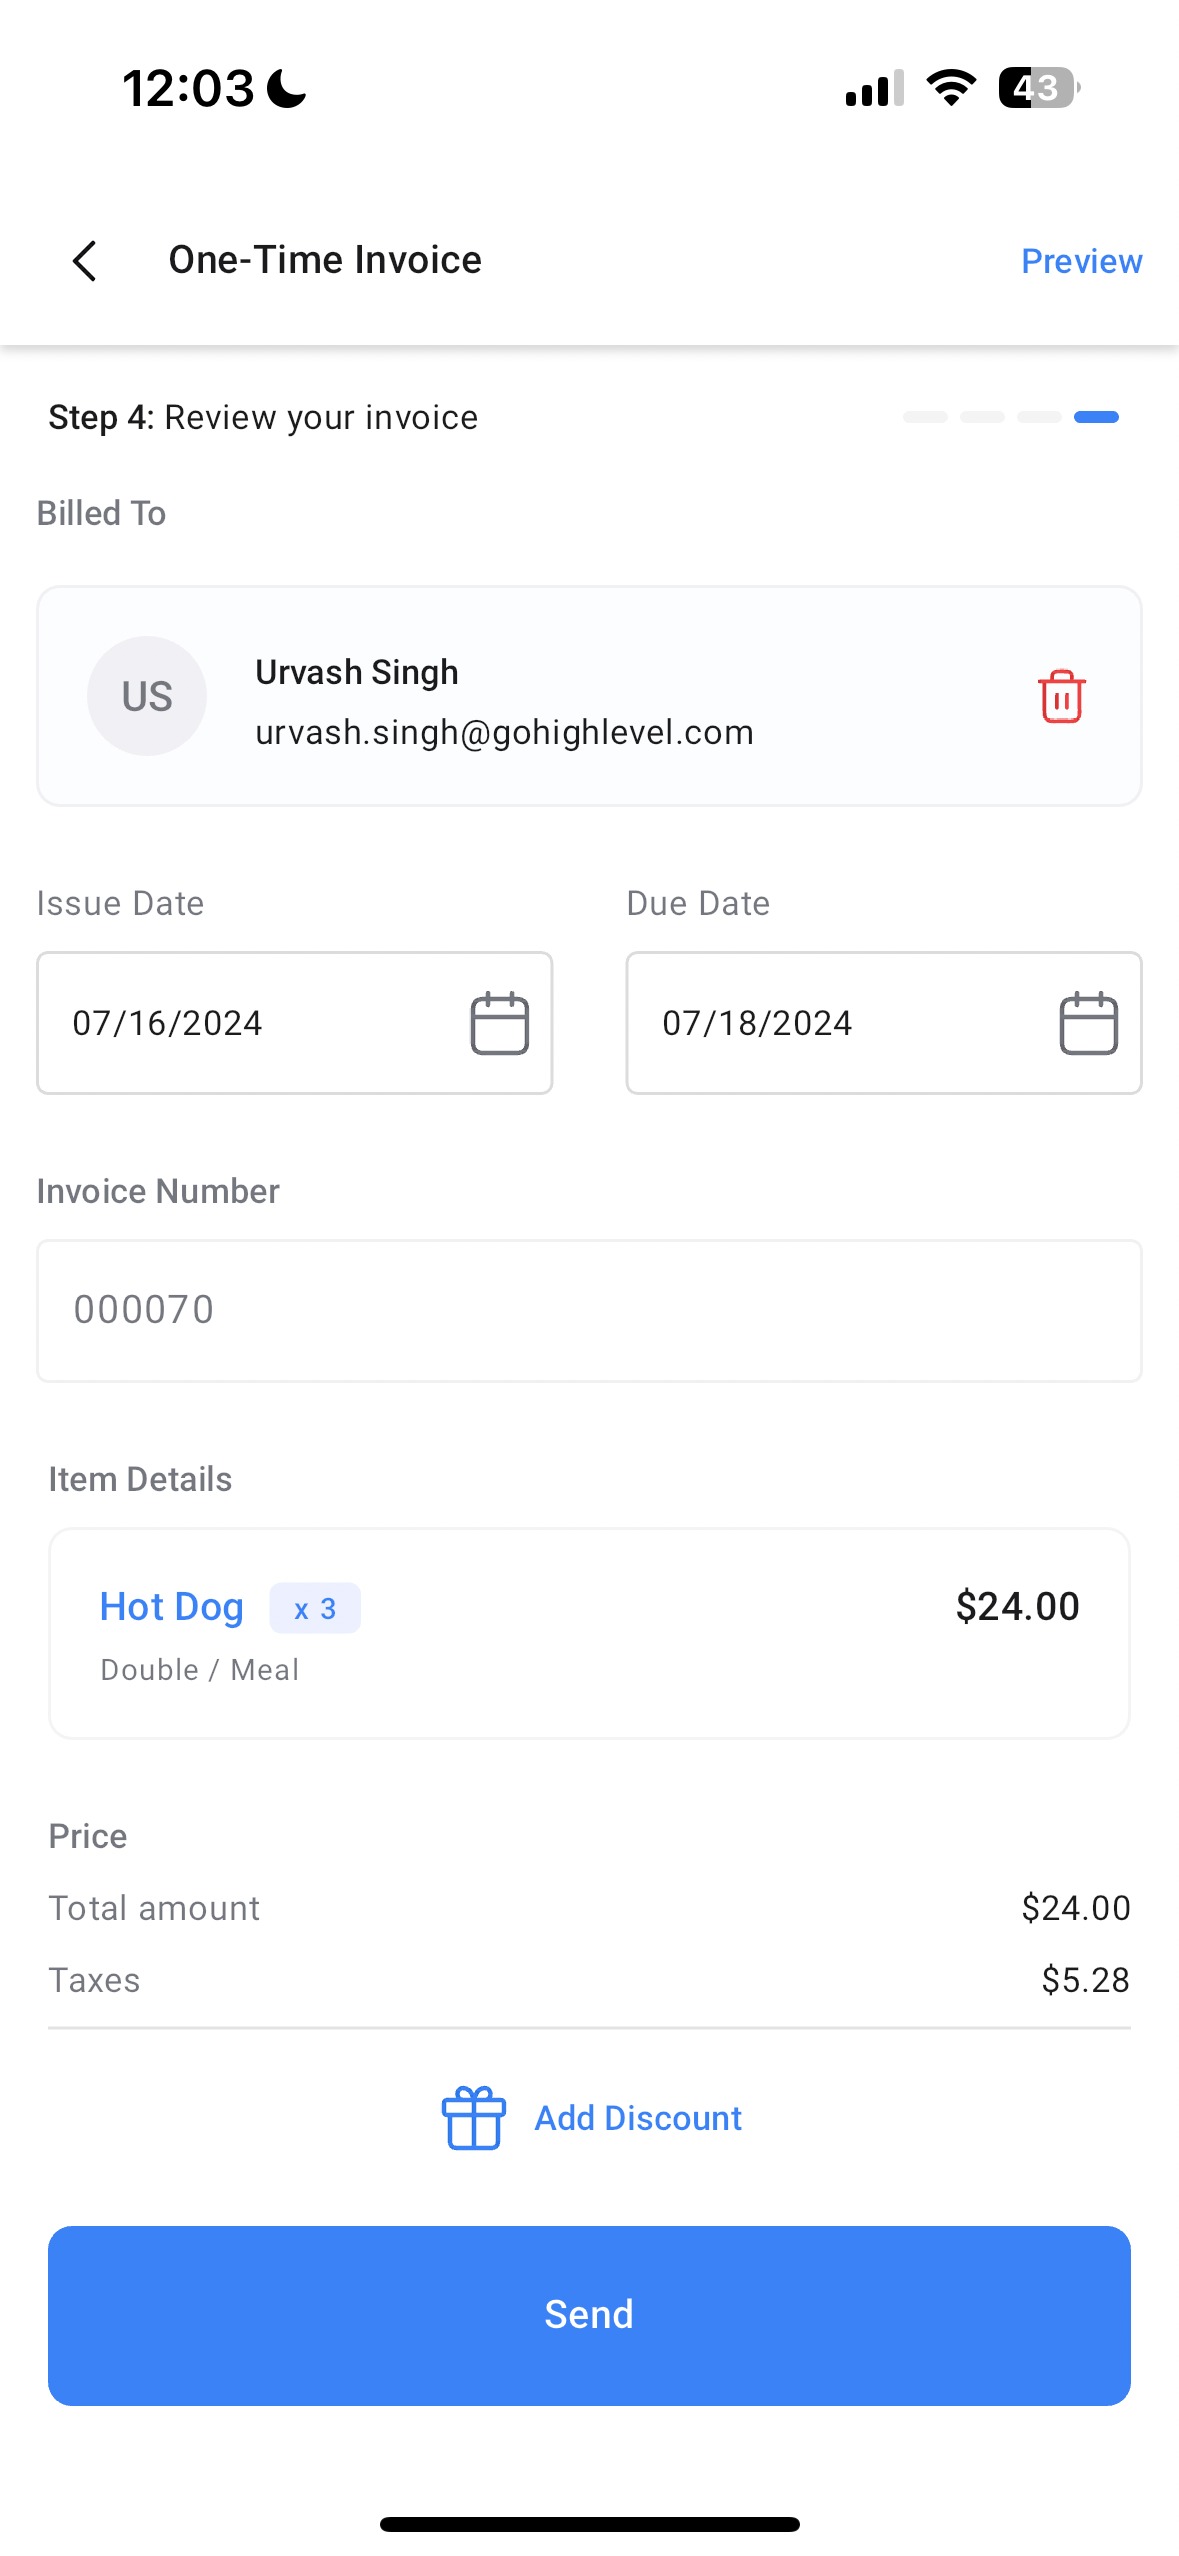
- Review and Send - Review your invoice with all the information on a single page. You can also add a discount here.
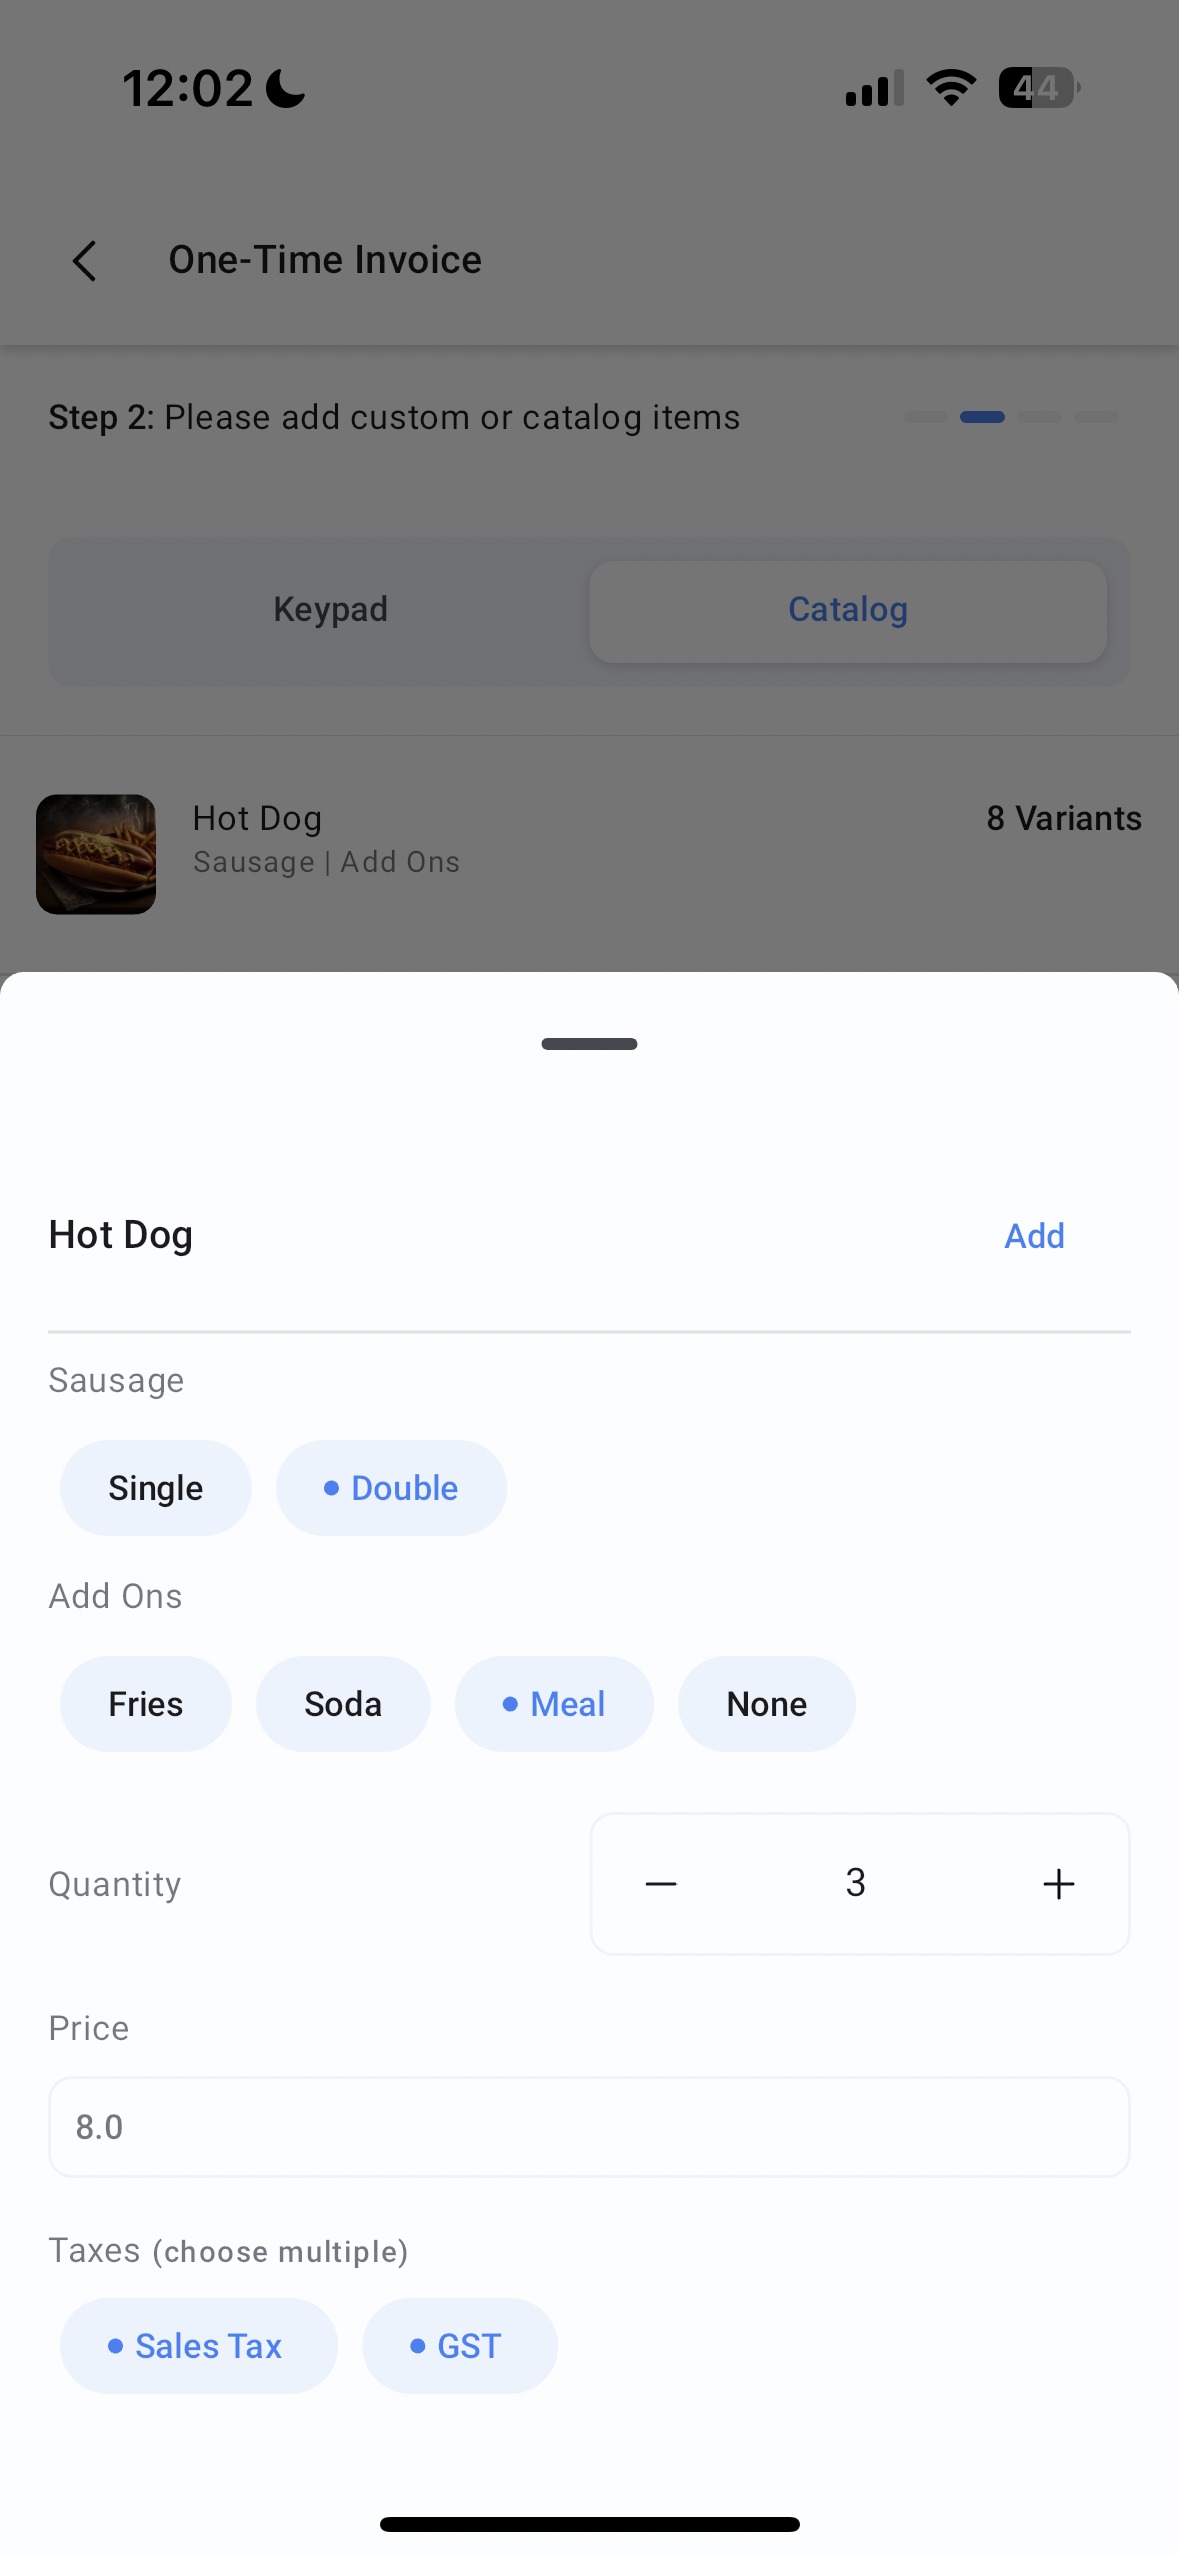
- Real time tax selection - A new way of adding taxes to products. Make sure that you link taxes to products by using the Products module on Mobile or by using Payment settings -> Taxes on web. Every time you create an invoice, you will have the option to pick the relevant taxes while selecting the variant and choosing the quantity.
- Partial quantity support - Quantities are no longer restricted to whole numbers. You can now add partial quantities with upto 2 decimal places. To do that, just tap on the quantity field and type out the relevant quantity (1.25, 6.83, etc.)
- Create invoices with templates - Navigate to the templates tab and use your templates to quickly create a new invoice.
- POS transaction to Invoice - You can now build an invoice using the POS module. Start a new POS transaction by adding the items (with relevant quantities and taxes, link a contact, and add a discount. Once you head over to the Payments instruments screen, tap on "Convert to Invoice". All of the important information will already be filled. You can quickly choose the due date, review your terms, and review the final invoice before sending it out.
How It Works
- Open the mobile app and tap on the hamburger menu on the top left.
- Tap on Invoices. You will see 2 widgets depicting the amount you have collected from your invoices and the amount that is yet to be paid. You will also be able to see a list of all the invoices that you have created for that subaccount, either on mobile or on web. You can use the left swipe gesture on the invoice to reveal the primary actions (based on the status of the invoice) - e.g. for an invoice that is due, you will see the option to Edit, Record Payment and More that reveals all the actions you can perform on that invoice.
- To create a new invoice, tap on the floating + button on the bottom right of the screen. Choose between a one-time invoice and a recurring invoice.
- The first step will be to fill out the initial details - Recipient of the Invoice, Start date, and Due date. In case you chose recurring invoice, you will have the option to configure the frequency of payments.
- The second step involves adding items to your invoice. Choose items from your product catalog or add custom items with a note using the keypad section. Select the right variants (if applicable), adjust the quantity, and select the applicable taxes.
- The third step allows you to review your terms and notes. Here you can lay down the terms of this invoice, including information about late fee if the invoice isn't paid on time.
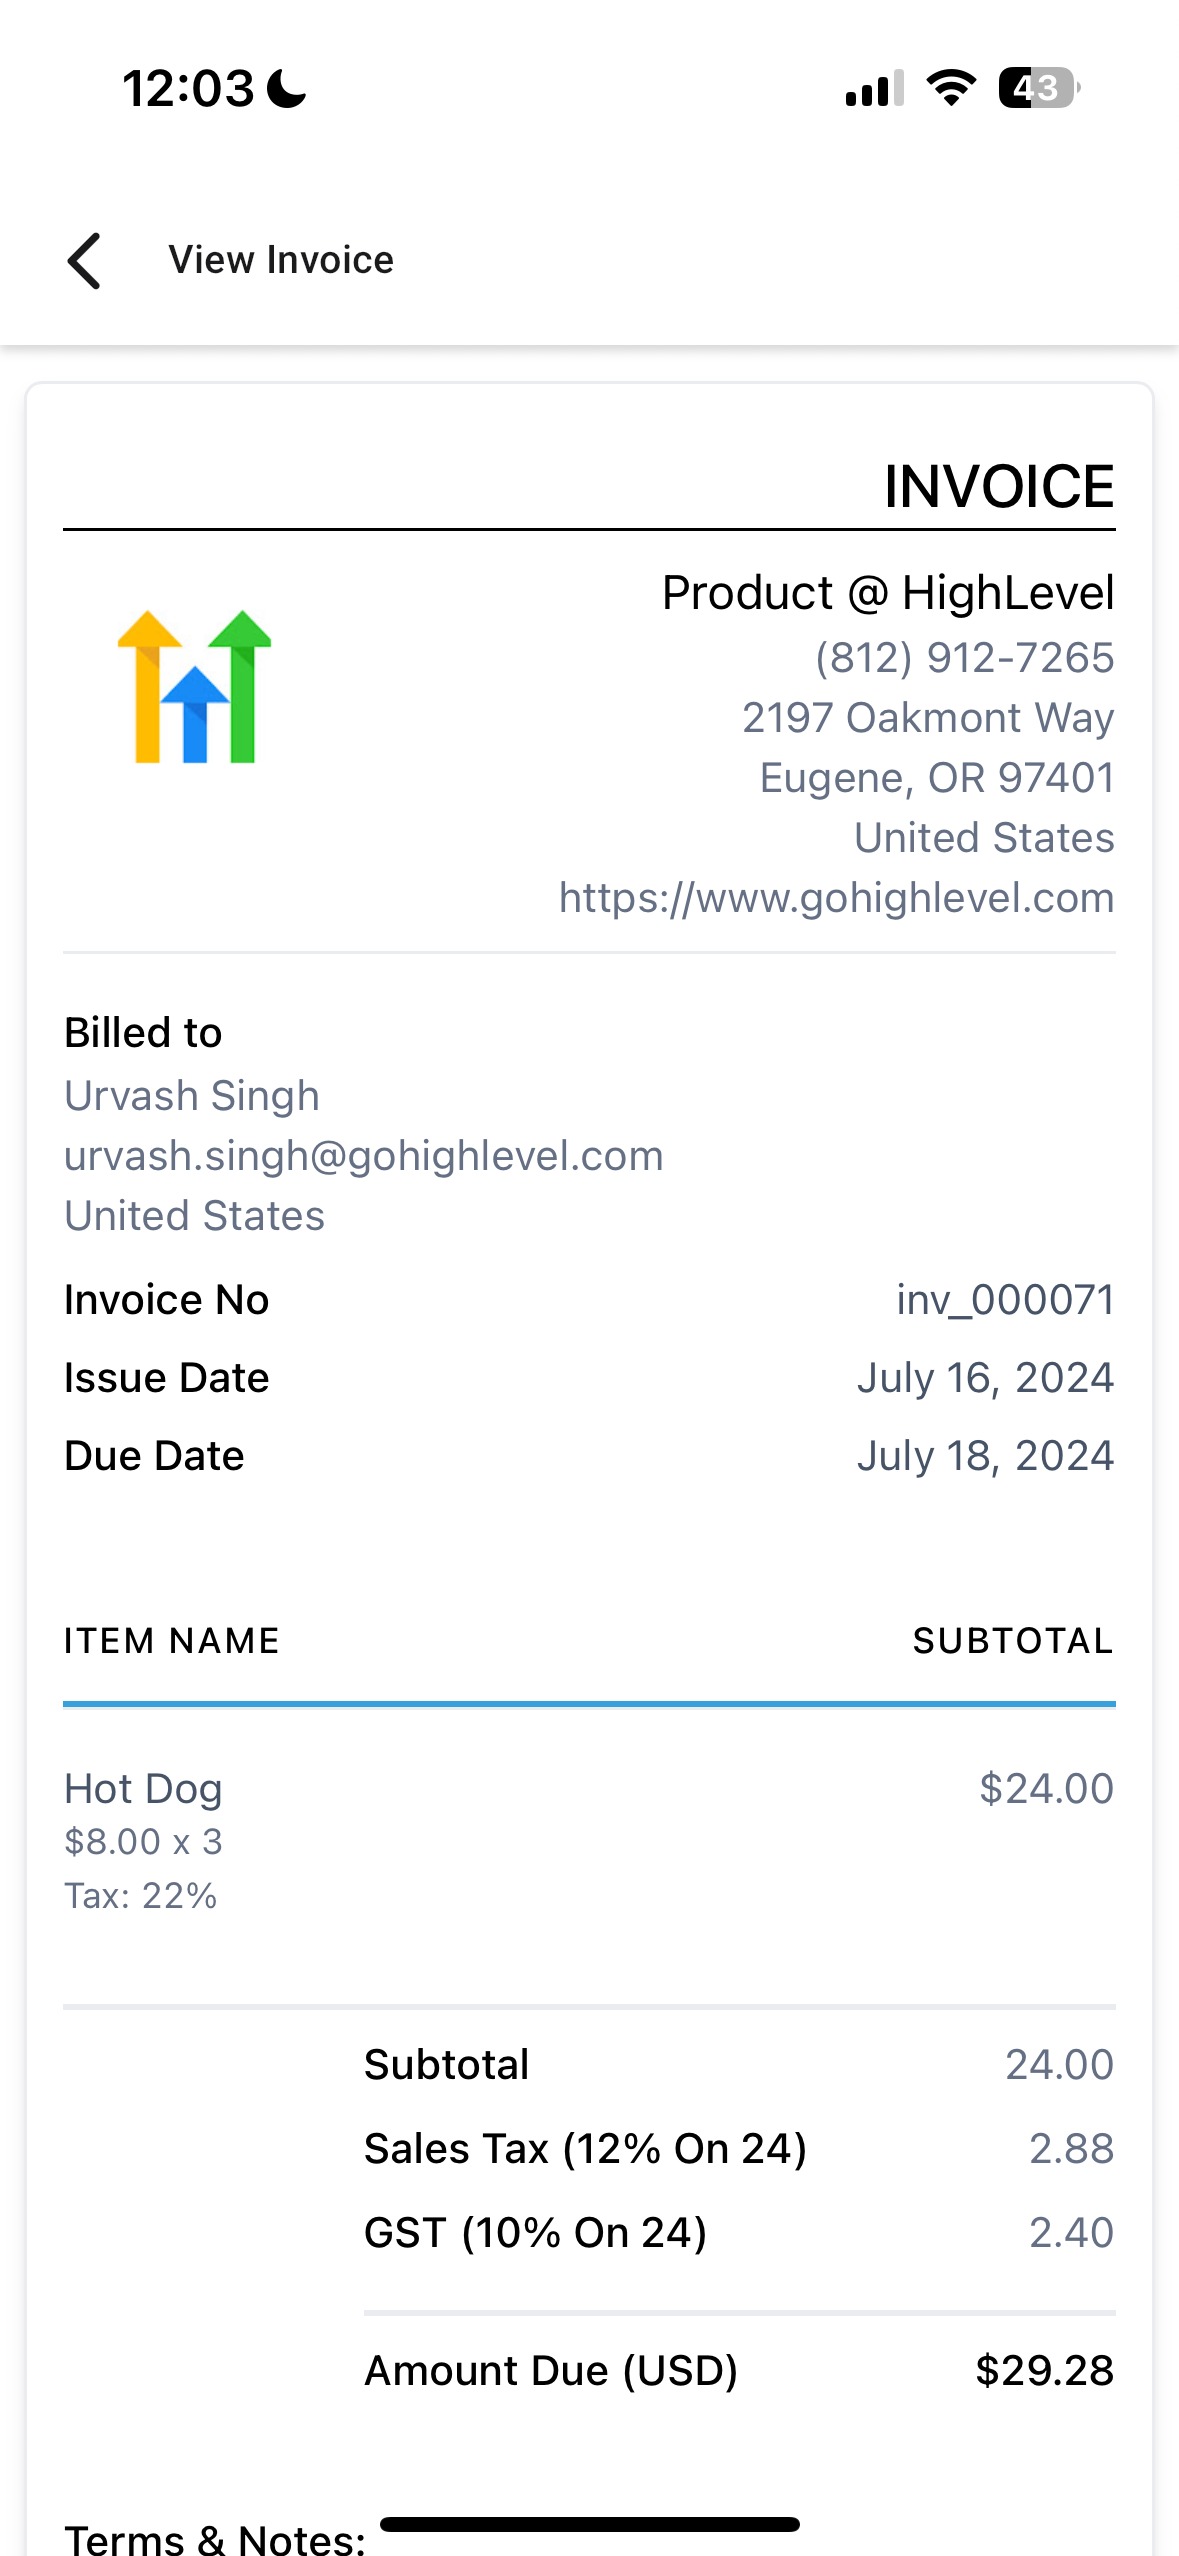
- Finally, the fourth step involves you reviewing the invoice. You can adjust the quantity of the items, change the recipient, and even add a discount. You can also see a web preview of the invoice by tapping on the Preview button present on the top right of the screen.
- Once your invoice looks good to go, tap on Send. This will open up a bottom sheet where you can select the right channel to send your invoice. You can choose to send the invoice via either email, sms, or both (make sure that your contact has an email as well as a phone number).
- There you go! You have just sent out your invoice. To record a payment for this invoice, just head over to the Invoice list, navigate to the relevant invoice card, left swipe the card and tap on Record Payment. You will be able to record payment using tap to pay, cash, cards on file, or manual entry.
Why it Matters
This update brings a lot of new features available in invoices on web in a very simple and intuitive flow. Building an invoice has never been simpler before!