How to Set Up WhatsApp for a Sub-Account
WhatsApp Business Integration Guide
Connect your WhatsApp Business account to Chat To Clients CRM. Choose the method that fits your situation.
Choose Your Method
1 Connect Your Existing WhatsApp Business AppKeep using your existing app alongside the platform (Coexistence) 2 Connect a New WhatsApp Business NumberStarting fresh with a brand-new number 3 Migrate from an Existing BSPSwitch from another Business Solution ProviderUnsupported CountriesThe Coexistence feature is not available for phone numbers from Nigeria or South Africa.
Start the Signup Process
Navigate to Settings > WhatsApp and select Connect your WhatsApp
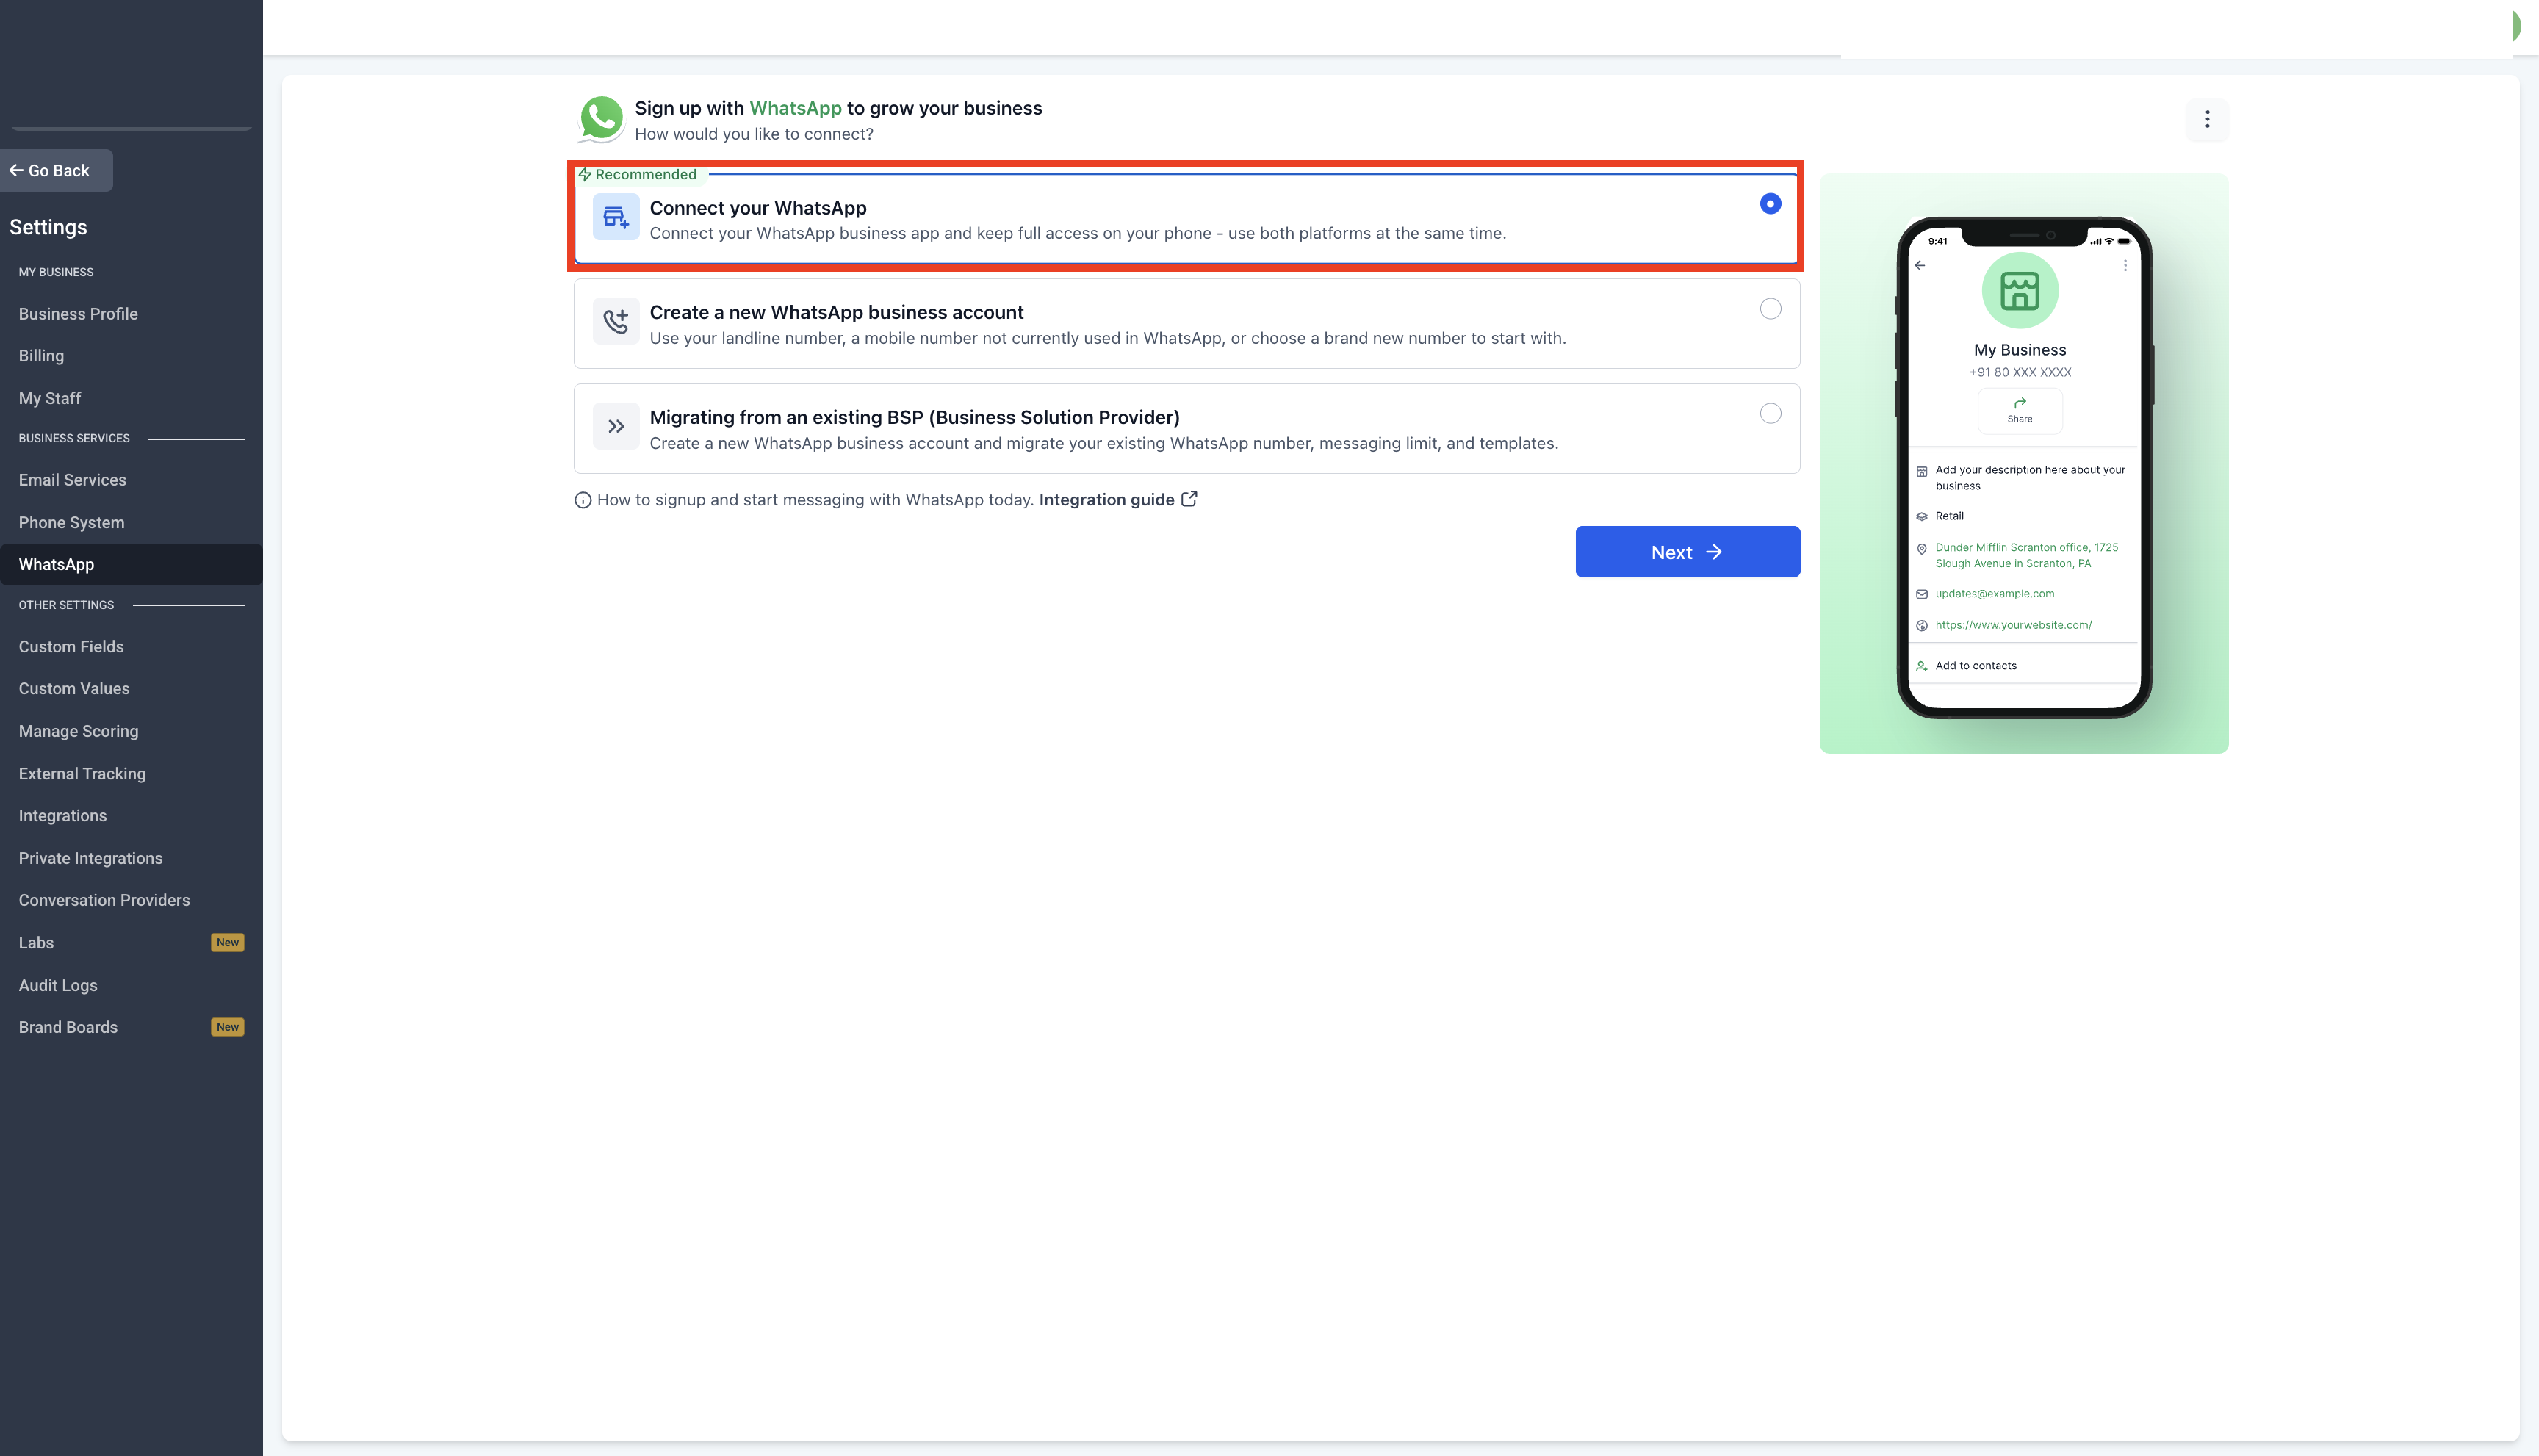
Continue with Signup
Follow the on-screen instructions to begin the registration process.
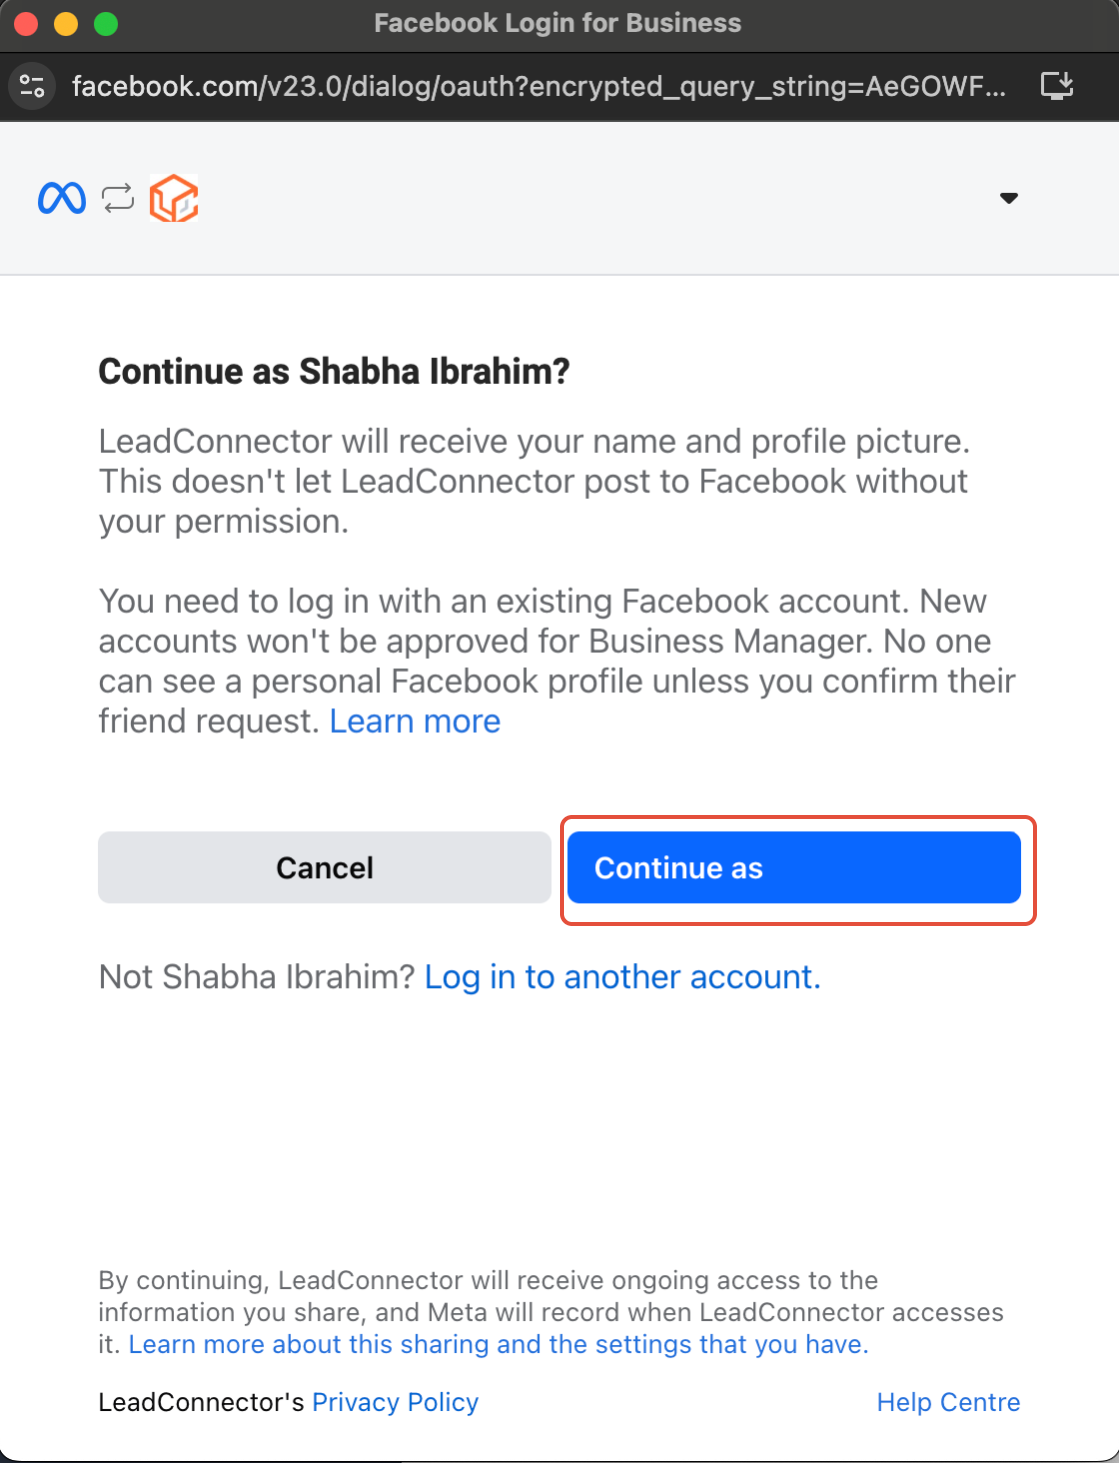
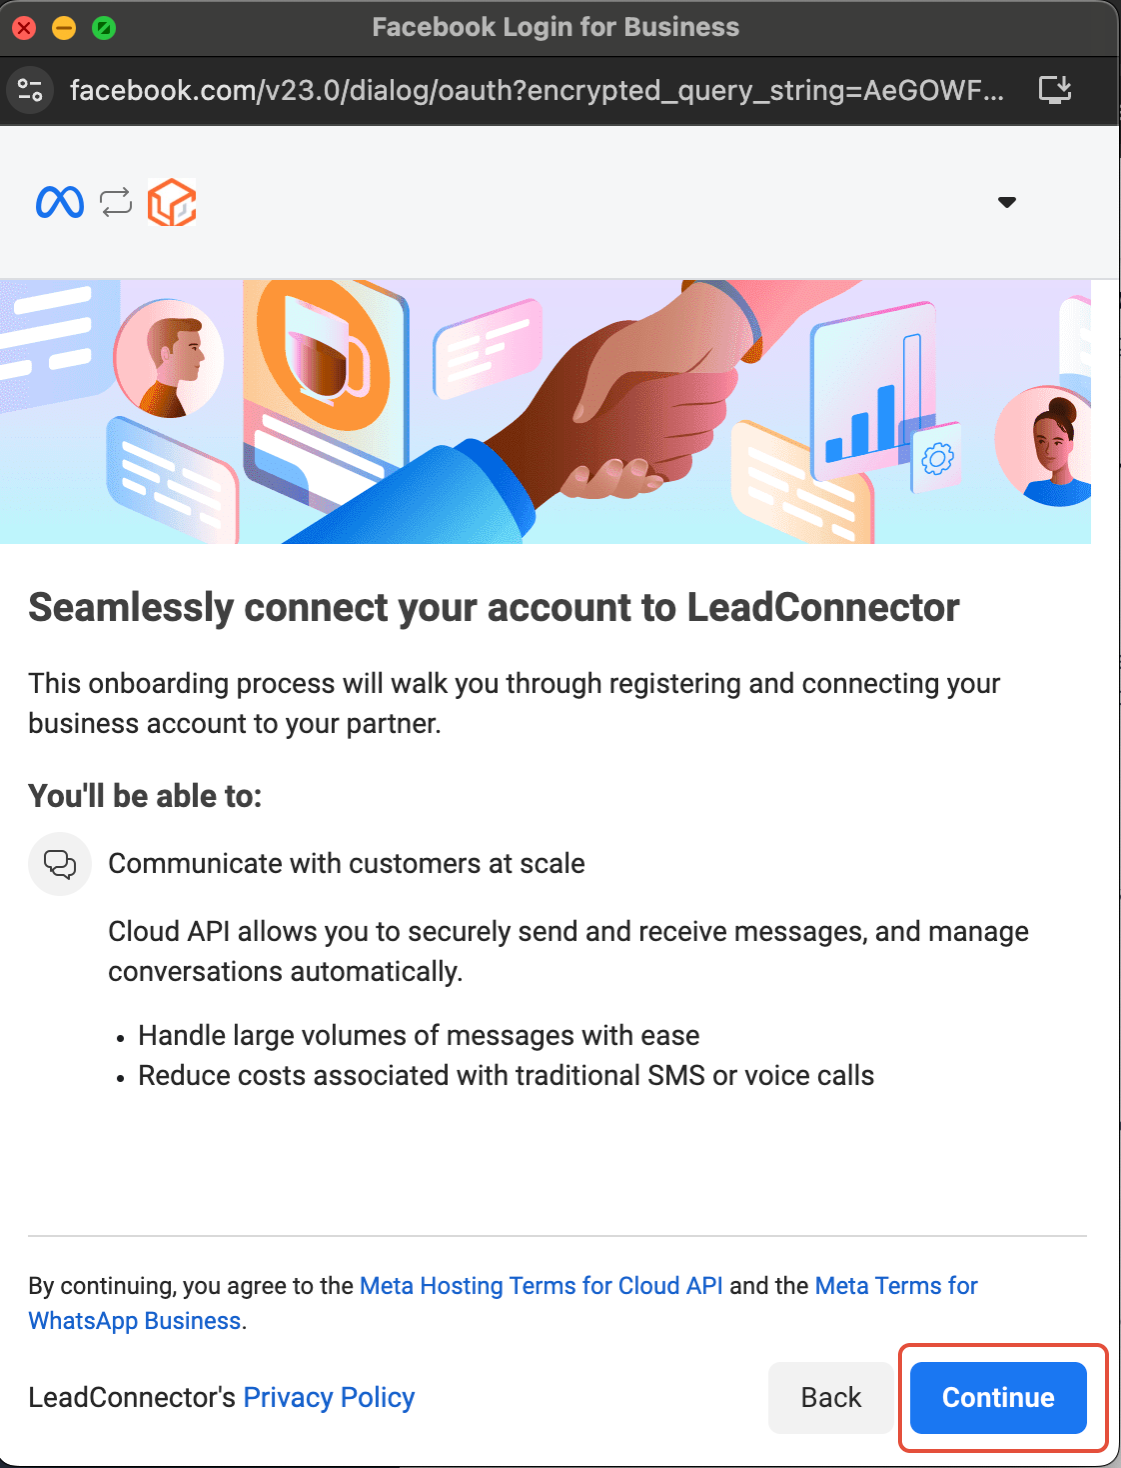
Connect to Chat To Clients CRM
Click Continue to proceed with the integration.
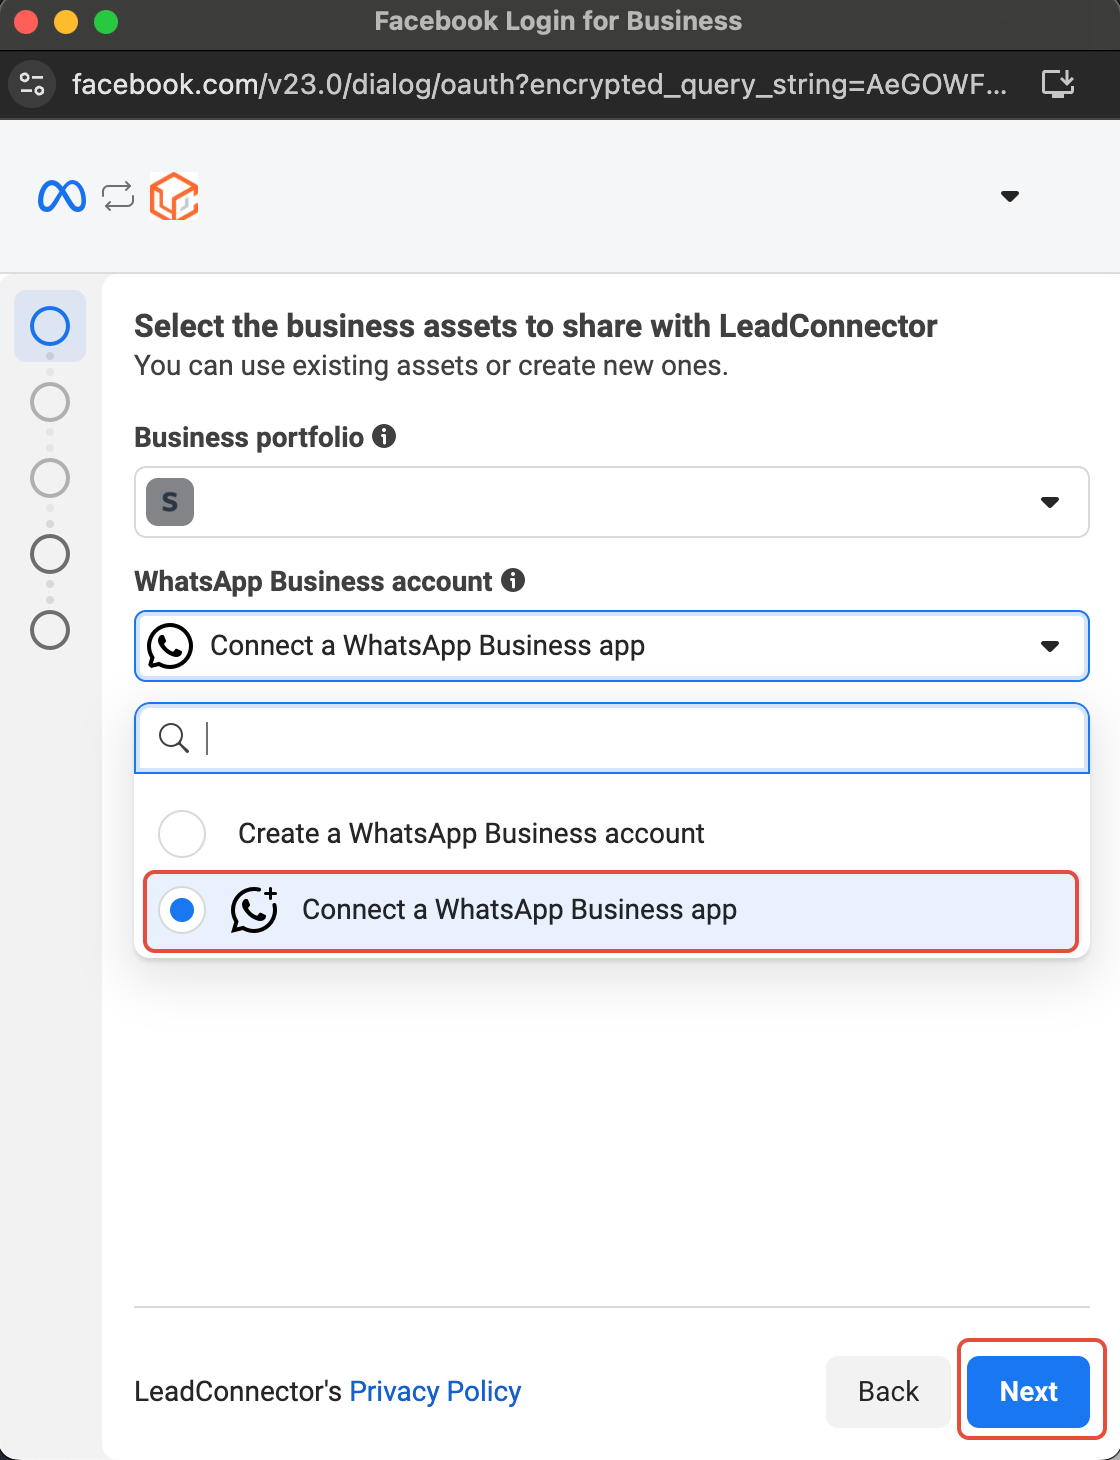
Select WhatsApp Business App
Click Connect a WhatsApp Business App, then tap Next.
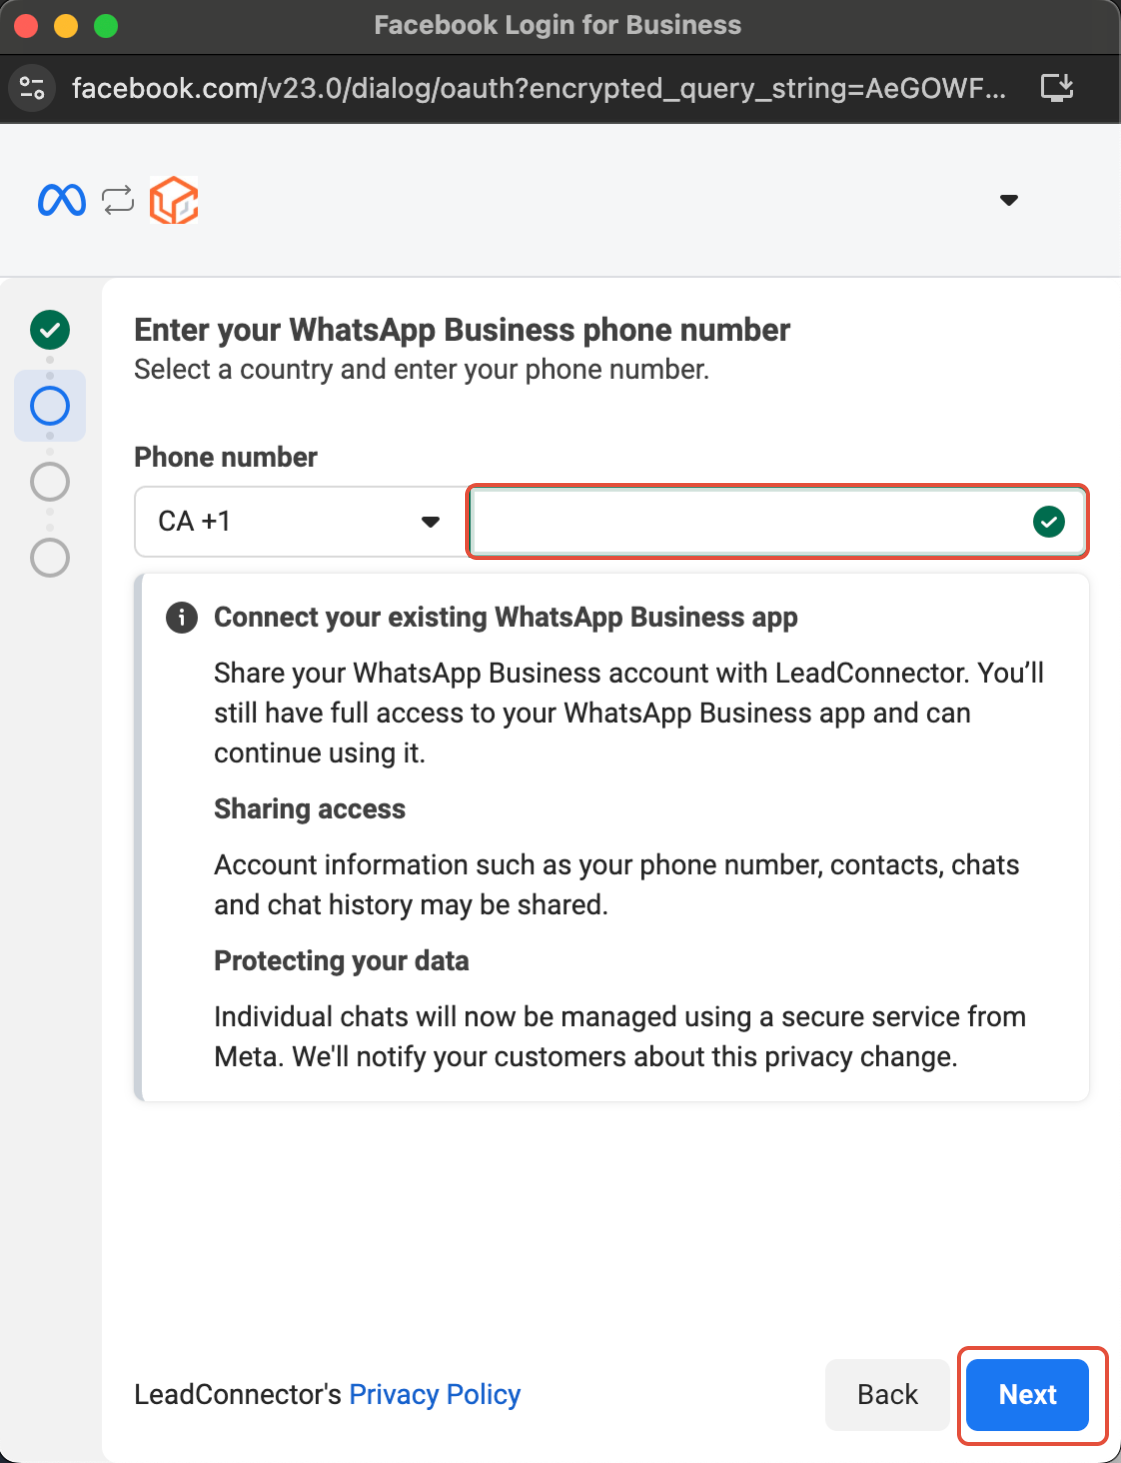
Enter Your Phone Number
Add your WhatsApp Business phone number and tap Next.
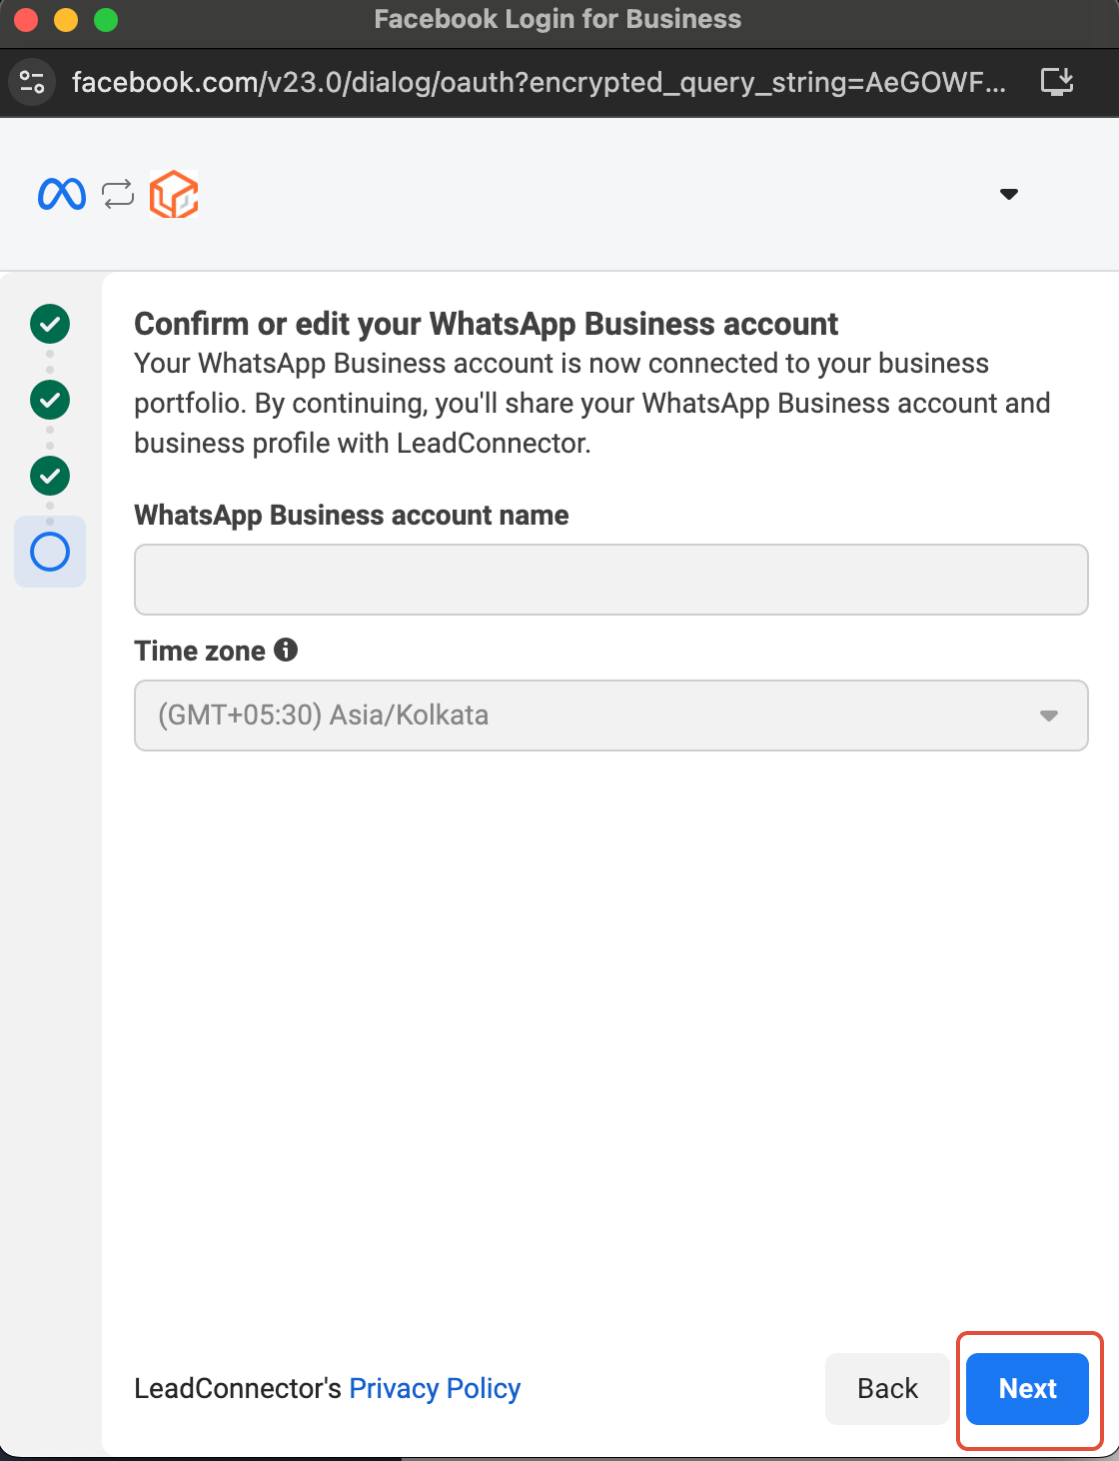
Verify Your Account Details
Review your WhatsApp Business Account details and make any corrections before proceeding.
Import Contacts & Chat History
Import contacts and up to six months of chat history from the WhatsApp Business App into Chat To Clients CRM.
- Update your WhatsApp Business App to the latest version before this step.
- Look for a message from the official Facebook Business account and scan the QR code when prompted.
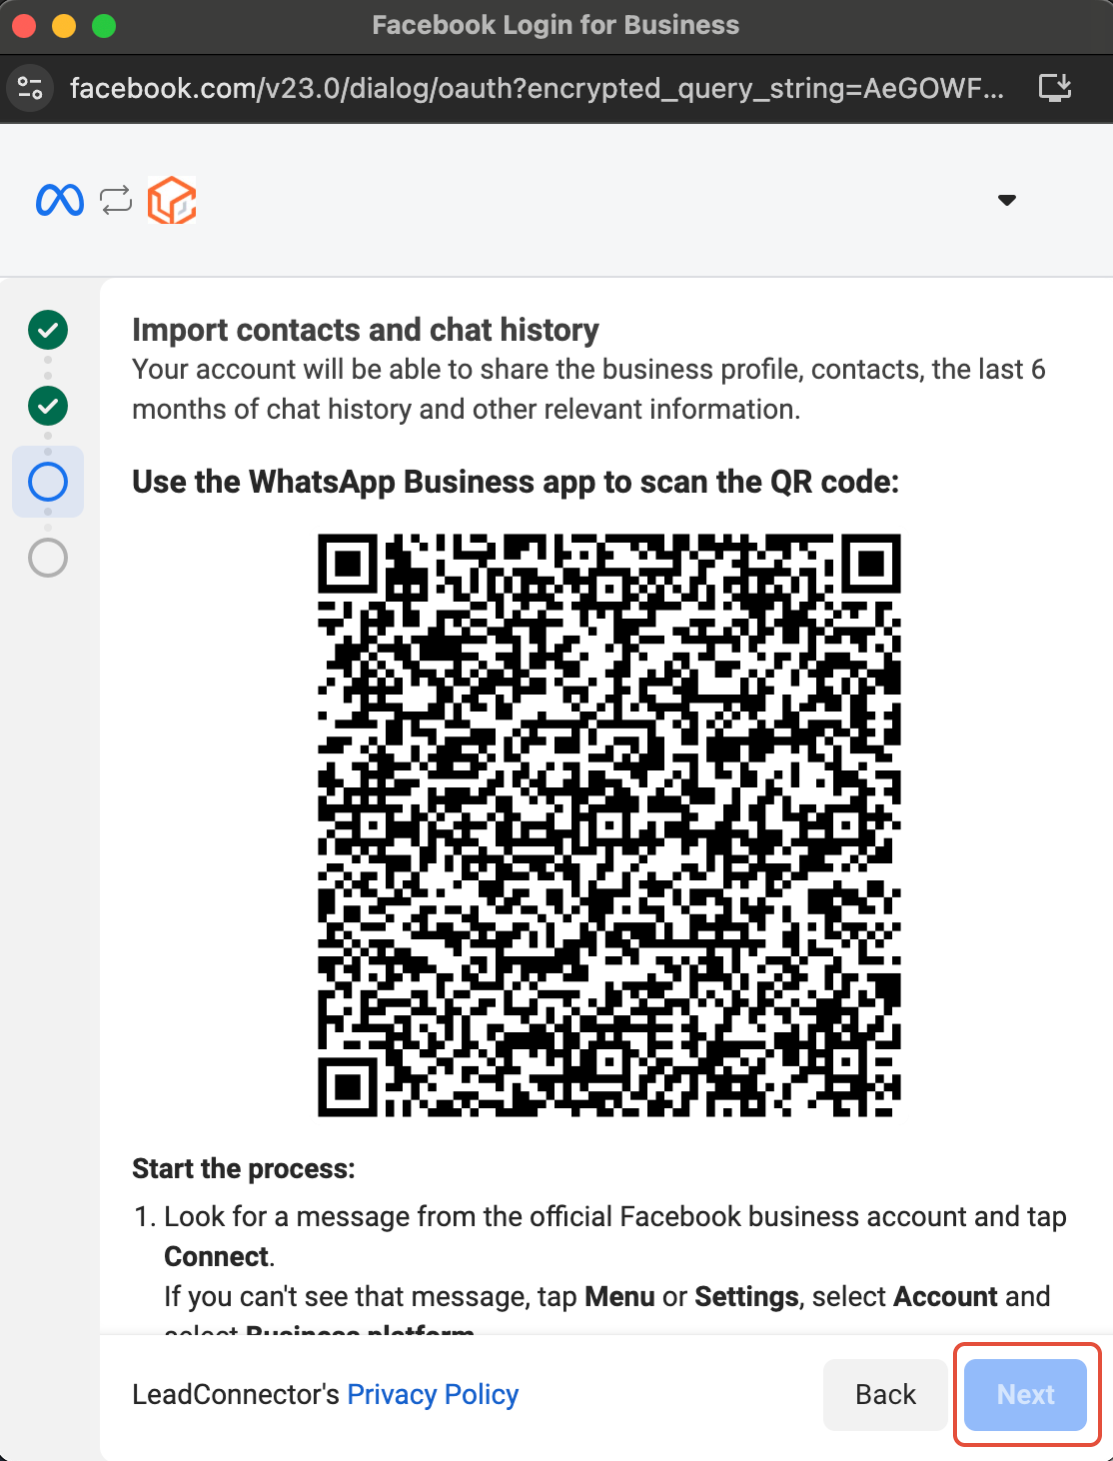
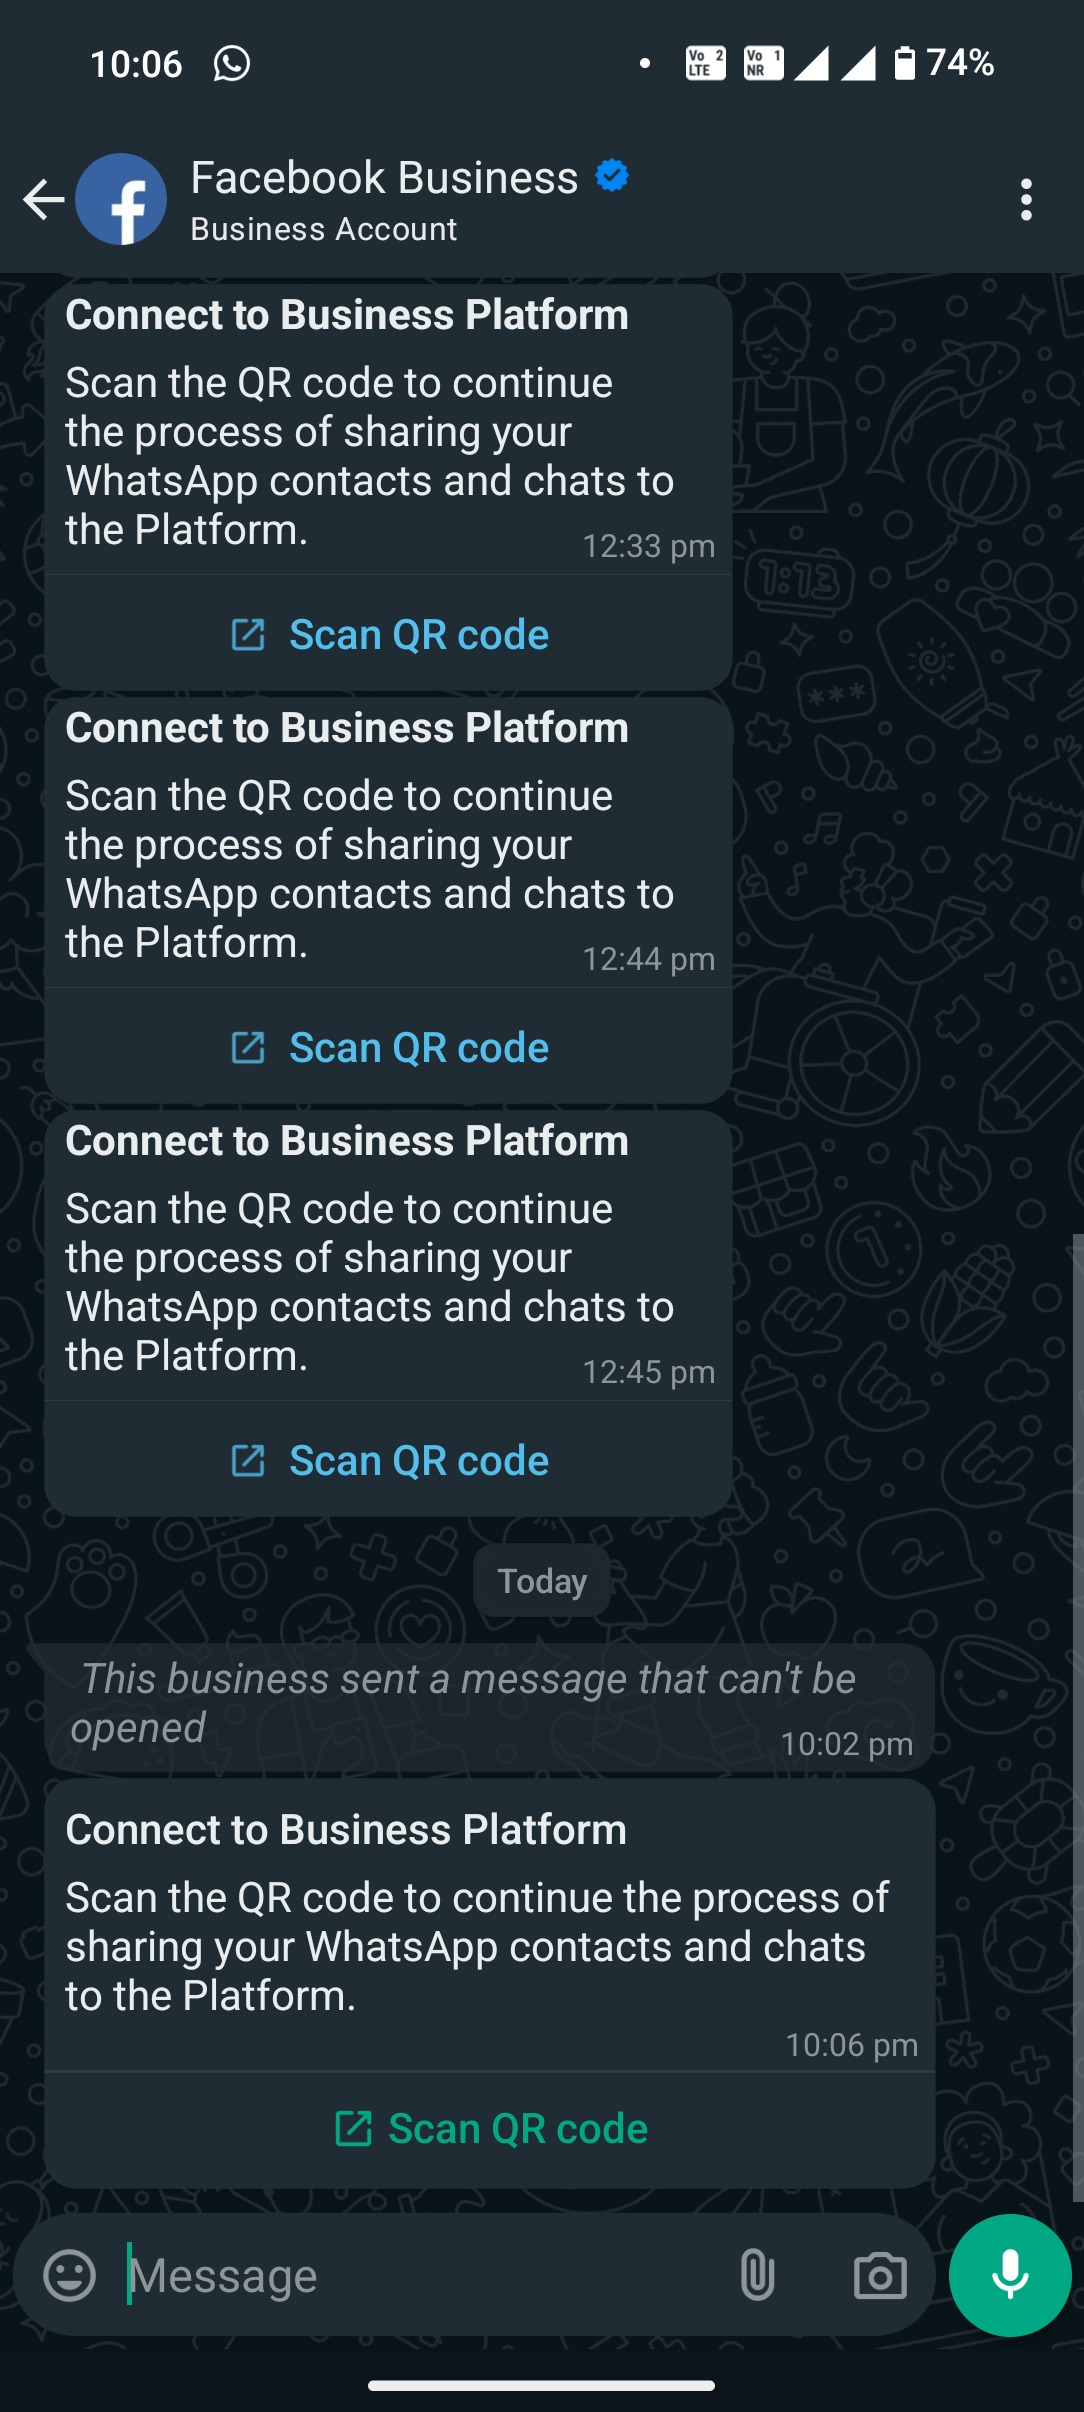
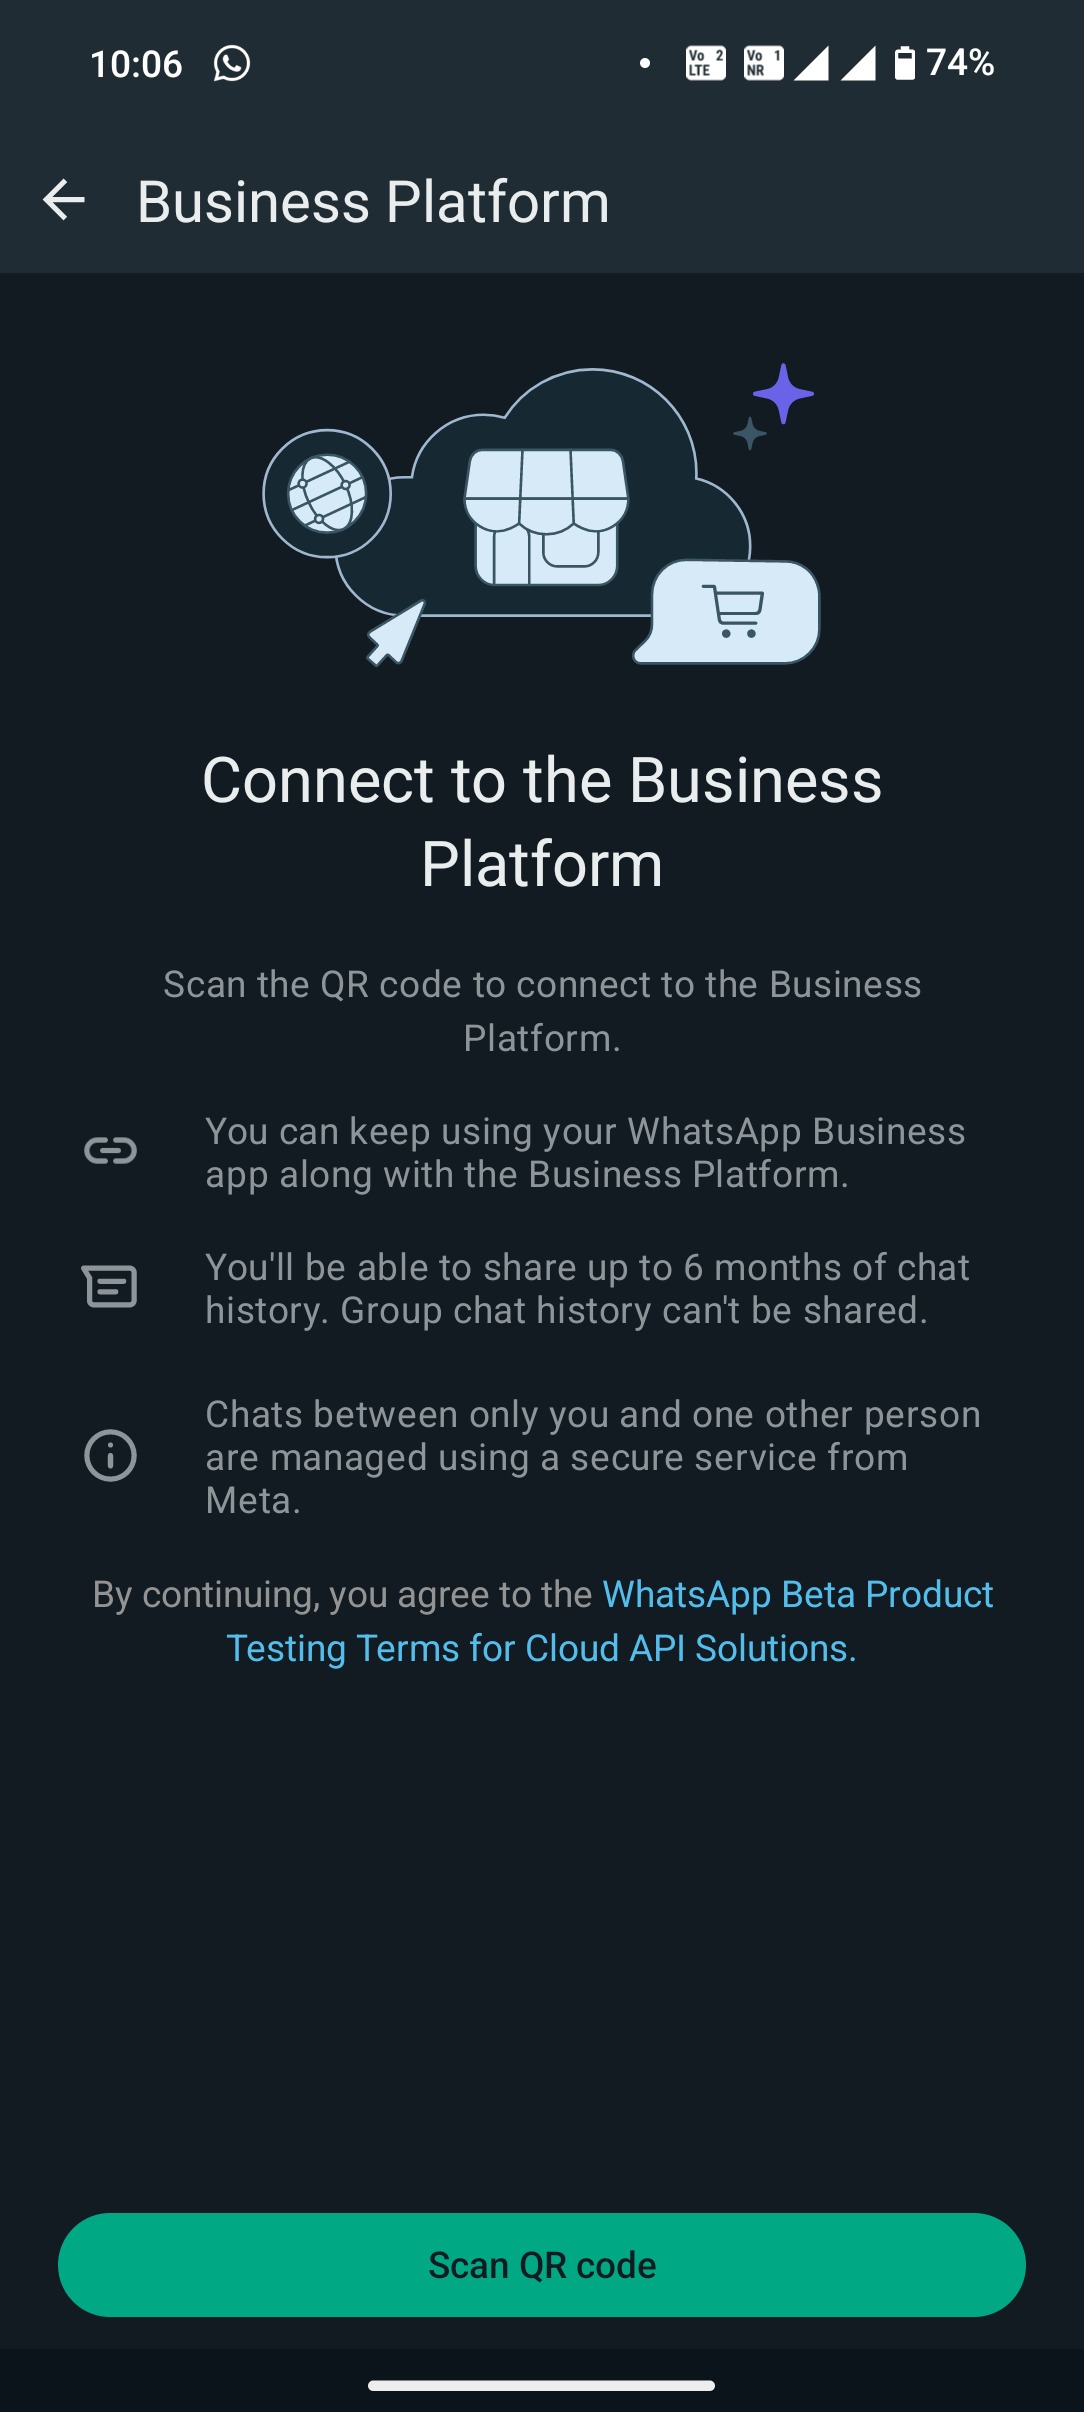
Connect to the Business Platform
Scan the QR code to complete the connection. You can continue using your WhatsApp Business App alongside the Business Platform.
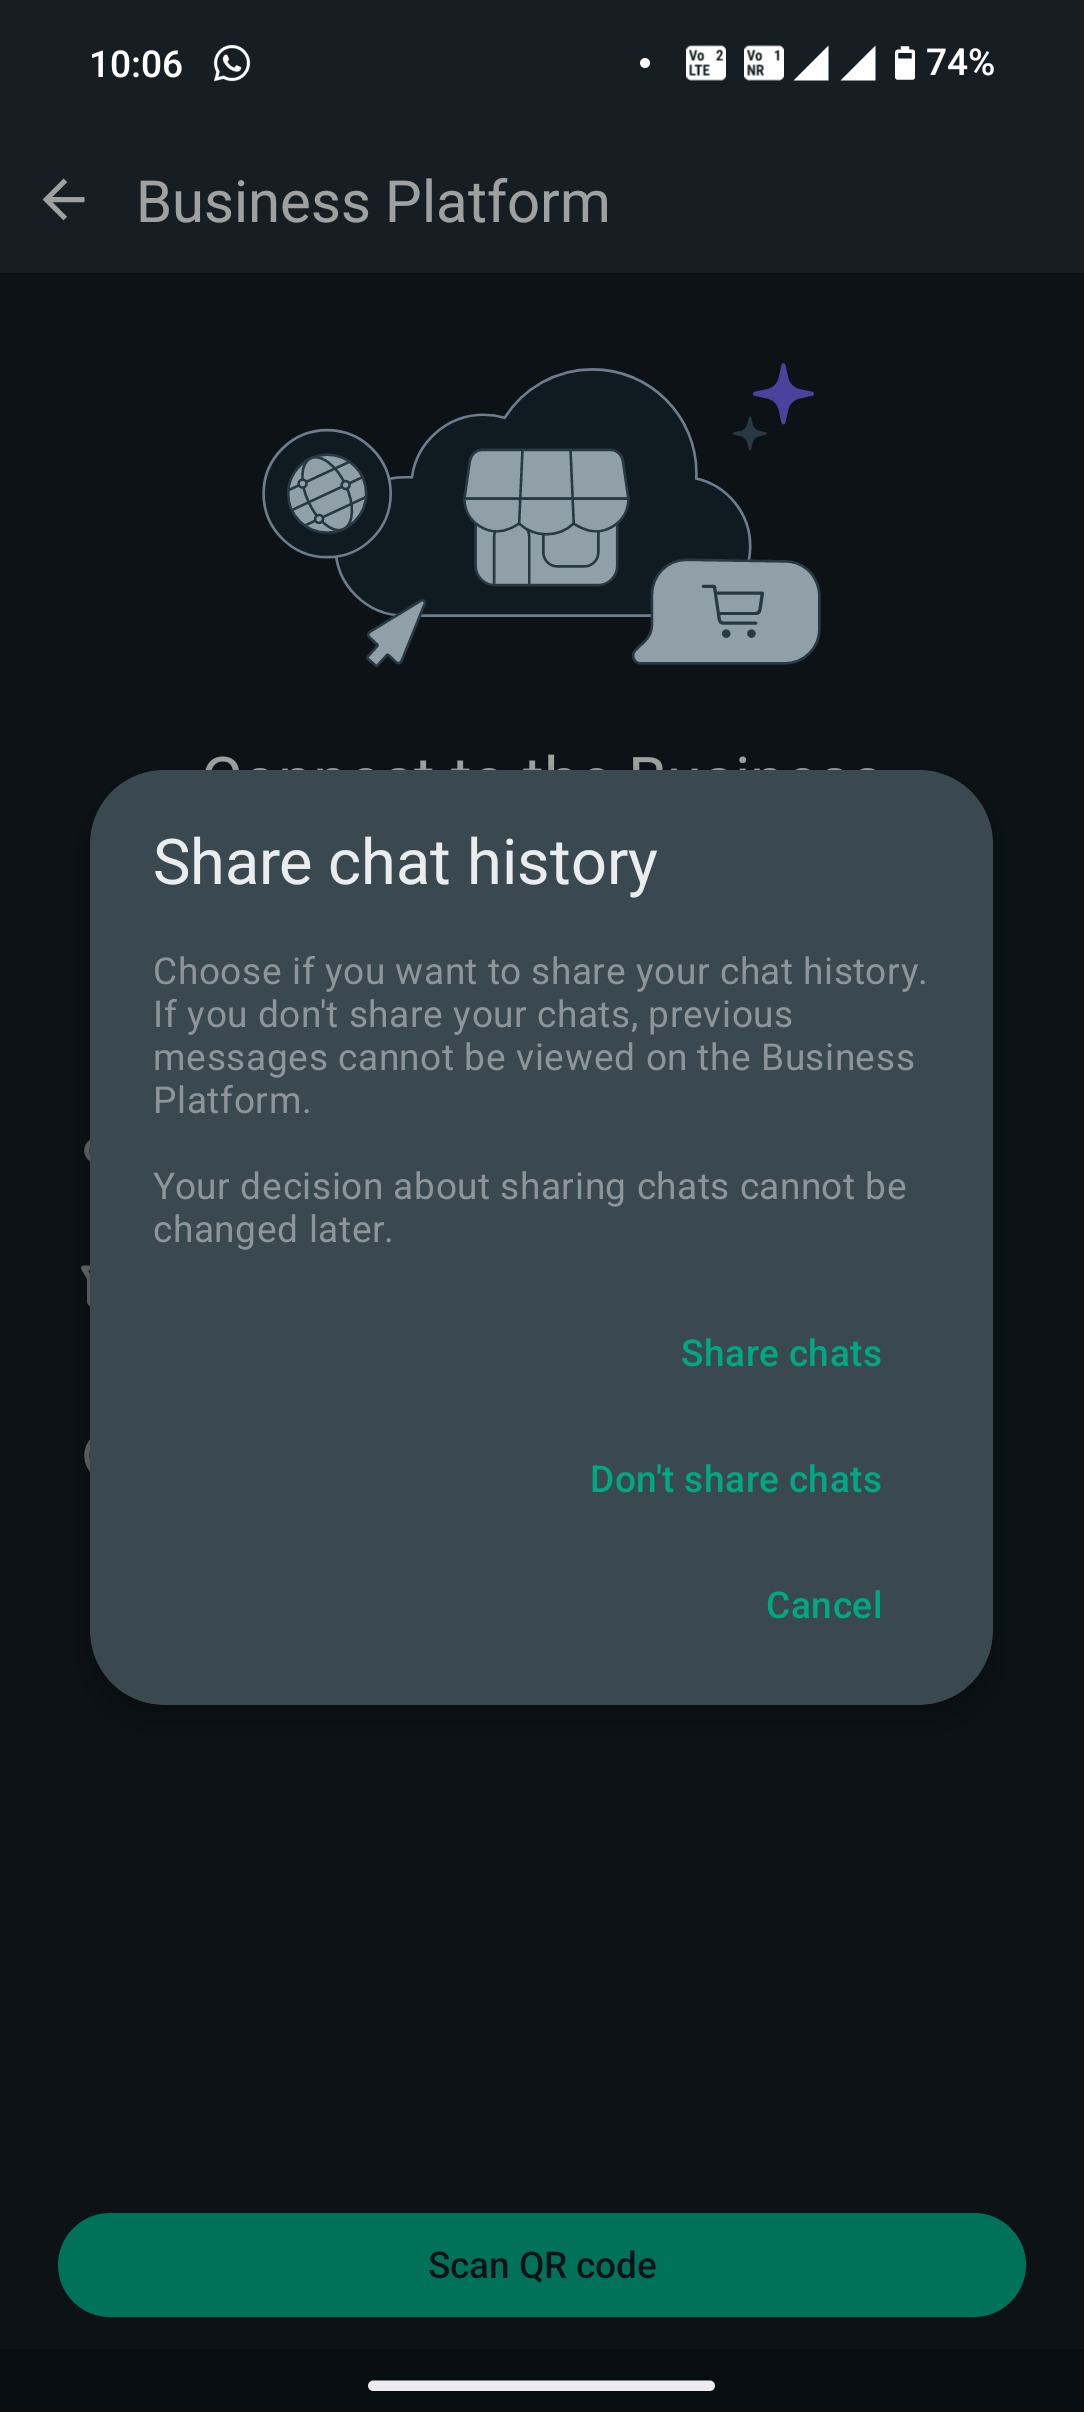
Share Chat History & Contacts
Your contacts and conversations will be securely synced with Chat To Clients CRM.
Setup Complete
Your WhatsApp Business App is now successfully integrated with Chat To Clients CRM.

Review and Confirm
Check all entered details carefully, then click Confirm.
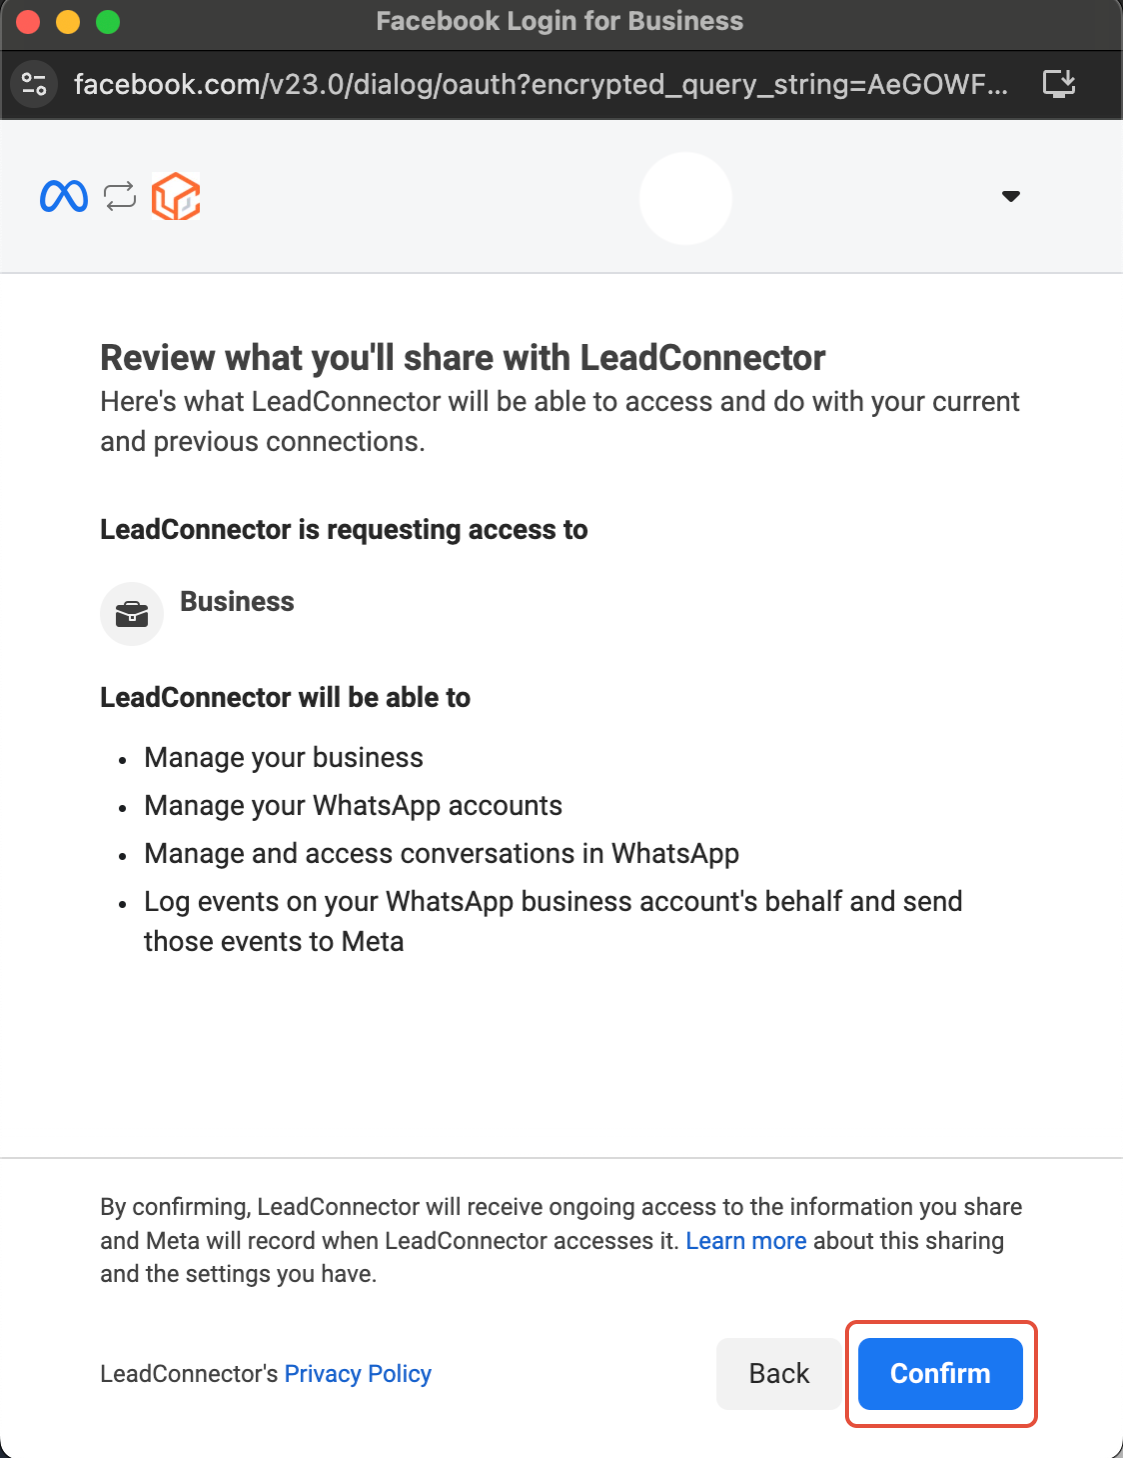
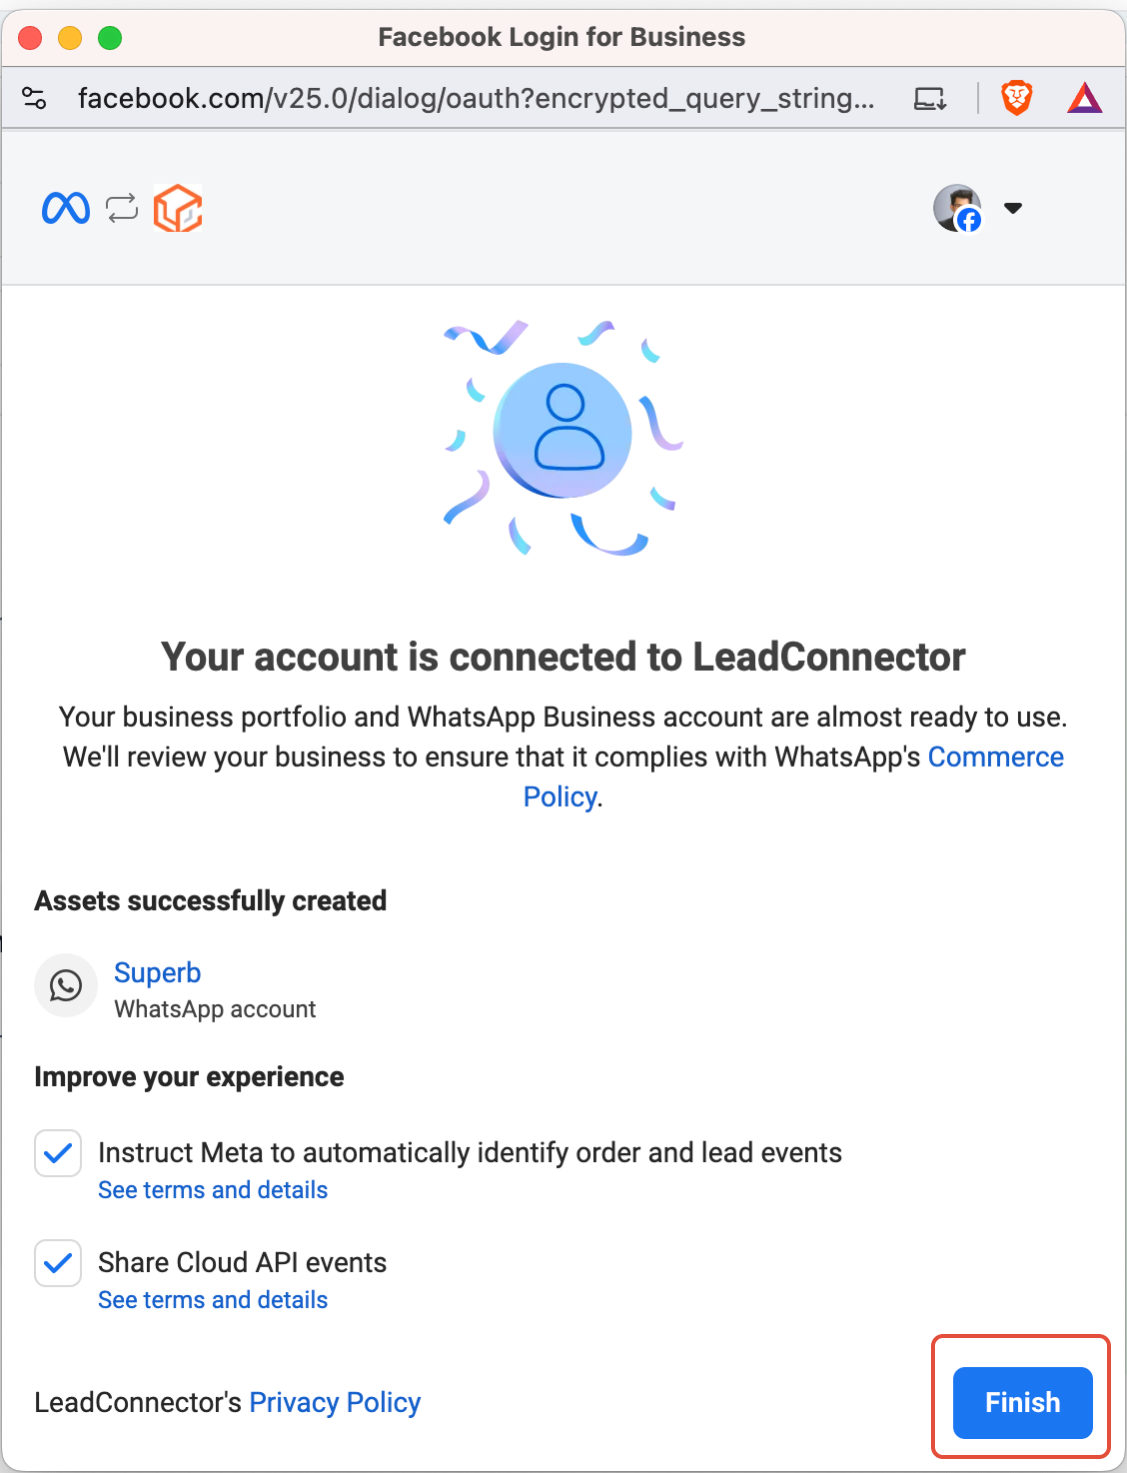
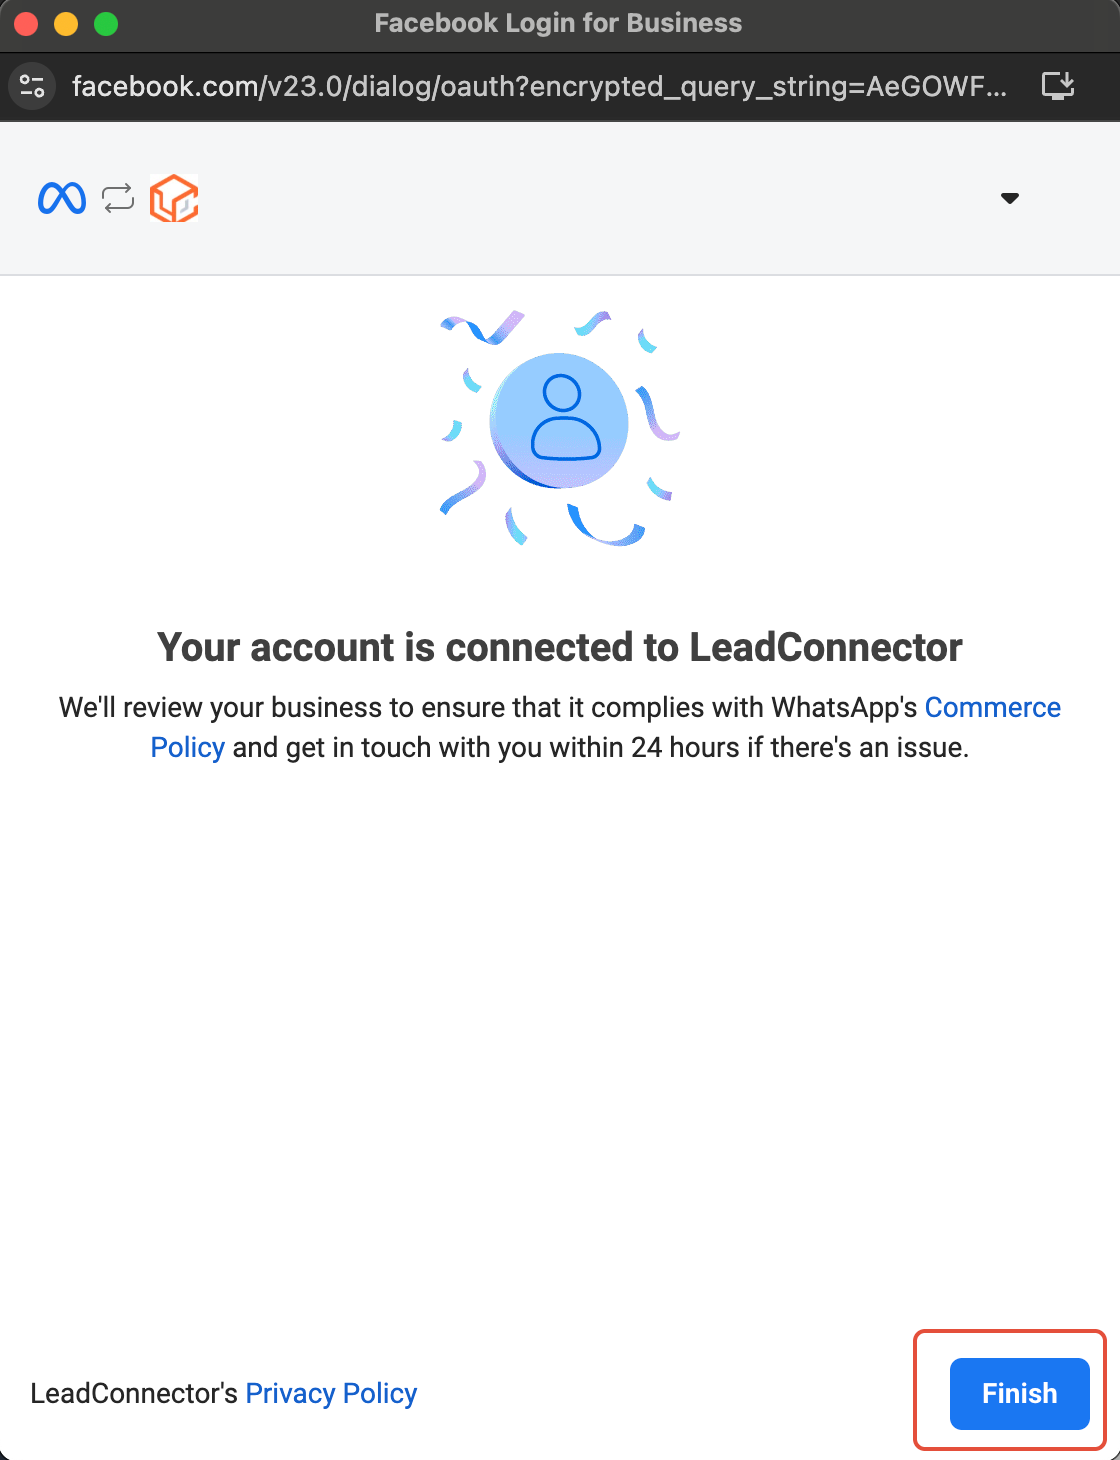
Integration Complete
Click Finish. Your WhatsApp Business App is fully integrated with Chat To Clients CRM.
NOTE
1. Sending template messages is not supported via the WhatsApp Business App — they can only be sent through the CRM.
2. You will manage your WhatsApp profile from the WhatsApp Business App, not the CRM.
3. You can only have a maximum of one phone number under Coexistence.
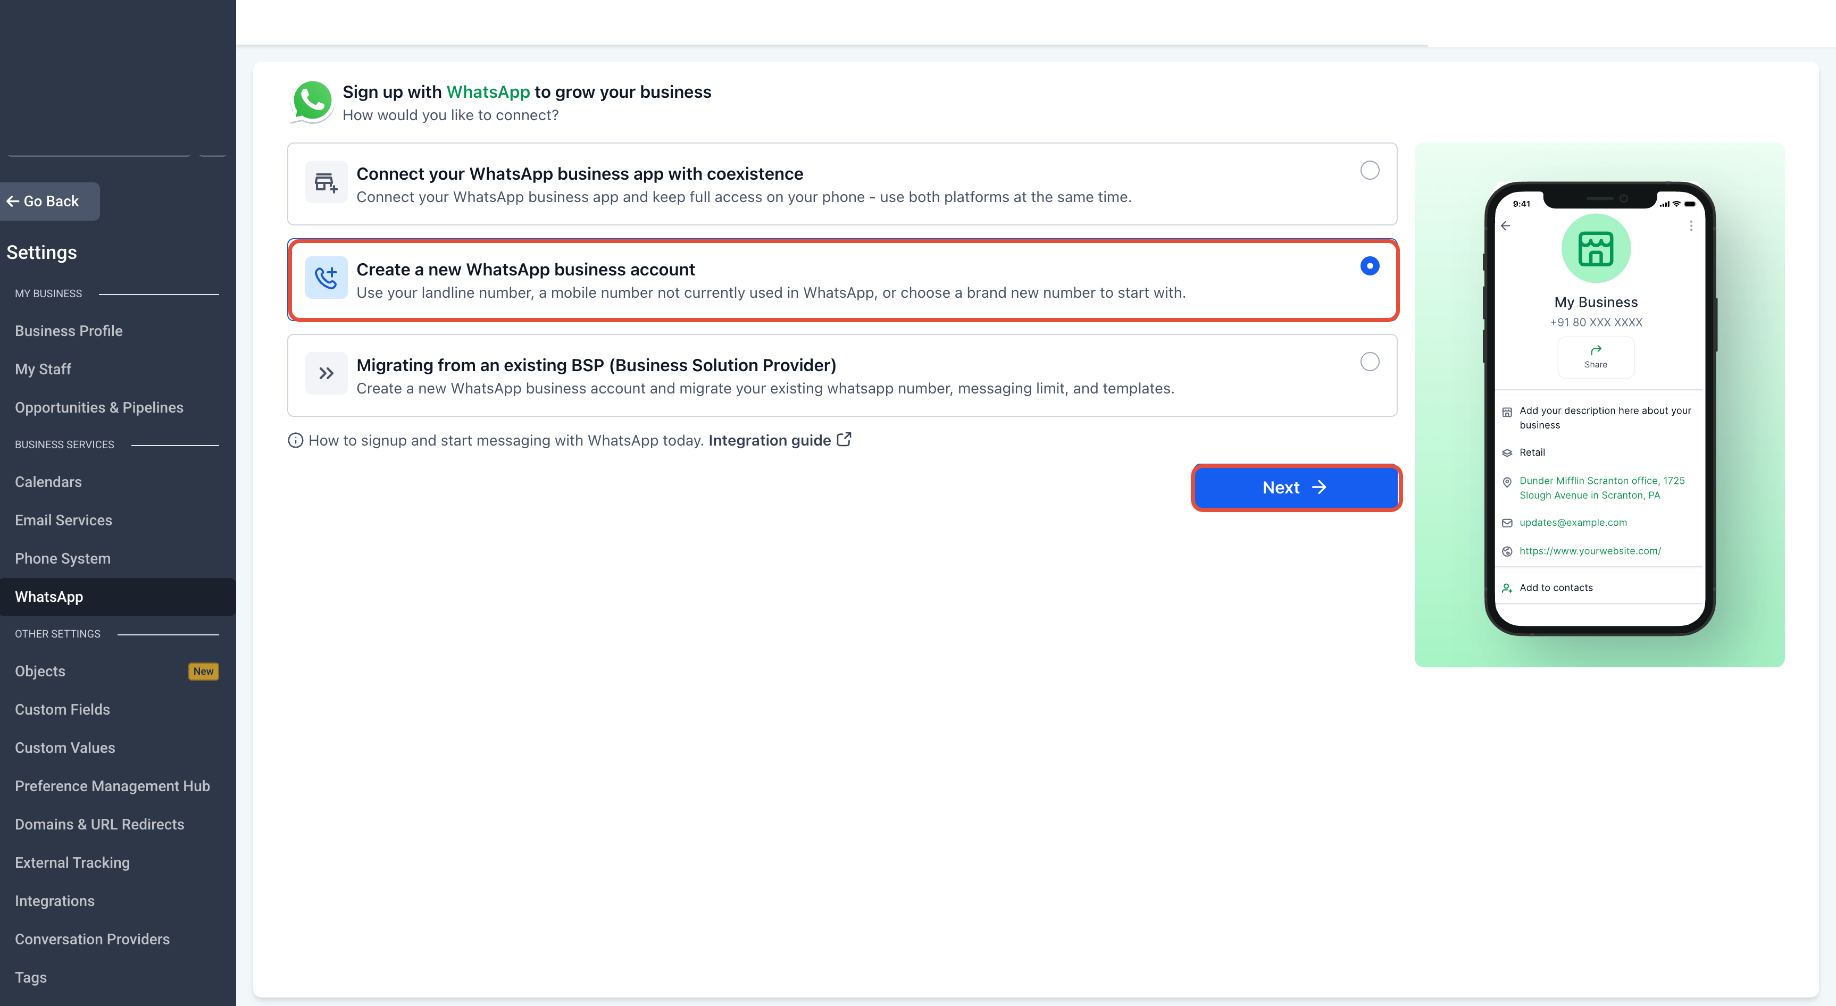
Start the Signup Process
Navigate to Settings > WhatsApp and click Create a new WhatsApp business account.
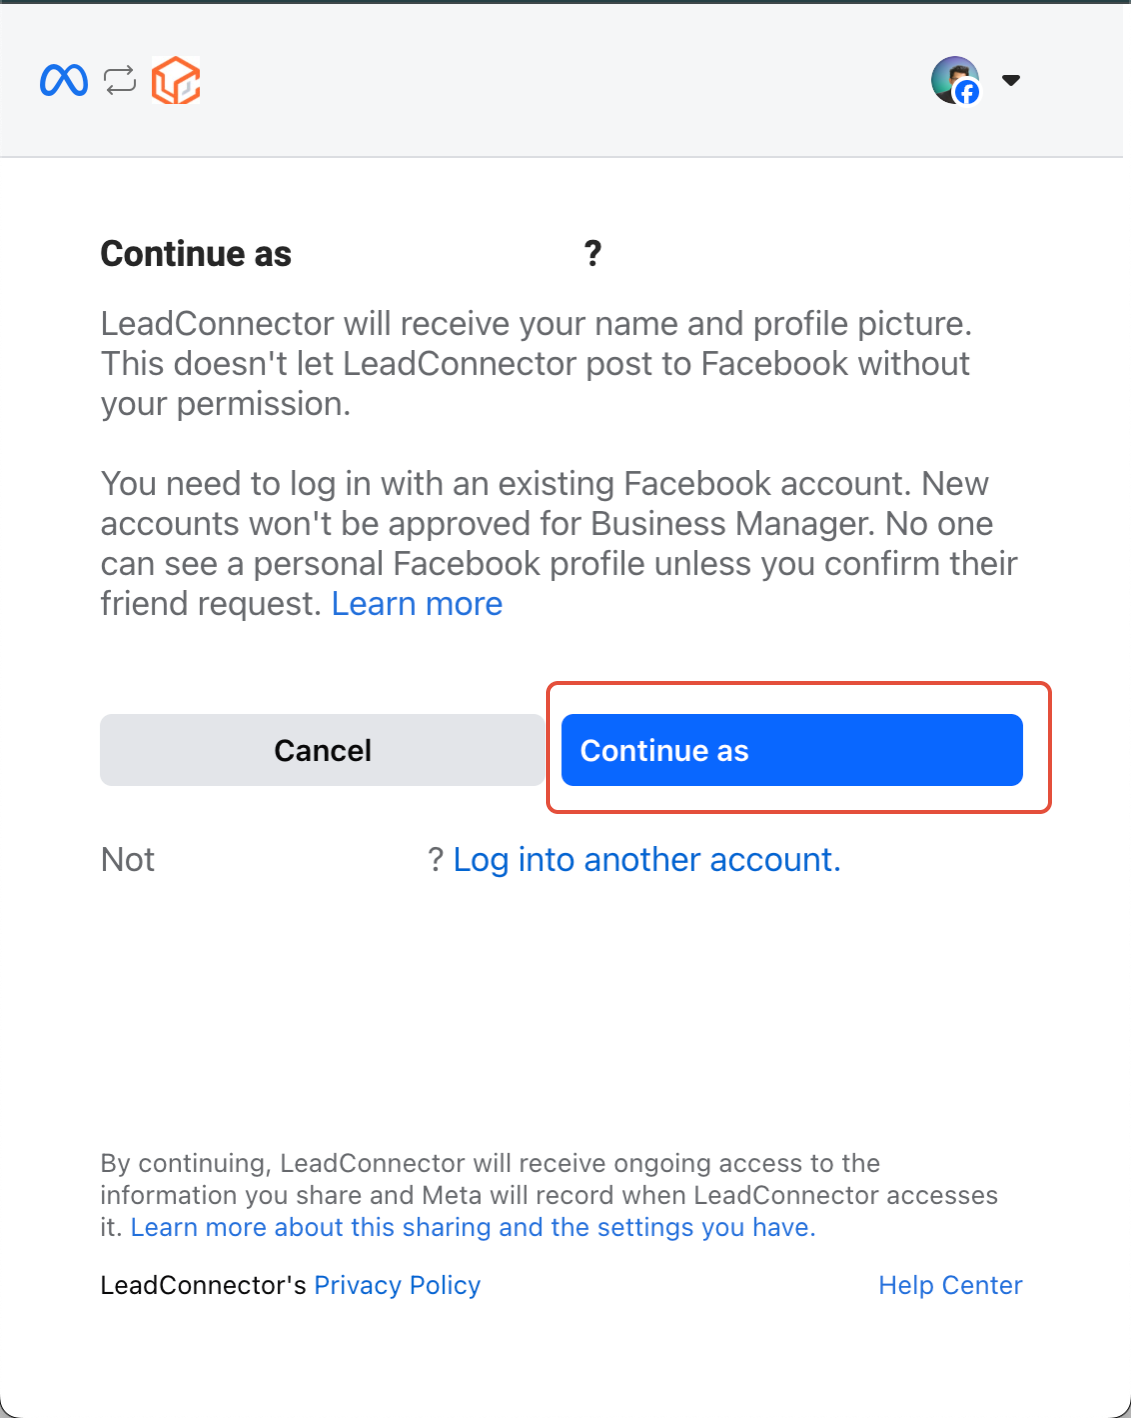
Continue with Facebook
Click Continue with Facebook and log in using the Facebook account associated with your business.
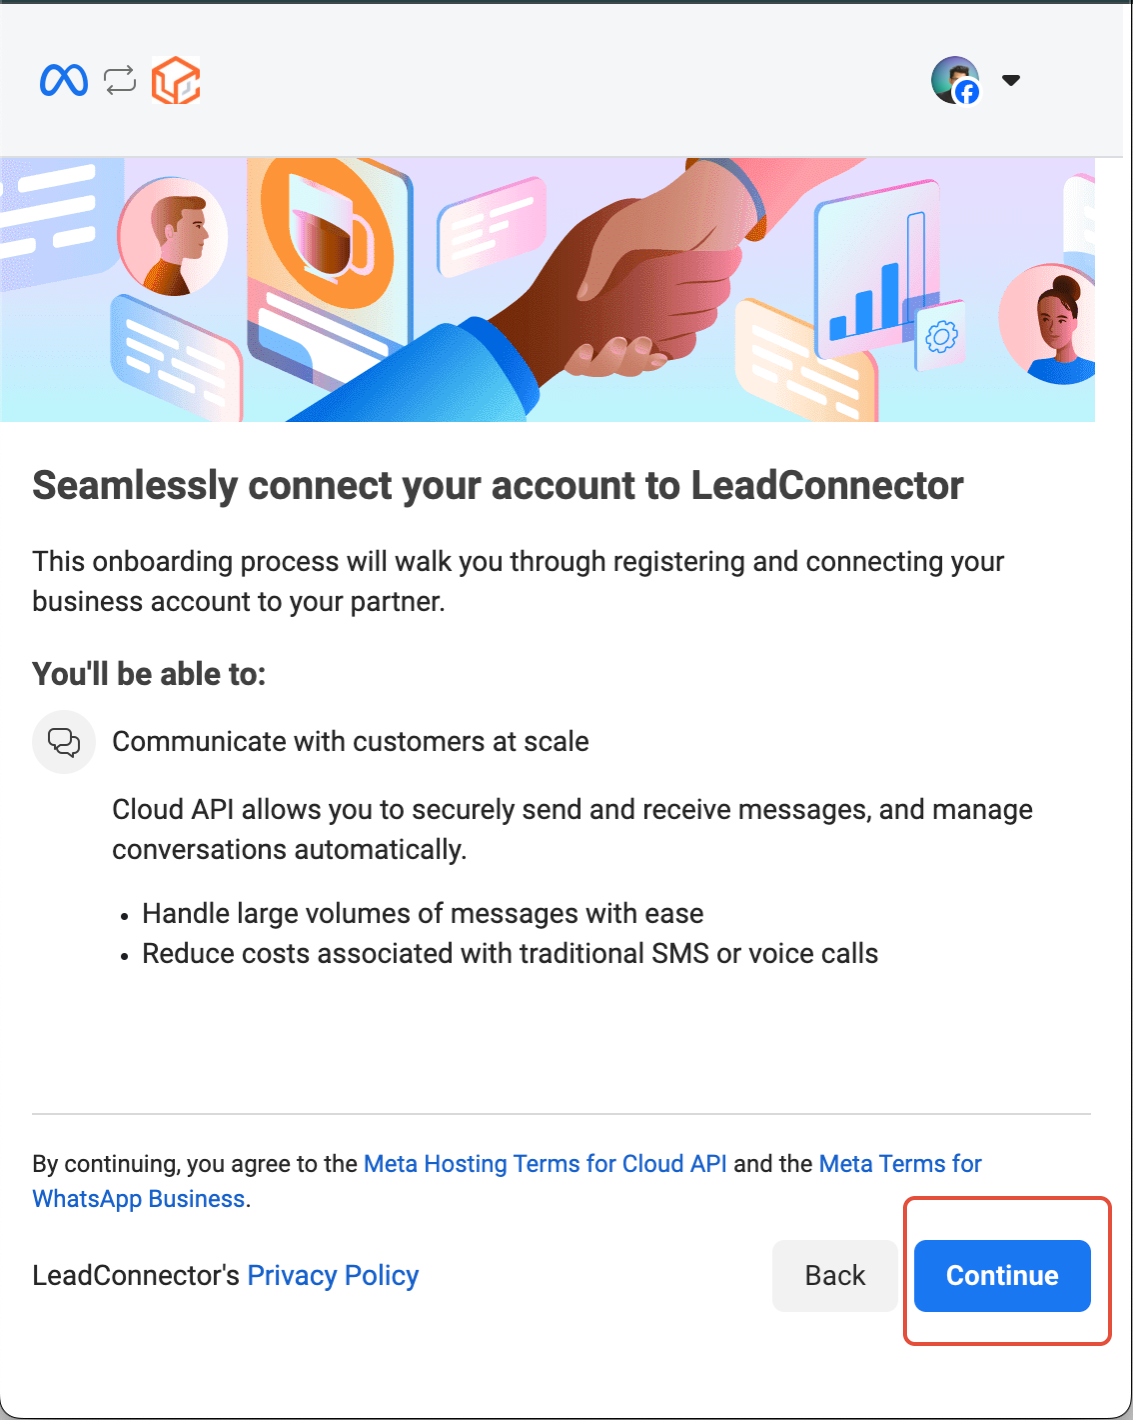
Begin Setup
Tap Continue to initiate the integration process.
Enter Phone number
Enter a new business phone number, or select an existing phone number from the dropdown, to associate with their WhatsApp Business Account.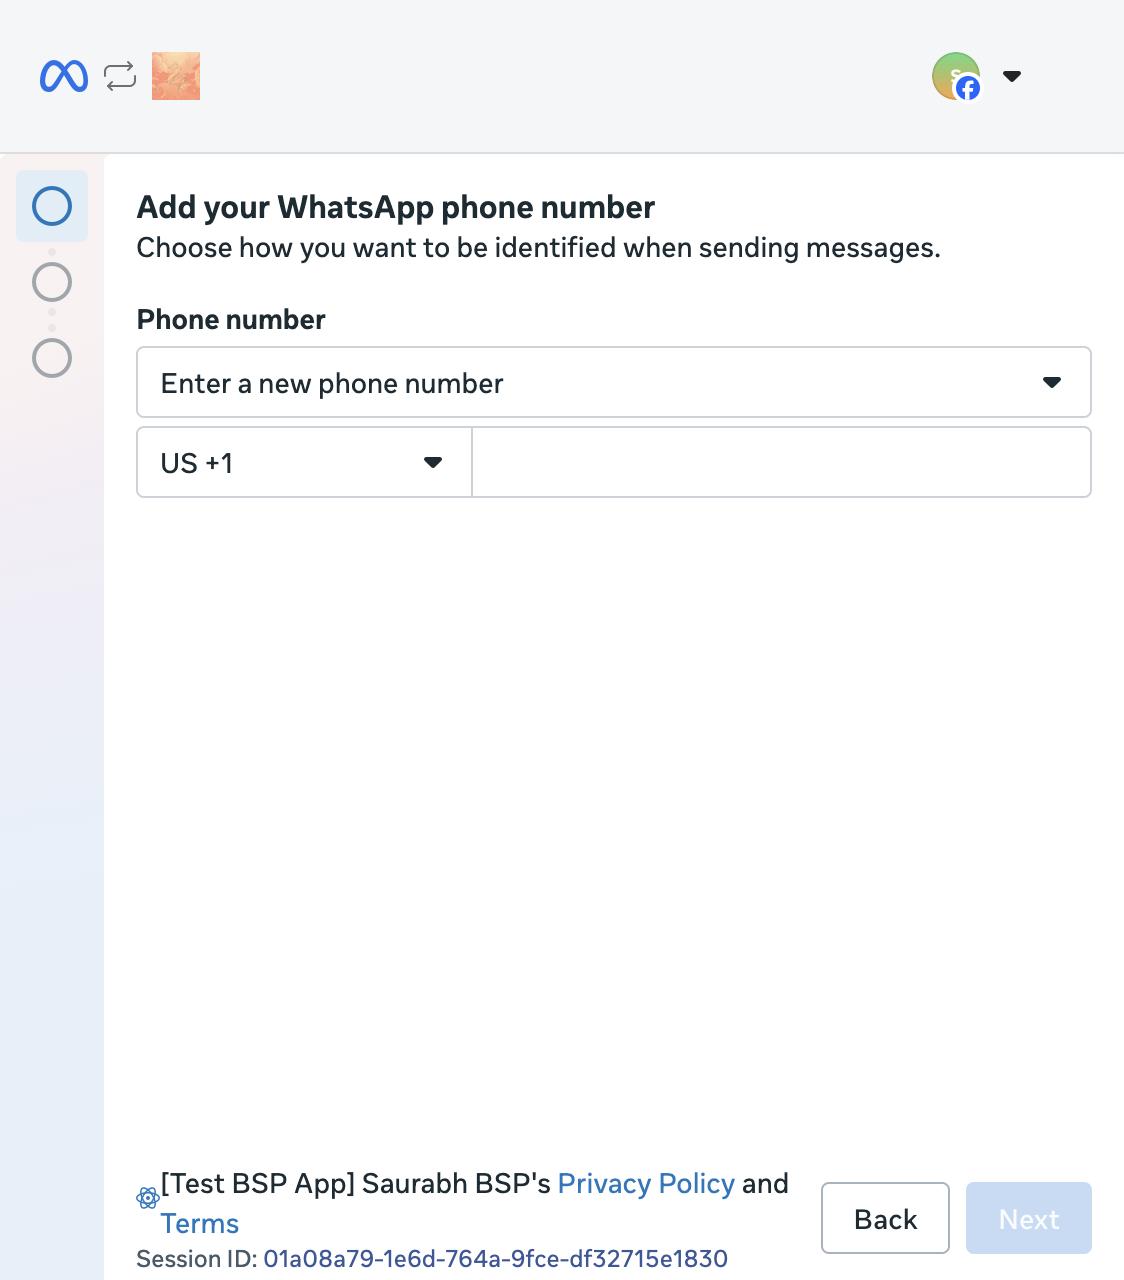
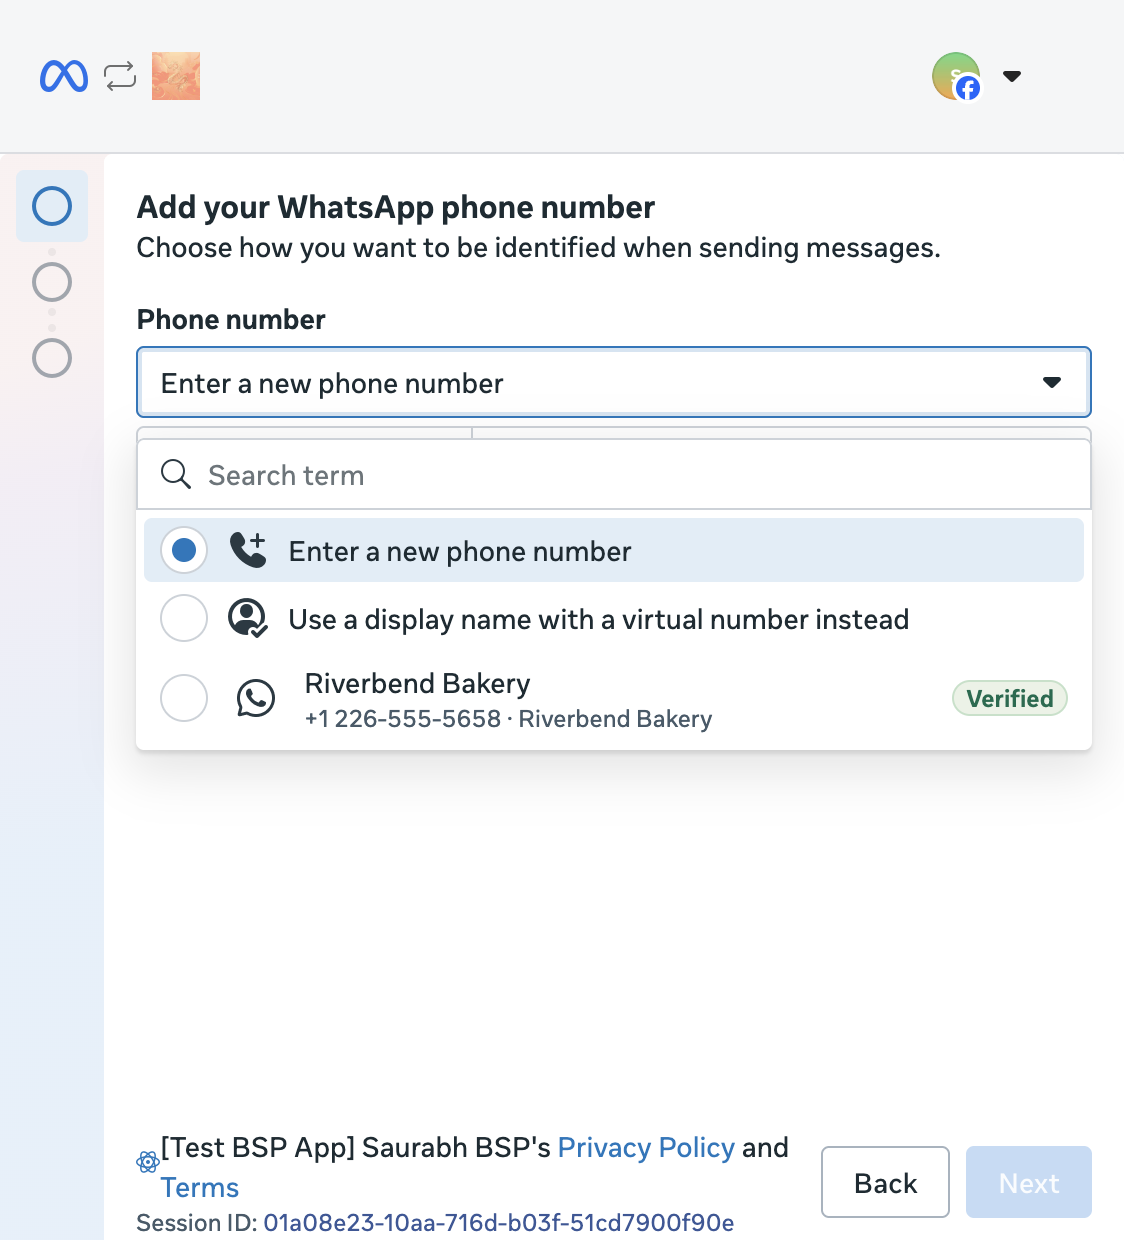
Phone Number Dropdown
The phone number dropdown offers two ways to supply a number: Enter a new phone number, or Use a display name with a virtual number instead. Below those, it lists the business phone numbers already associated with the business customer, each with its eligibility status, which the business customer can search and select from.
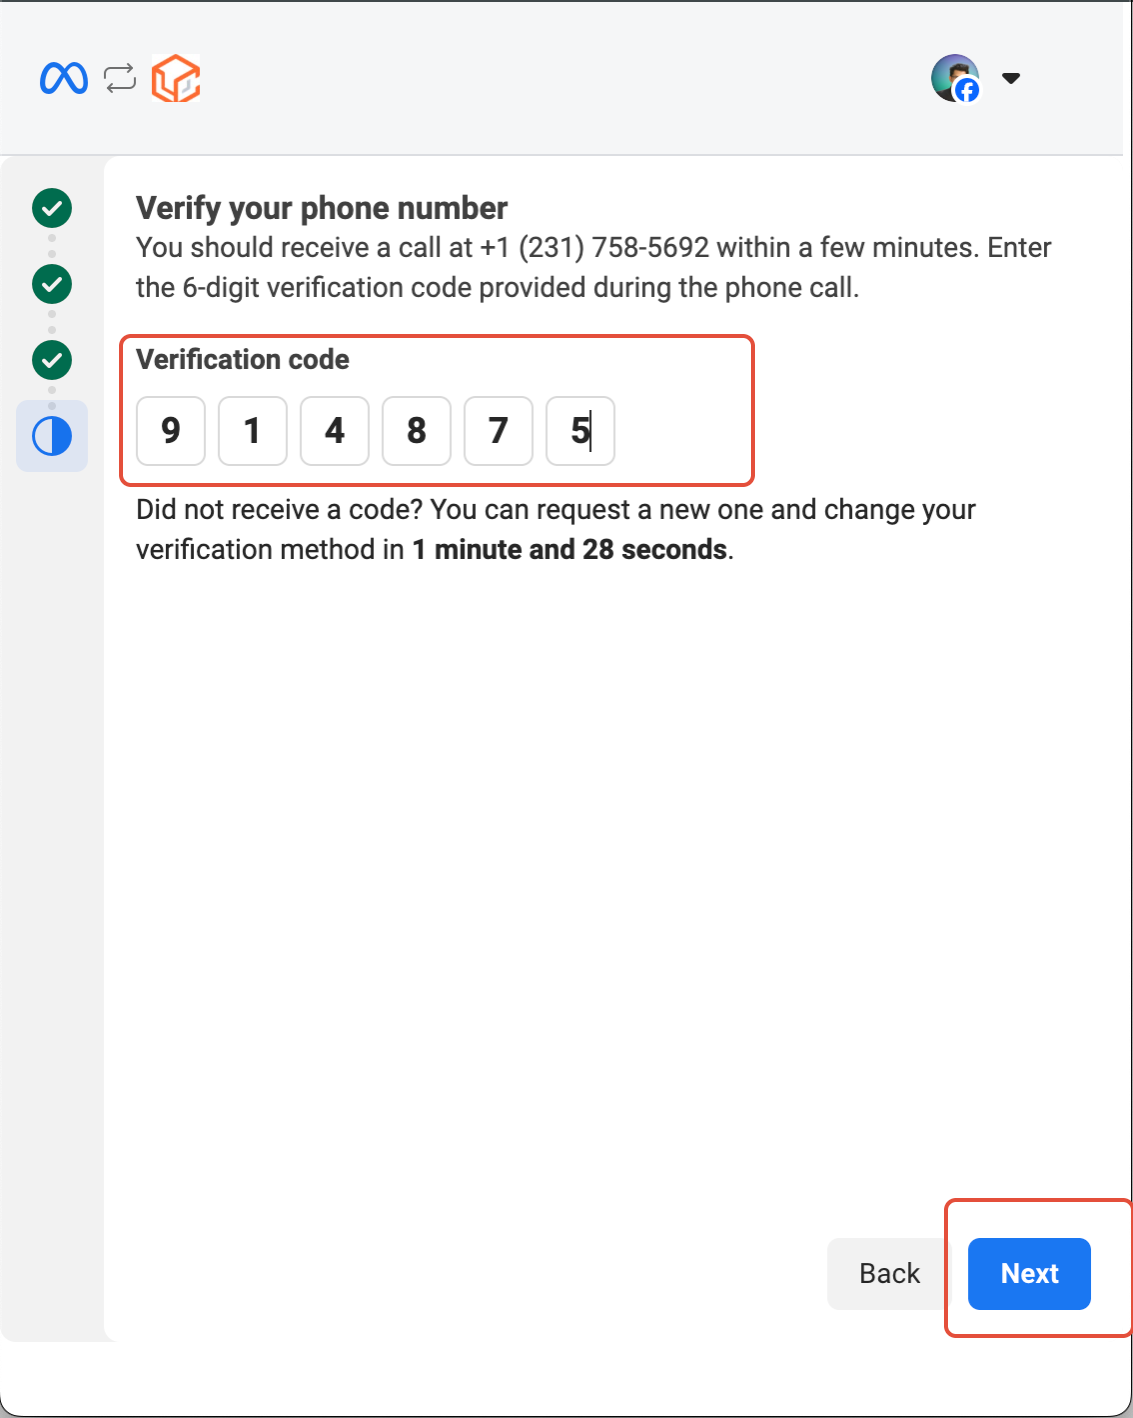
Verify via OTP
Enter the one-time password received by SMS or voice call, then click Next.
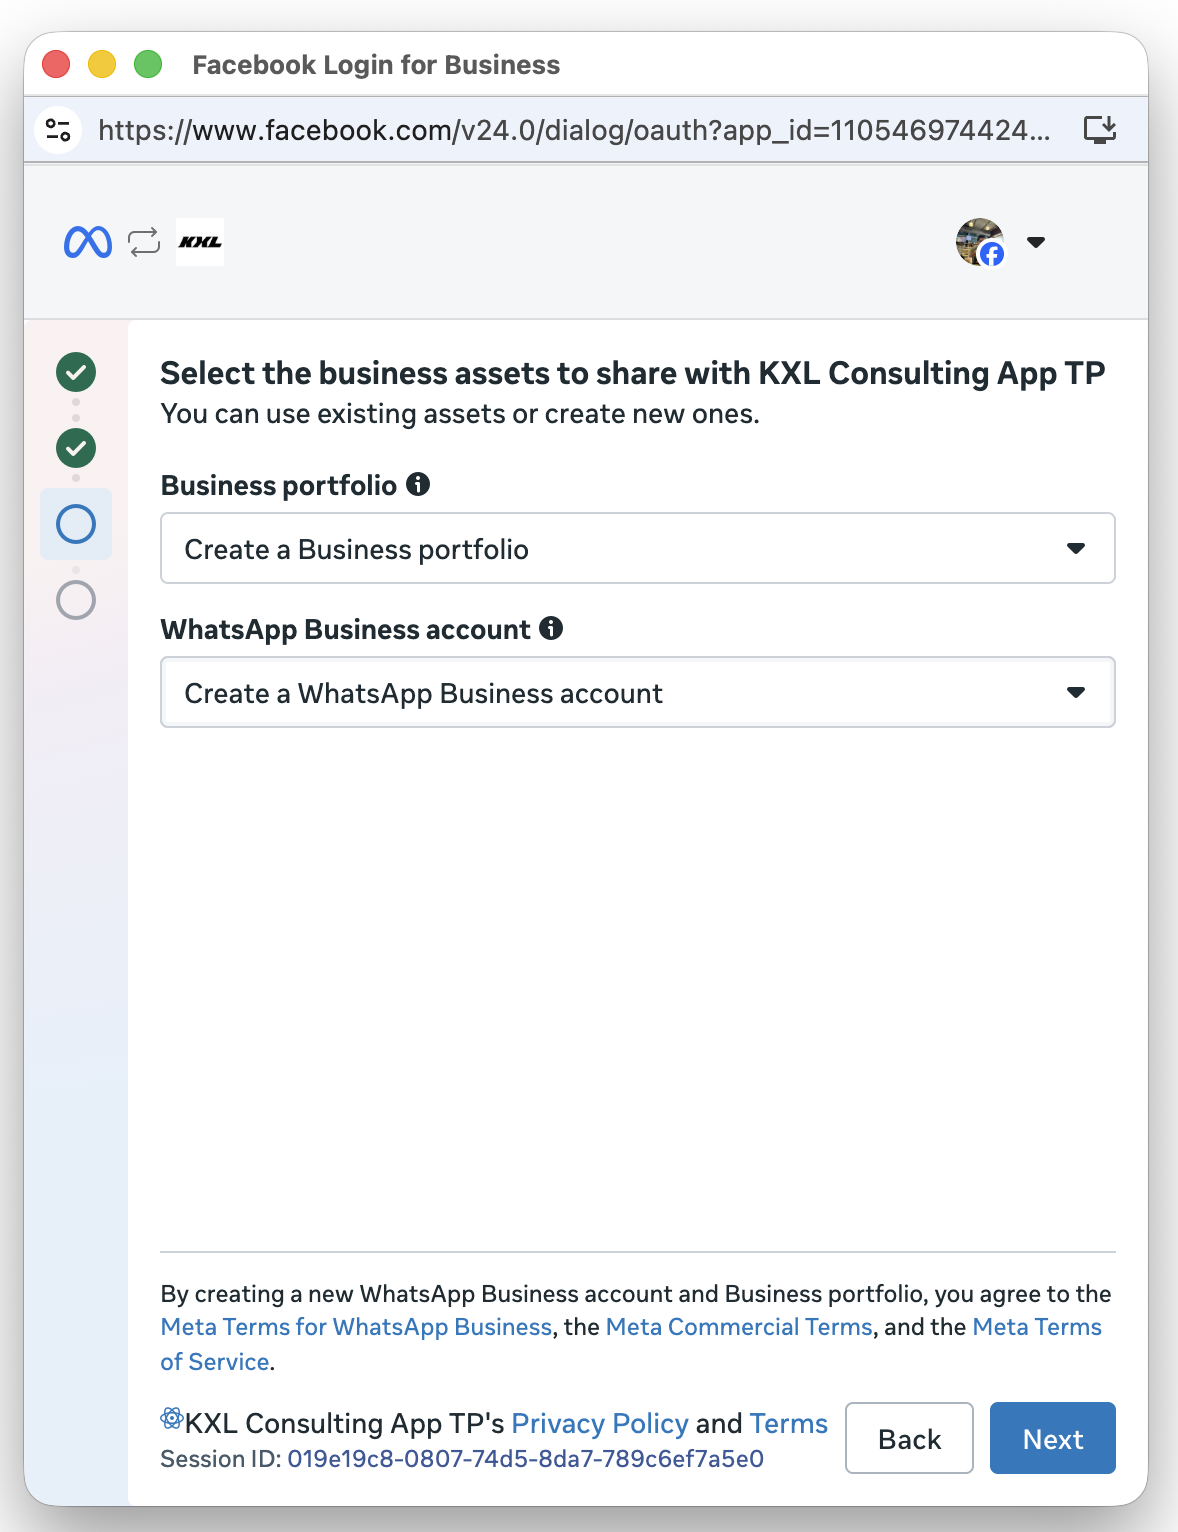
Review Business asset Selection Screen
Integration Complete
Your WhatsApp Business Account is now successfully integrated and ready to use.
Start the Signup Process
Navigate to Settings > WhatsApp and click Migrating from an existing BSP (Business Solution Provider).
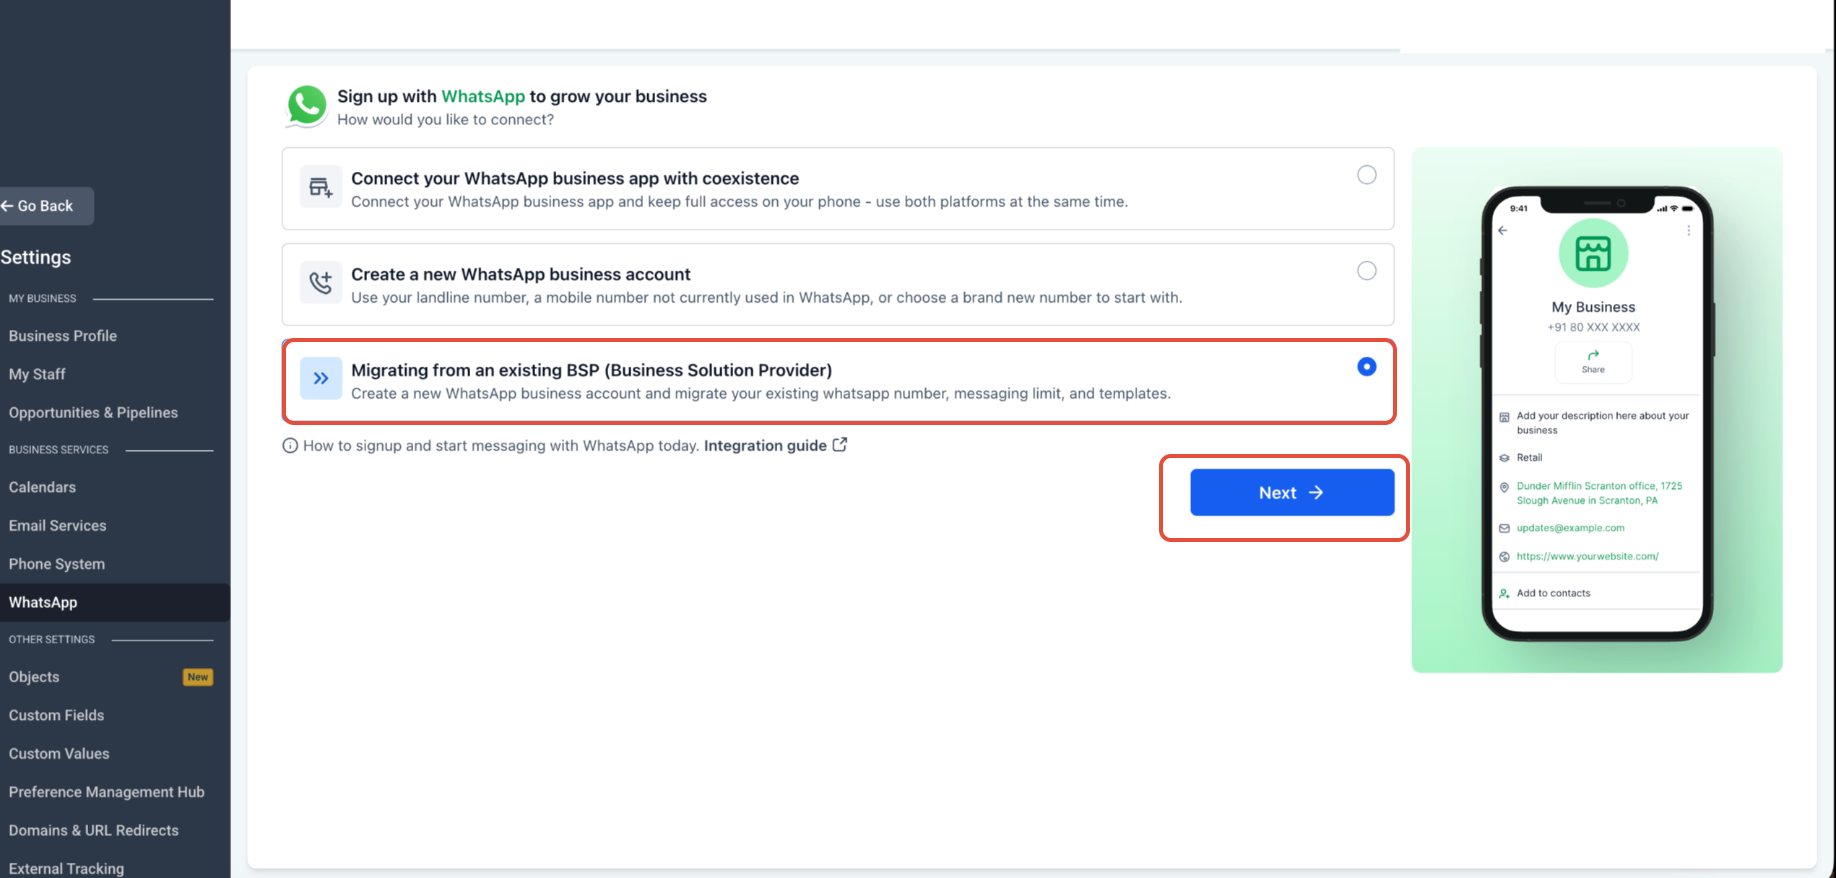
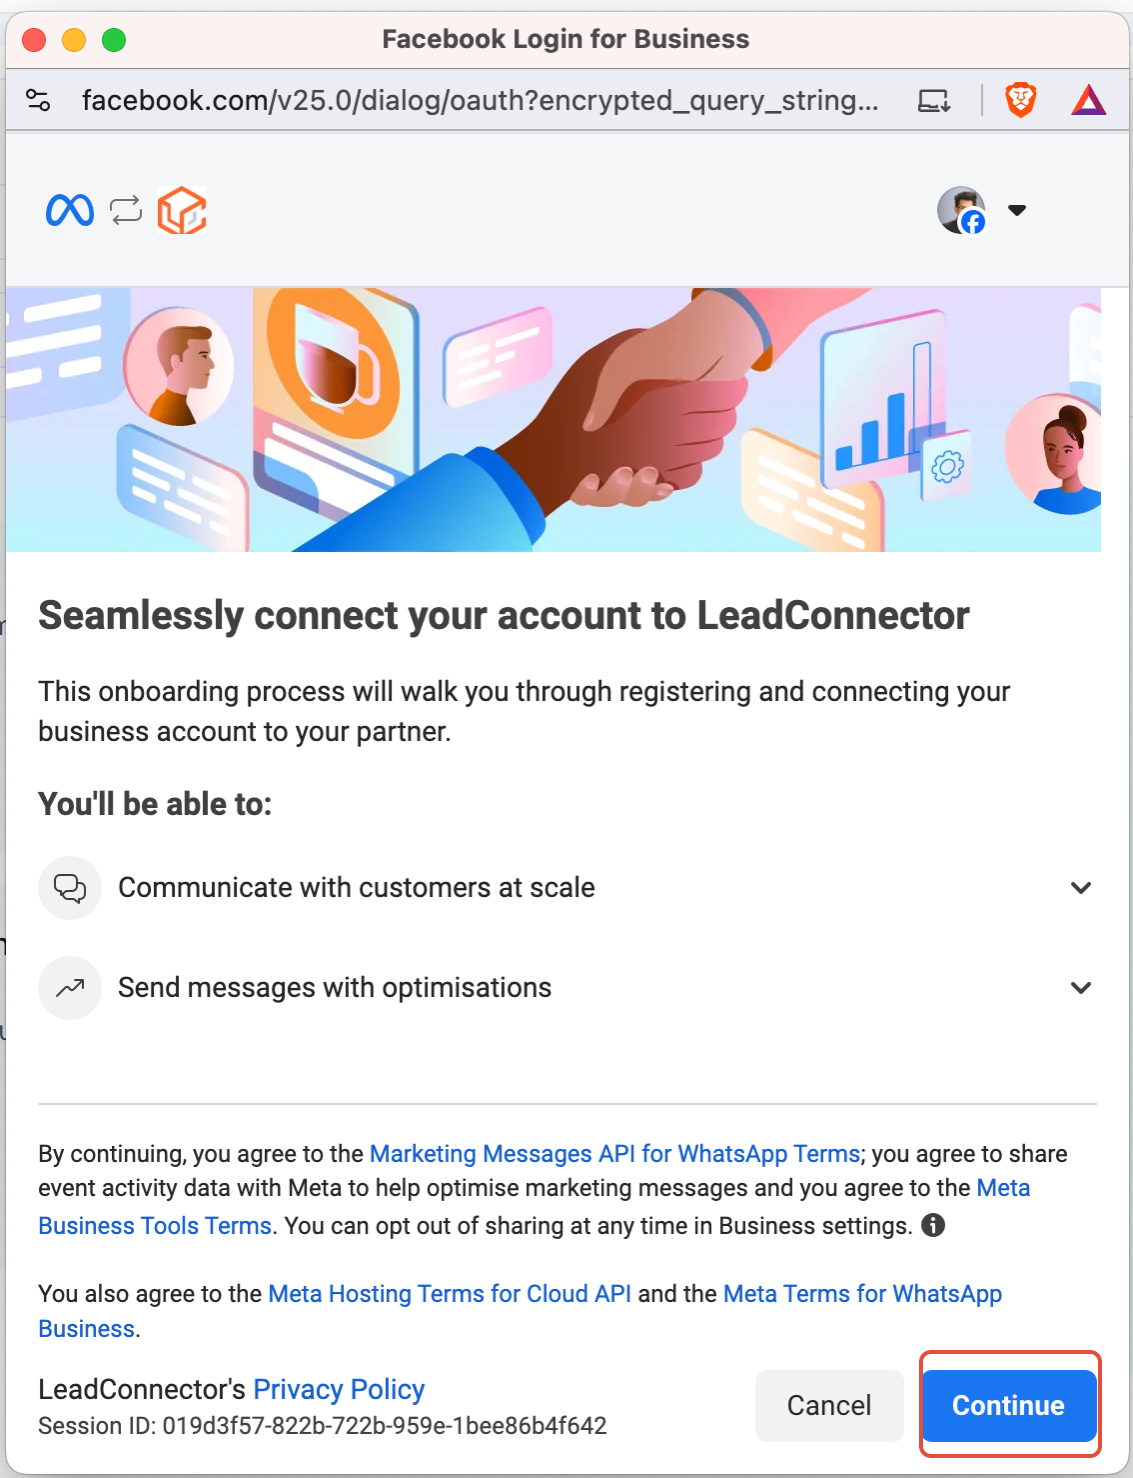
Begin Setup
Tap Continue to initiate the migration process.
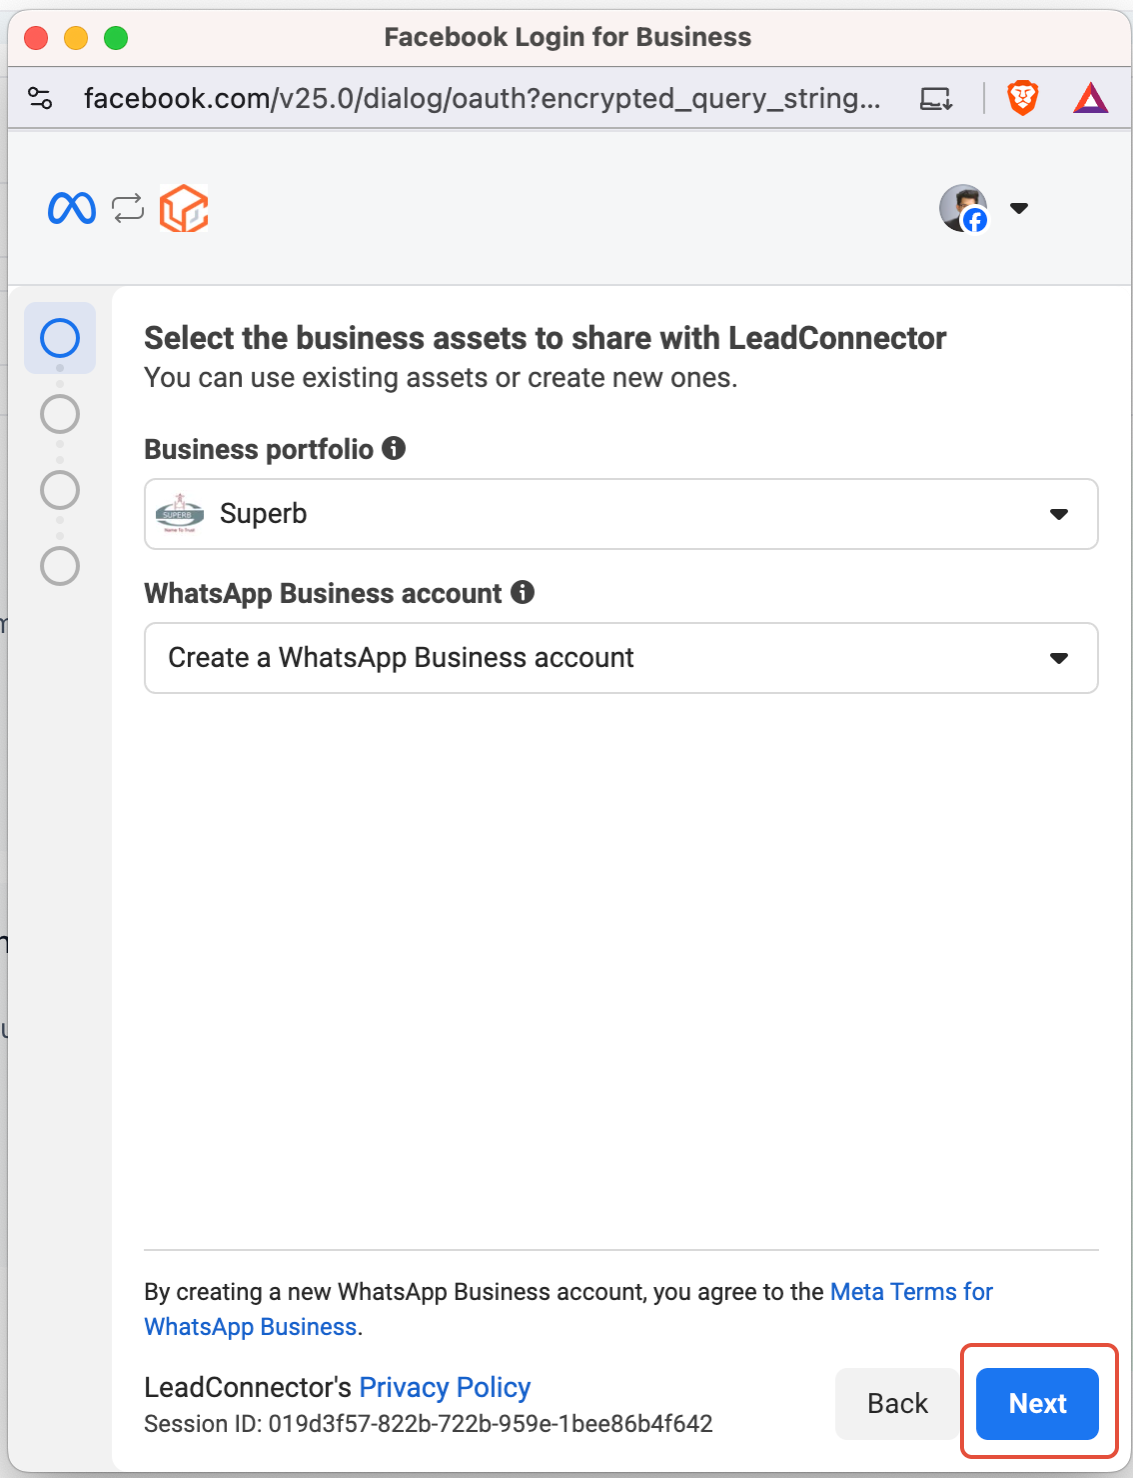
Select Business Assets
Choose the business assets you'd like to migrate. Make sure you select the correct WhatsApp Business Account and associated assets.
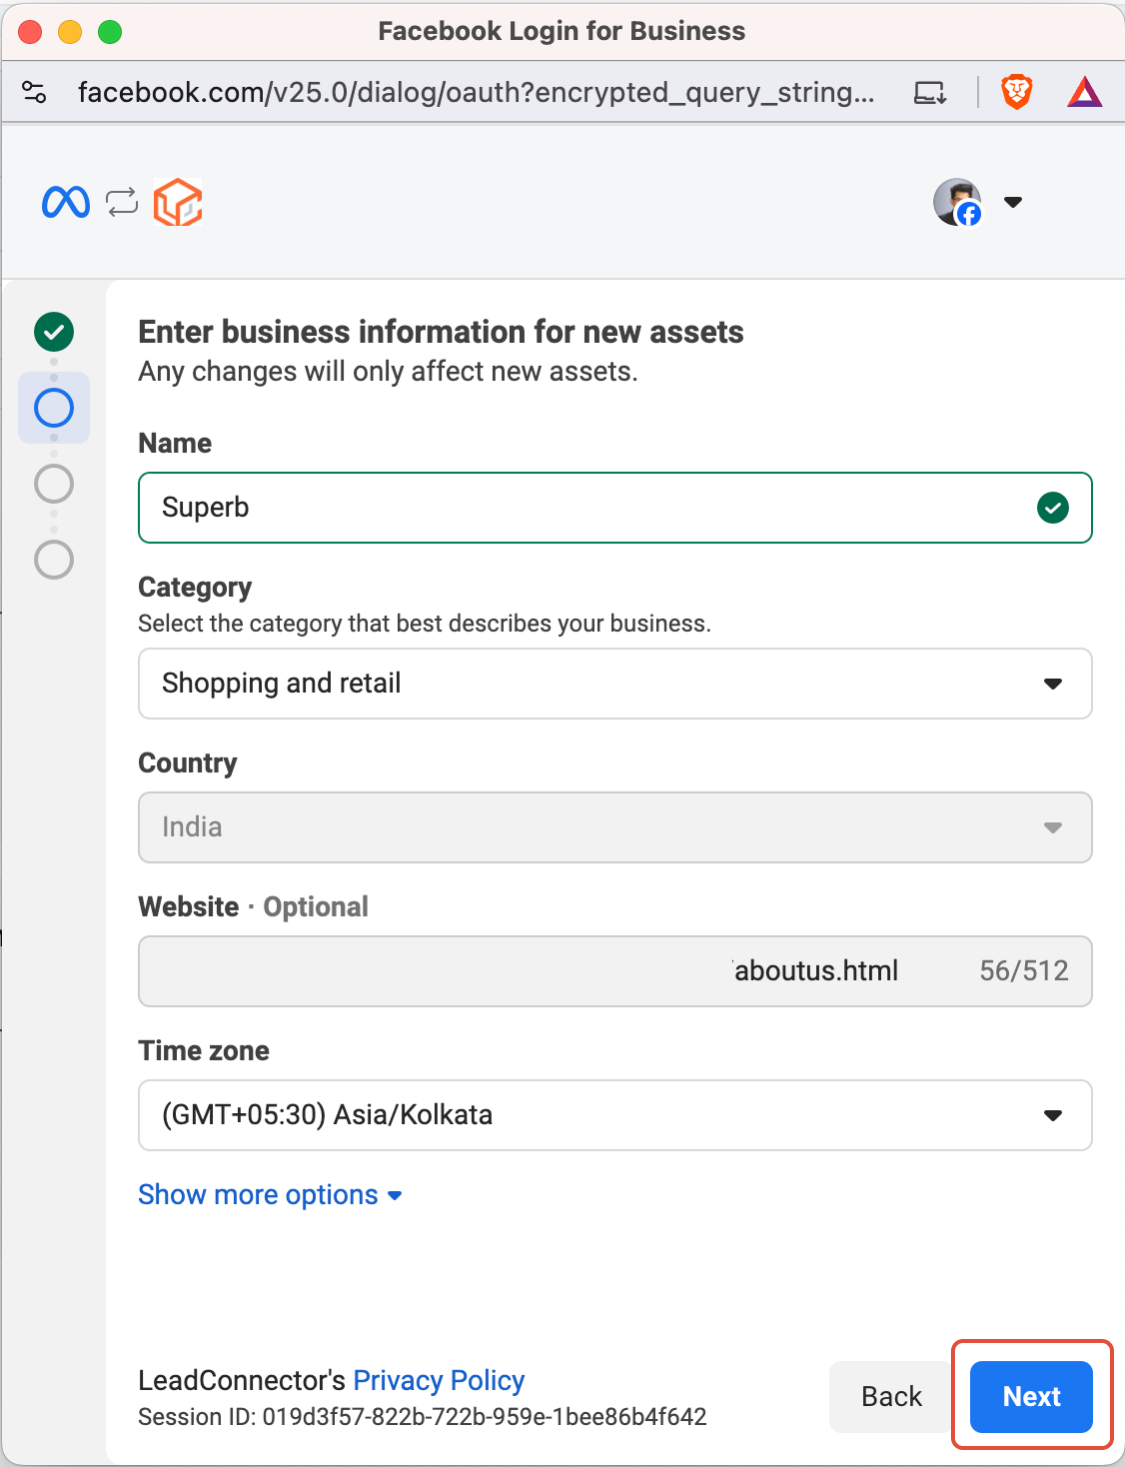
Enter Business Details
Fill in all required business information accurately, then click Next.
Add Your Phone Number
Enter the phone number you wish to migrate. Ensure it's active and accessible for verification, then click Next.
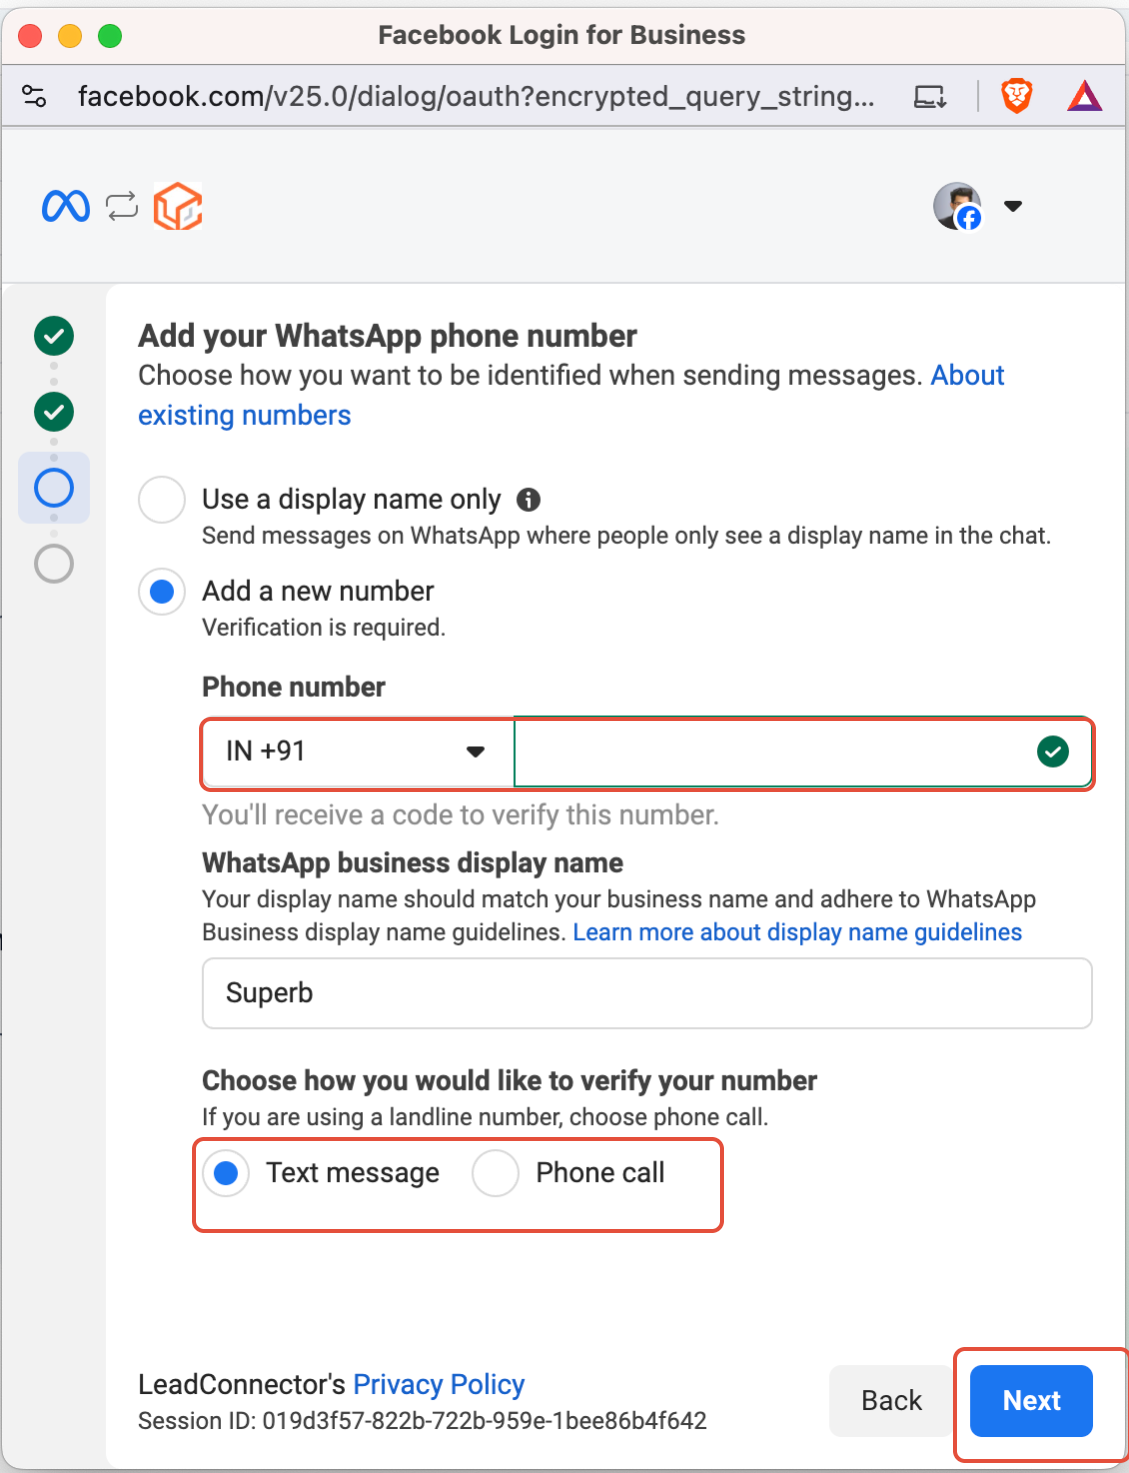
Verify Your Phone Number
Click Next to receive your verification code and proceed with number verification.
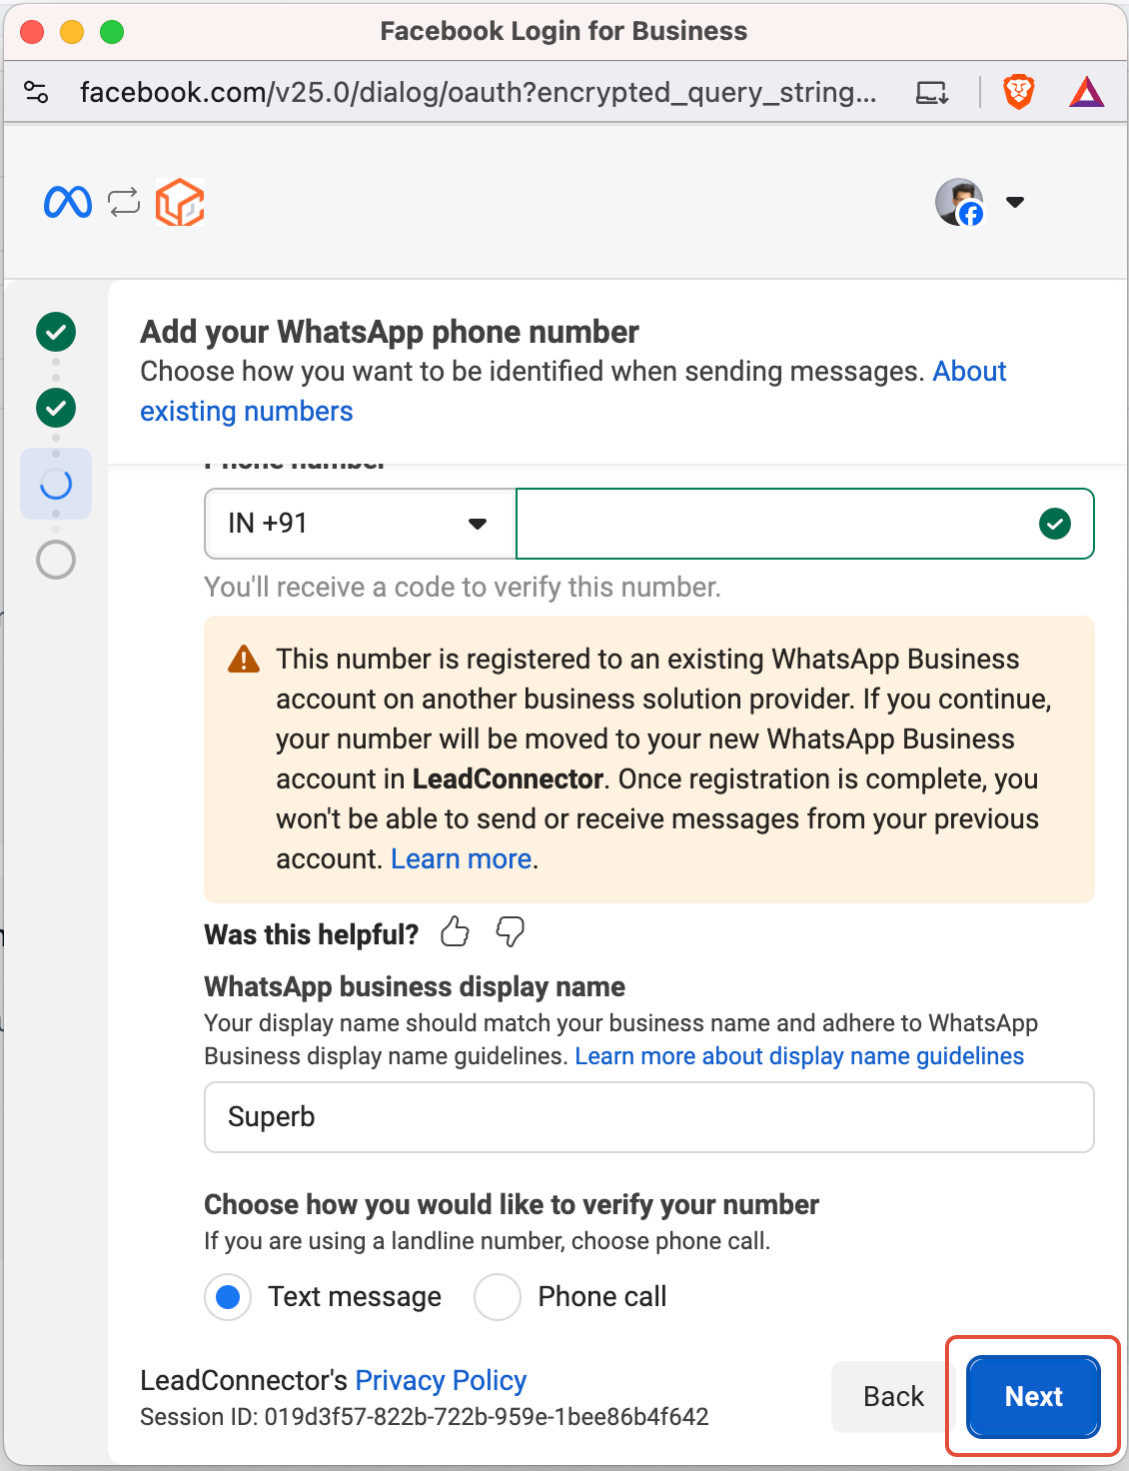
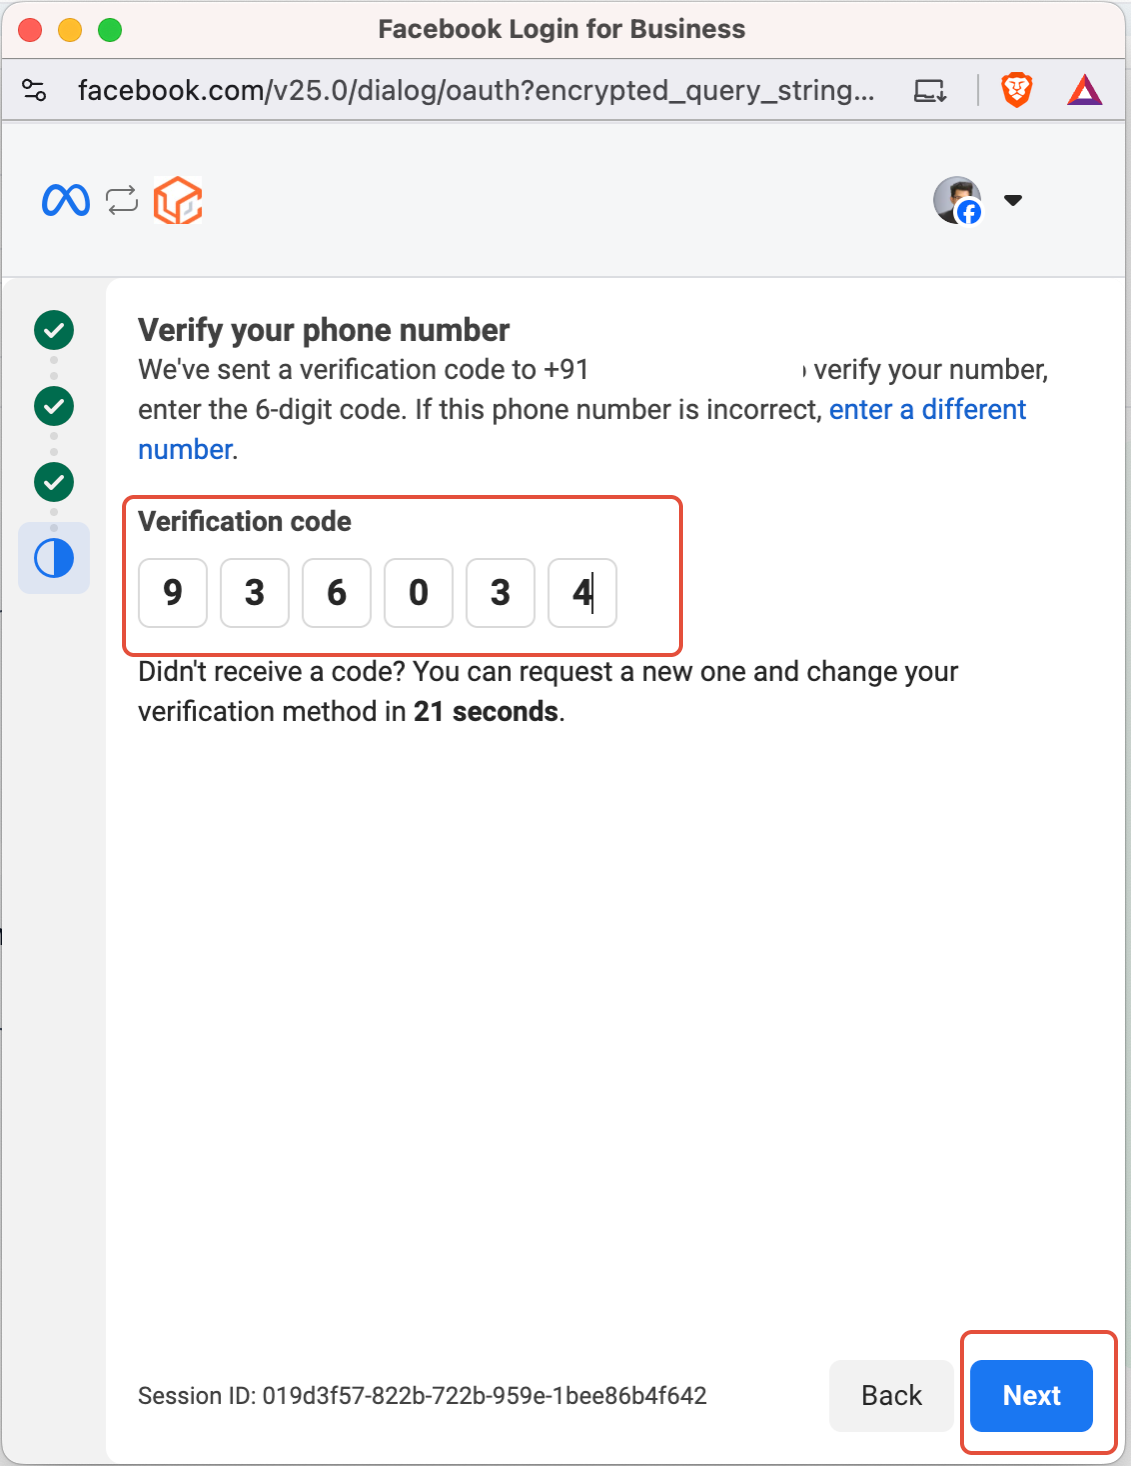
Enter the OTP
Enter the one-time password received by SMS or voice call, then click Next.
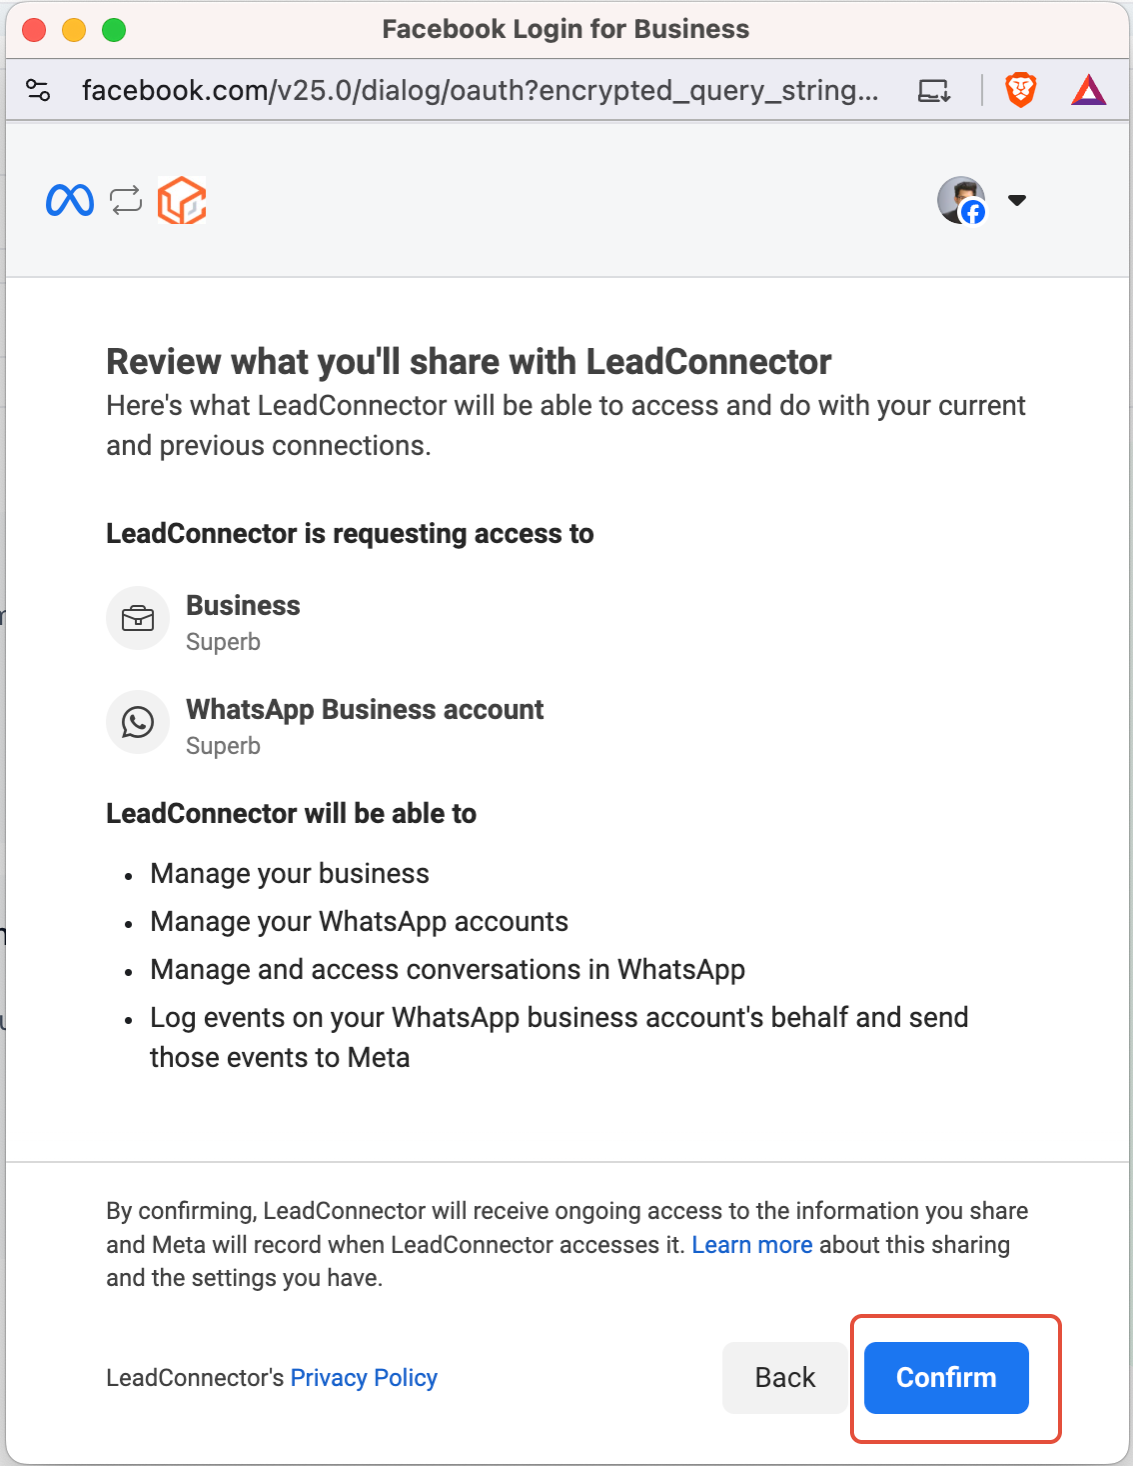
Review and Confirm
Check all entered details carefully, then click Confirm to complete the migration.
Migration Complete
Your WhatsApp Account has been successfully migrated and is ready to use.